7 TOP TIPS FOR PUFFIN PHOTOGRAPHY SUCCESS
The Atlantic puffin, one of the UK’s most loved seabirds, is known for its brightly colored bill, comical waddle, and inquisitive nature. It is these distinctive traits that have seen people flocking from all over the world to try puffin photography.
Additionally, they breed in some exceedingly beautiful locations across the country (UK), from the rugged cliffs of Shetland to the stunning Pembrokeshire coastline. The latter is relatively accessible to the public, and there are many boats and tour operators offering trips to see these fantastic birds in various locations
It’s easy to see why photographers are drawn to these endearing clowns of the sea.
Each summer, we only need to look at the number of puffin images appearing in our social feeds and in other forms of advertising and marketing, to know that the market is saturated with images of puffins. So, in order for your images to stand out from the crowd, consider "What hasn't been done?" and "How can I improve on it/put my spin on classic puffin imagery?"
Always remember that however well a species has been documented, there is always a new image to be found. In this piece, I will talk about how to photograph puffins, and how you can make your puffin images stand out from the crowd this summer.
Read more: 5 Tips For Seabird Photography Success
“Always remember that however well a species has been documented, there is always a new image to be found”

1. PUT IN THE TIME
Each photographer has their own way of working. I like to work on long-term projects with individual species. I understand spending extended periods on an island photographing puffins is not possible for everyone, but the same advice applies to all wildlife photography.
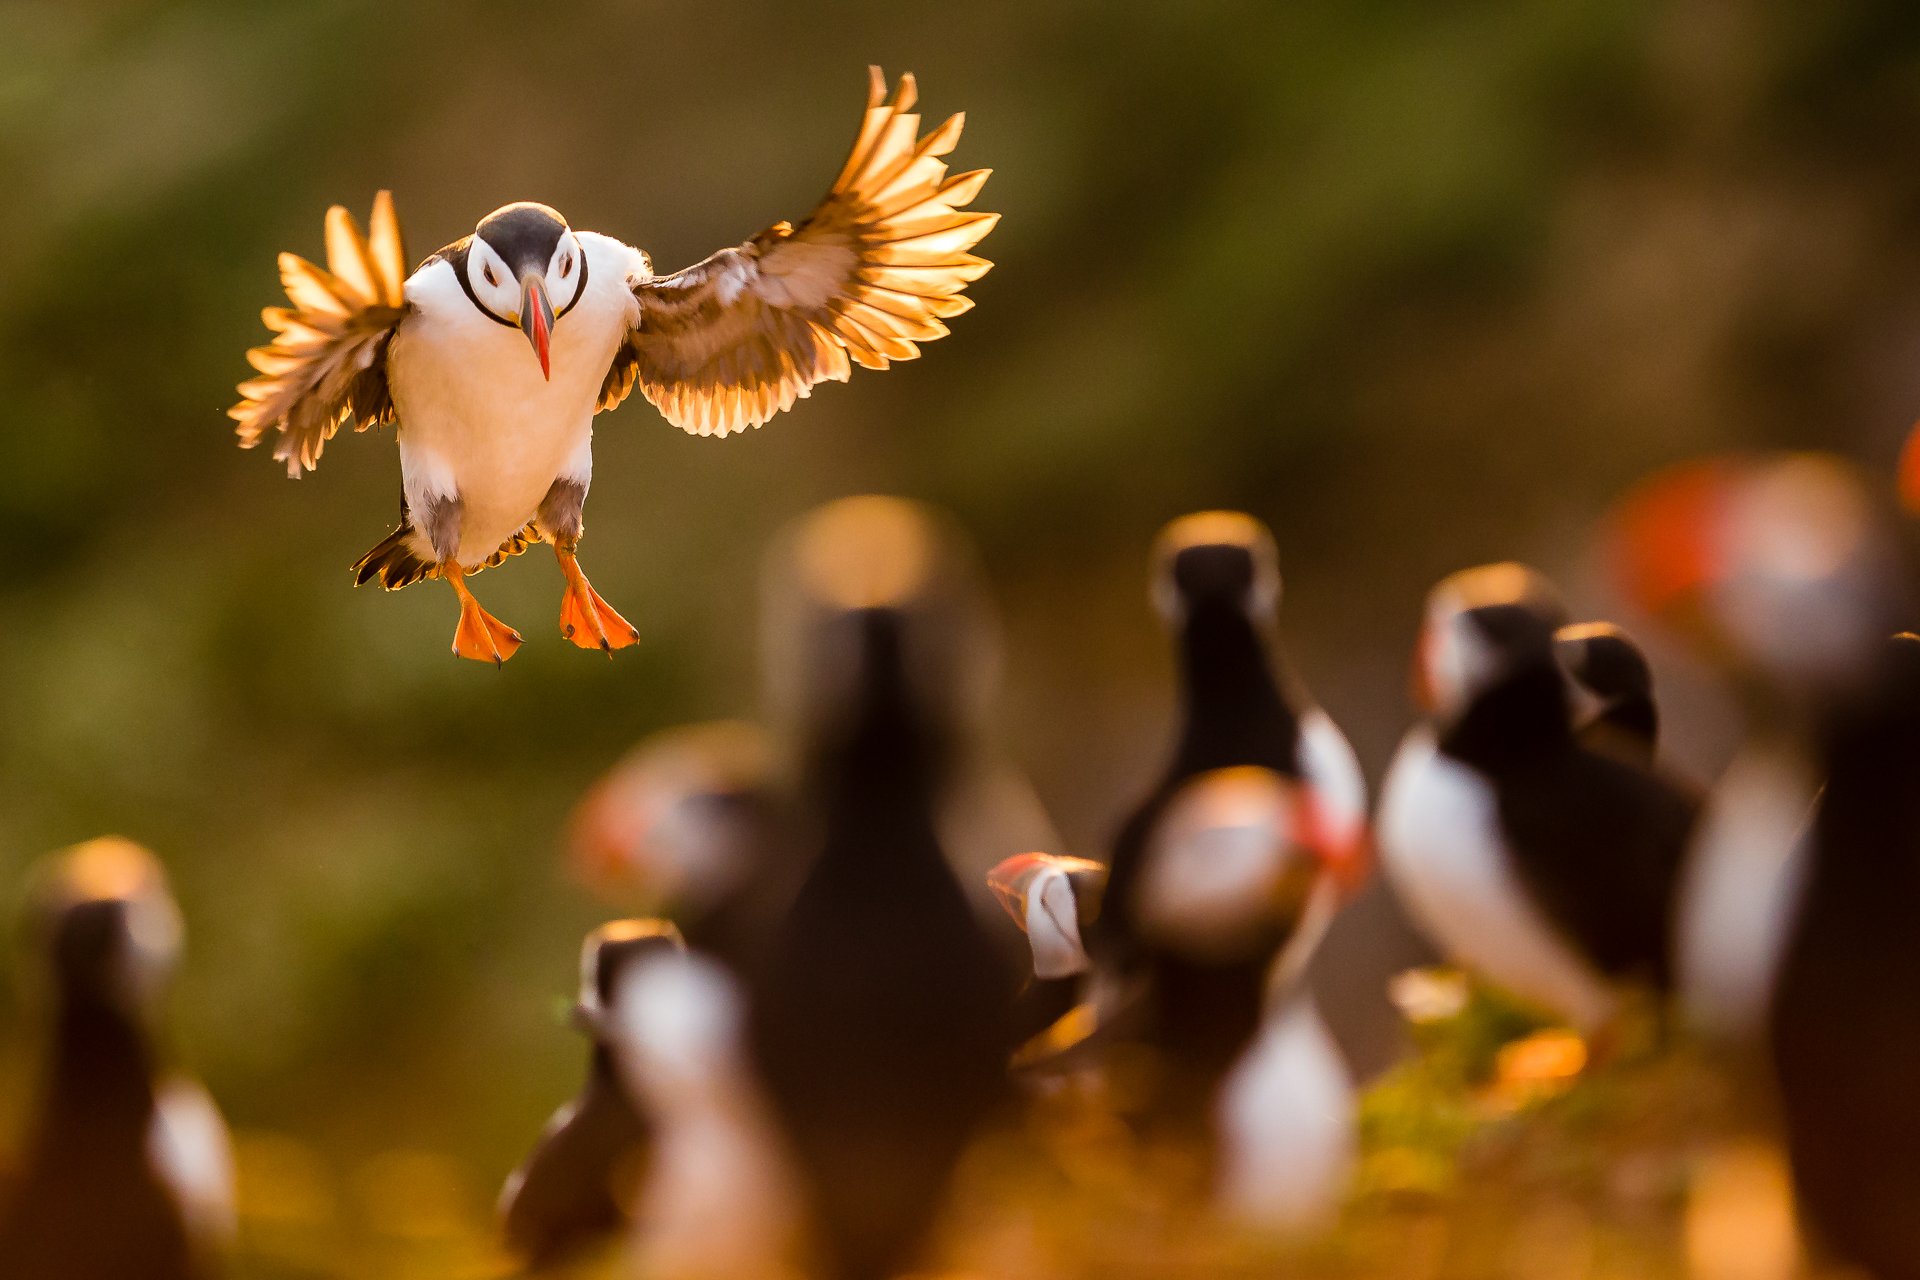
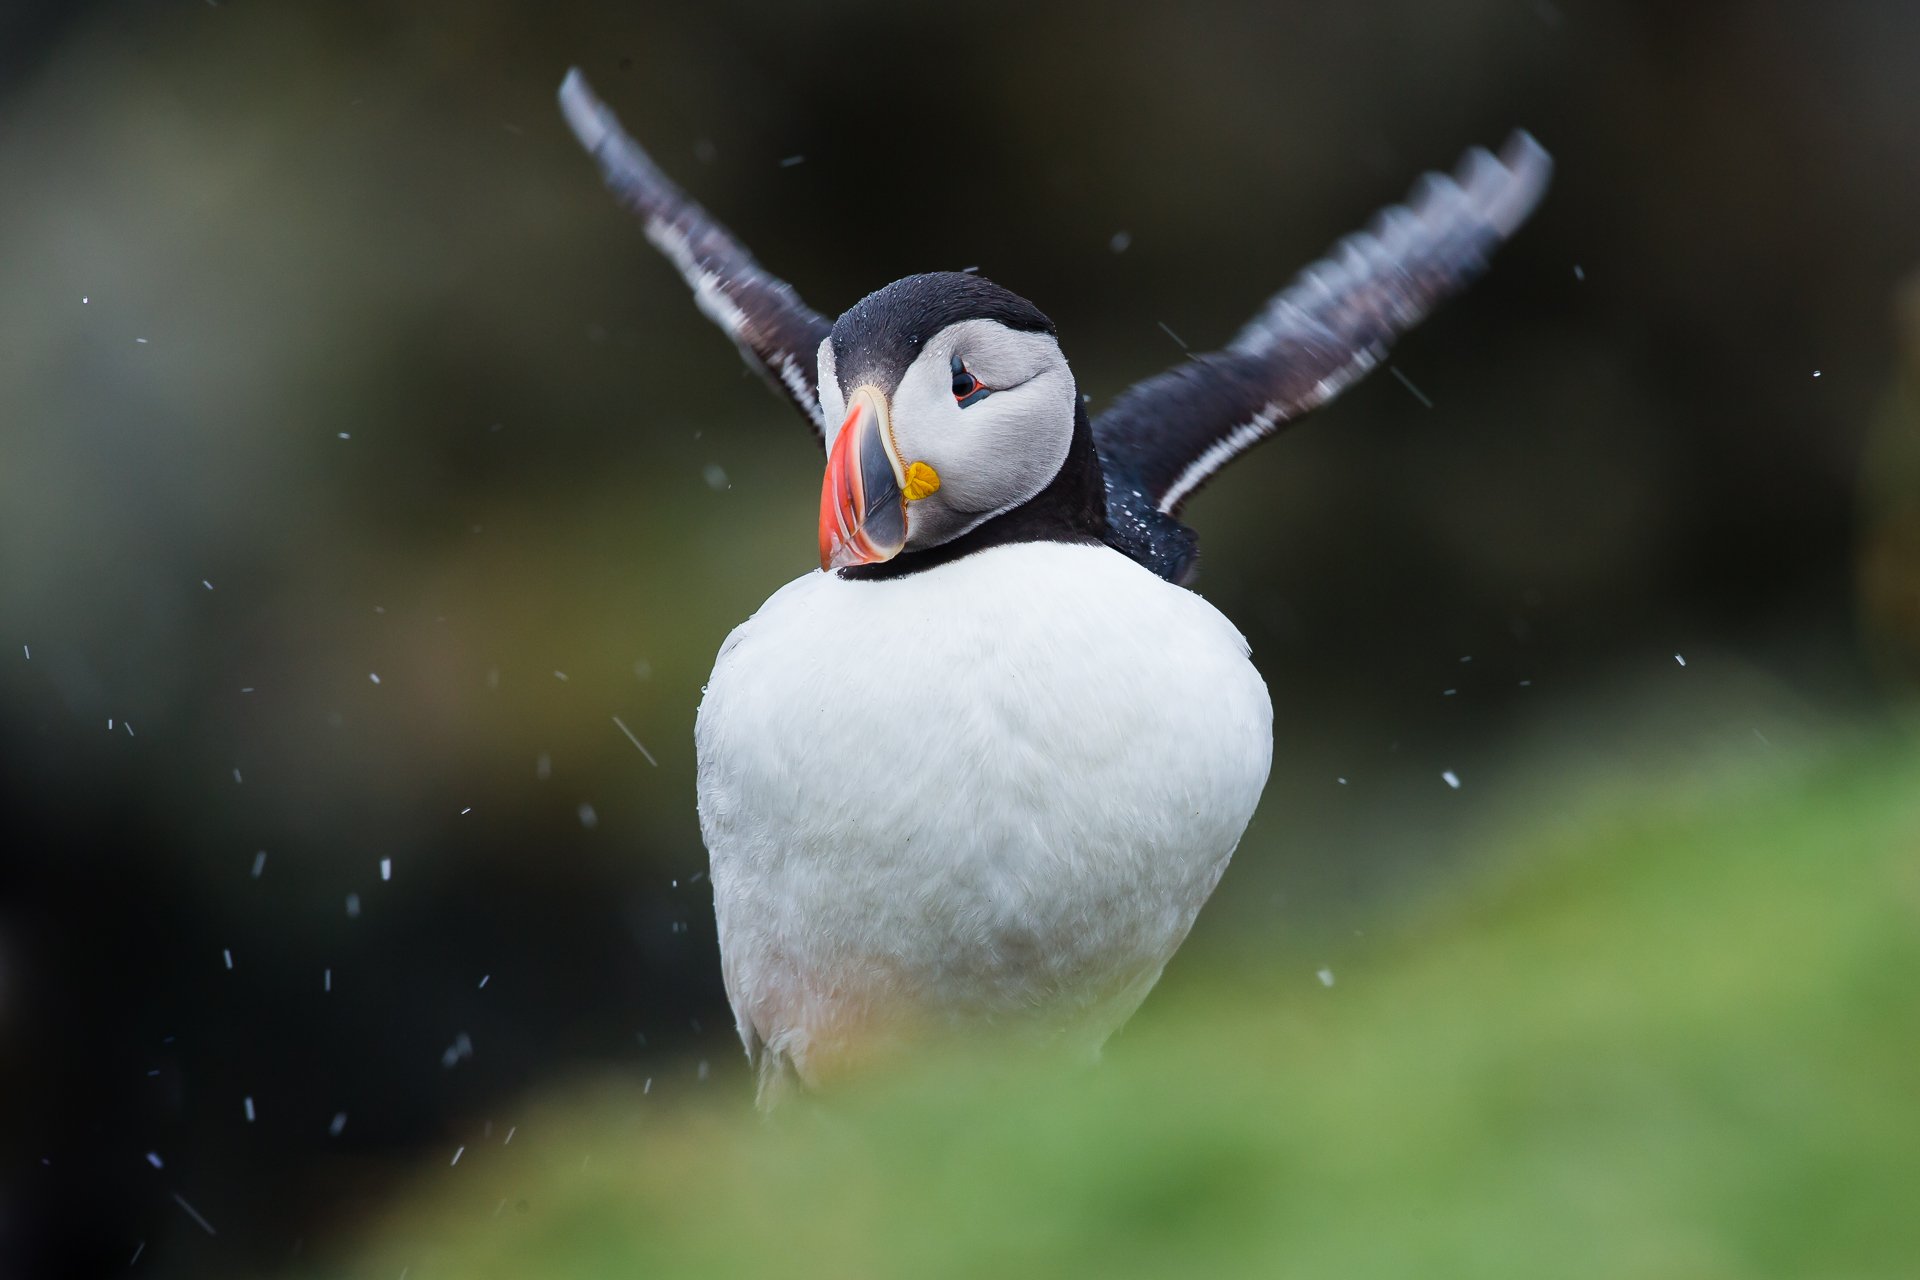
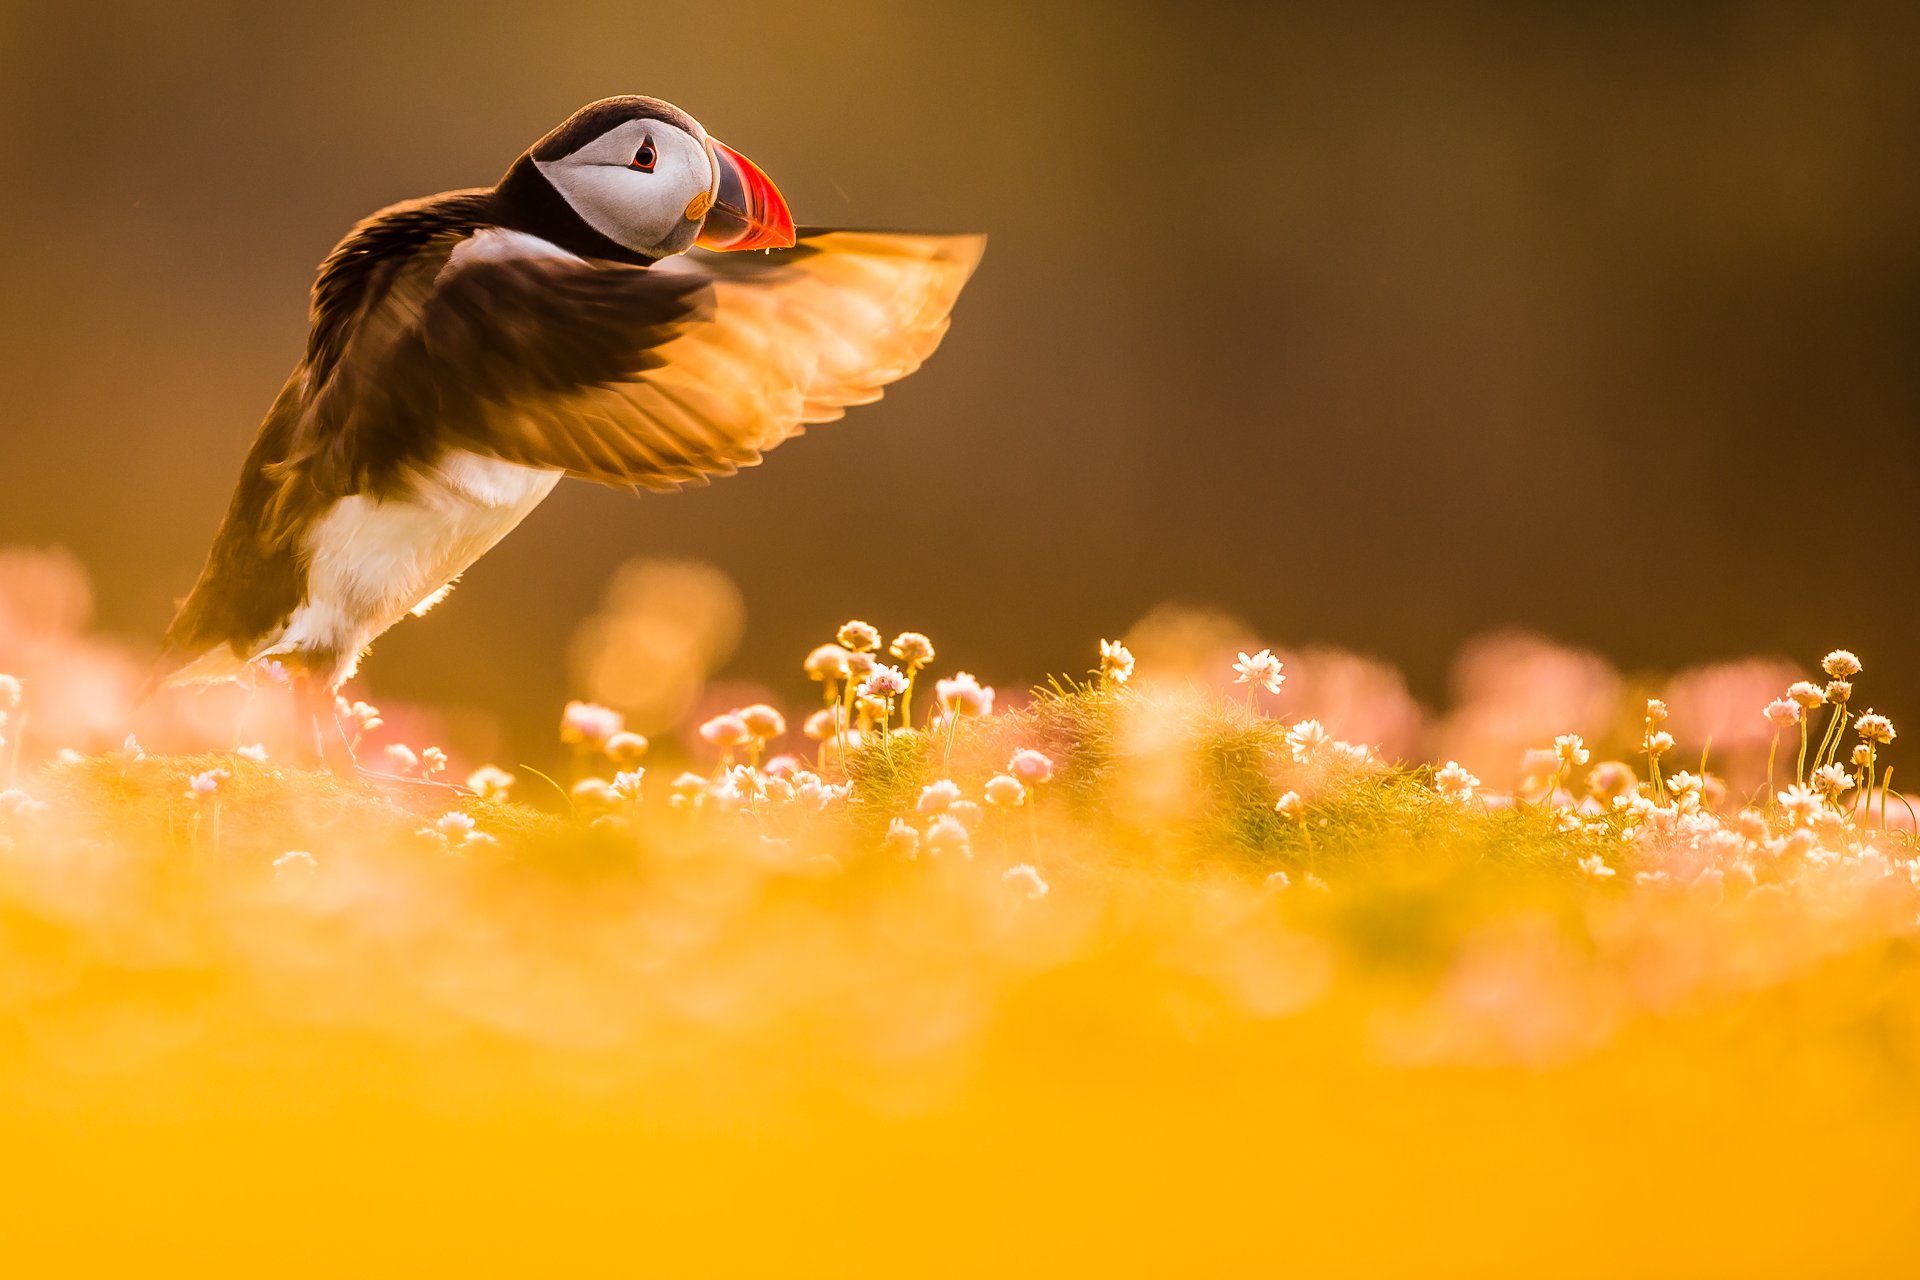
Only by putting in the time and watching/photographing a species can you begin to understand its intimate traits and behaviours, which will in turn help your photography. Each moment spent observing is time well spent. For example, with puffins, if you notice them take a sharp intake of breath, you know it will be closely followed by a wing stretch.
These are only small details, but they greatly improve your chances of capturing interesting behaviour. It is often said that wildlife photography is largely down to luck, which is true. However, the more time you spend in the field, the luckier you will become; in other words, you will create your own luck.

2. CREATE A STYLE

One way to make your images stand out from the crowd is to develop your photographic style. Learning fieldcraft, mastering light, and expanding our compositional techniques are all tools we can use as photographers to help improve our wildlife photography.
But what makes certain photographers go beyond this? What makes their work instantly recognizable? How do we know they took the picture without even looking at the image credit? These photographers will have their own style, defined by a recurring theme in their work, making it instantly recognisable to the wider audience.
A photography style is not just how you edit an image or your photographic preferences. It is made up of every decision you make as a photographer. To discover your style, look for patterns in your work. These can come in many forms.
It may be in your editing style, how you use light, your compositional practices, or your use of shutter speed, to name a few.
In general, photographic styles often complement your personality. While technical tricks, camera settings etc. can all be taught, your style cannot. This needs to come from within and draw on what you love, and it should display your unique approach and emotions. This all forms part of your style.
Read more: Wildlife Photography - Finding Your Voice


3. MASTER AND MANIPULATE LIGHT
In my photography, the key element is light. A camera is just a tool, light is what can transform an image into something truly breathtaking.
As wildlife photographers, we are often exposed to the elements; working on a windswept mountain or rocky cliff edge. We don’t have studio-controlled setups. So, we need to understand how light falls and the qualities it possesses. I strongly believe that photography is never about the subject, but about light.
There are many ways to manipulate light to your advantage.
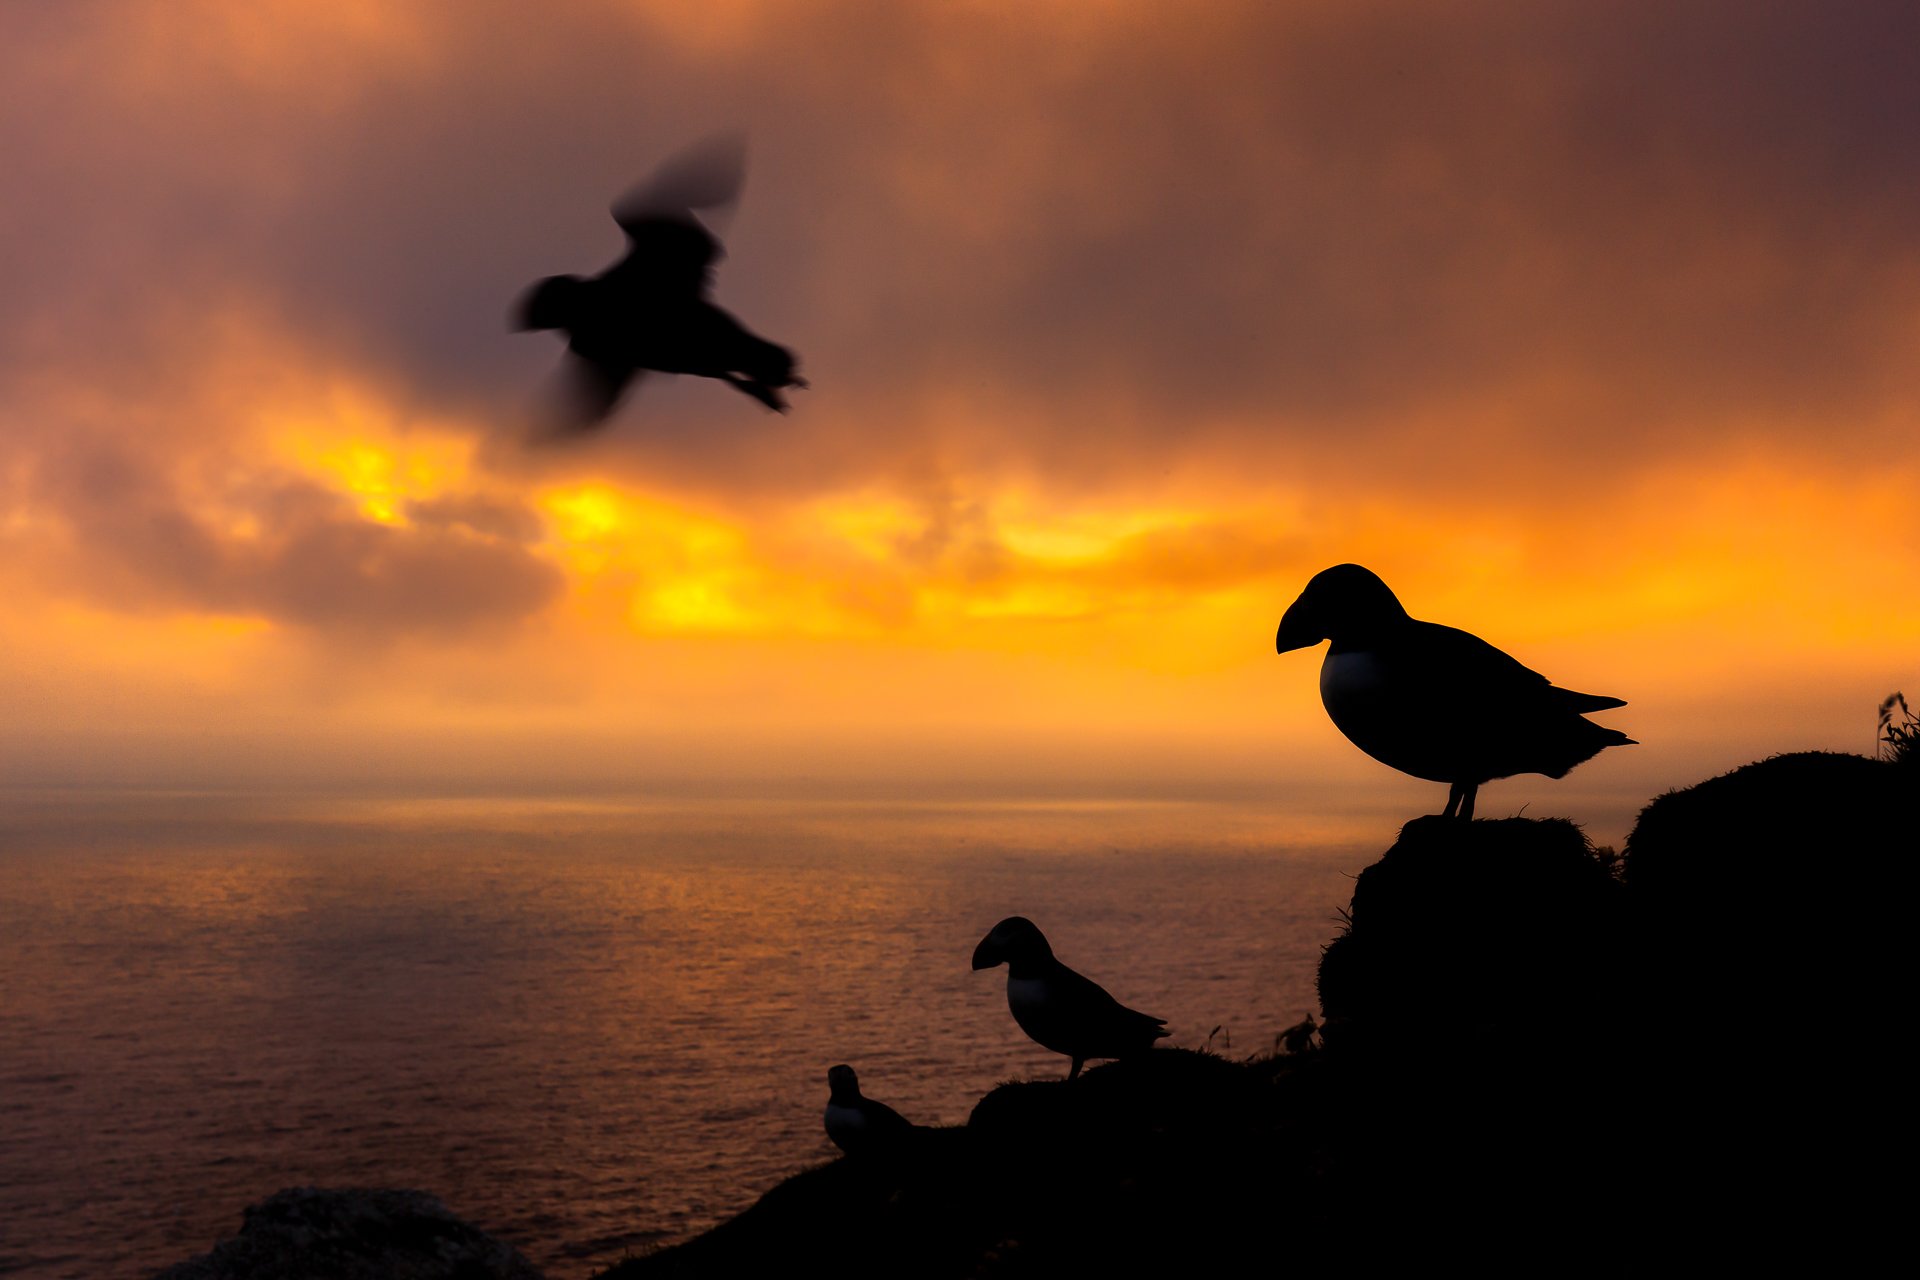
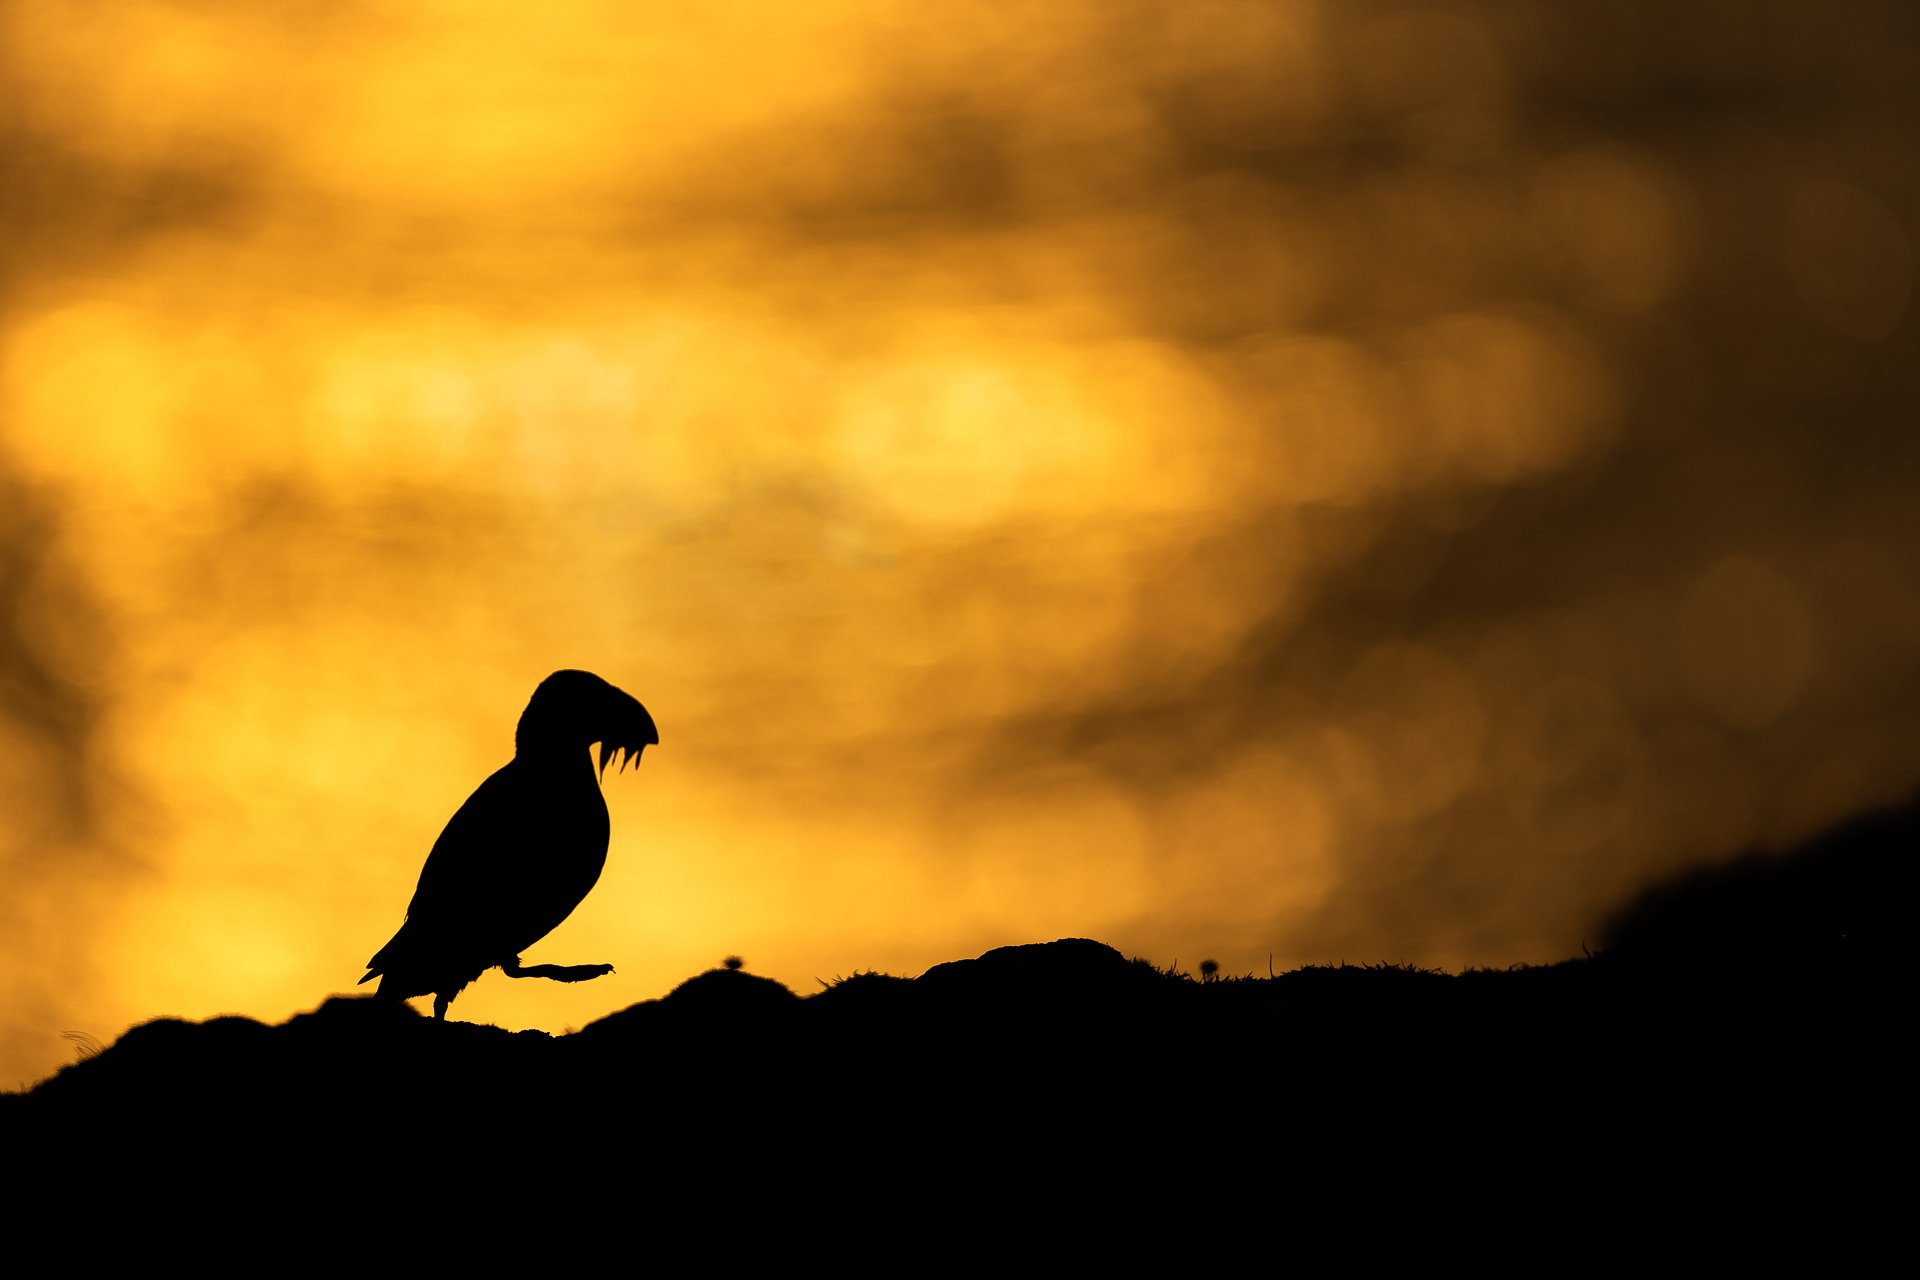
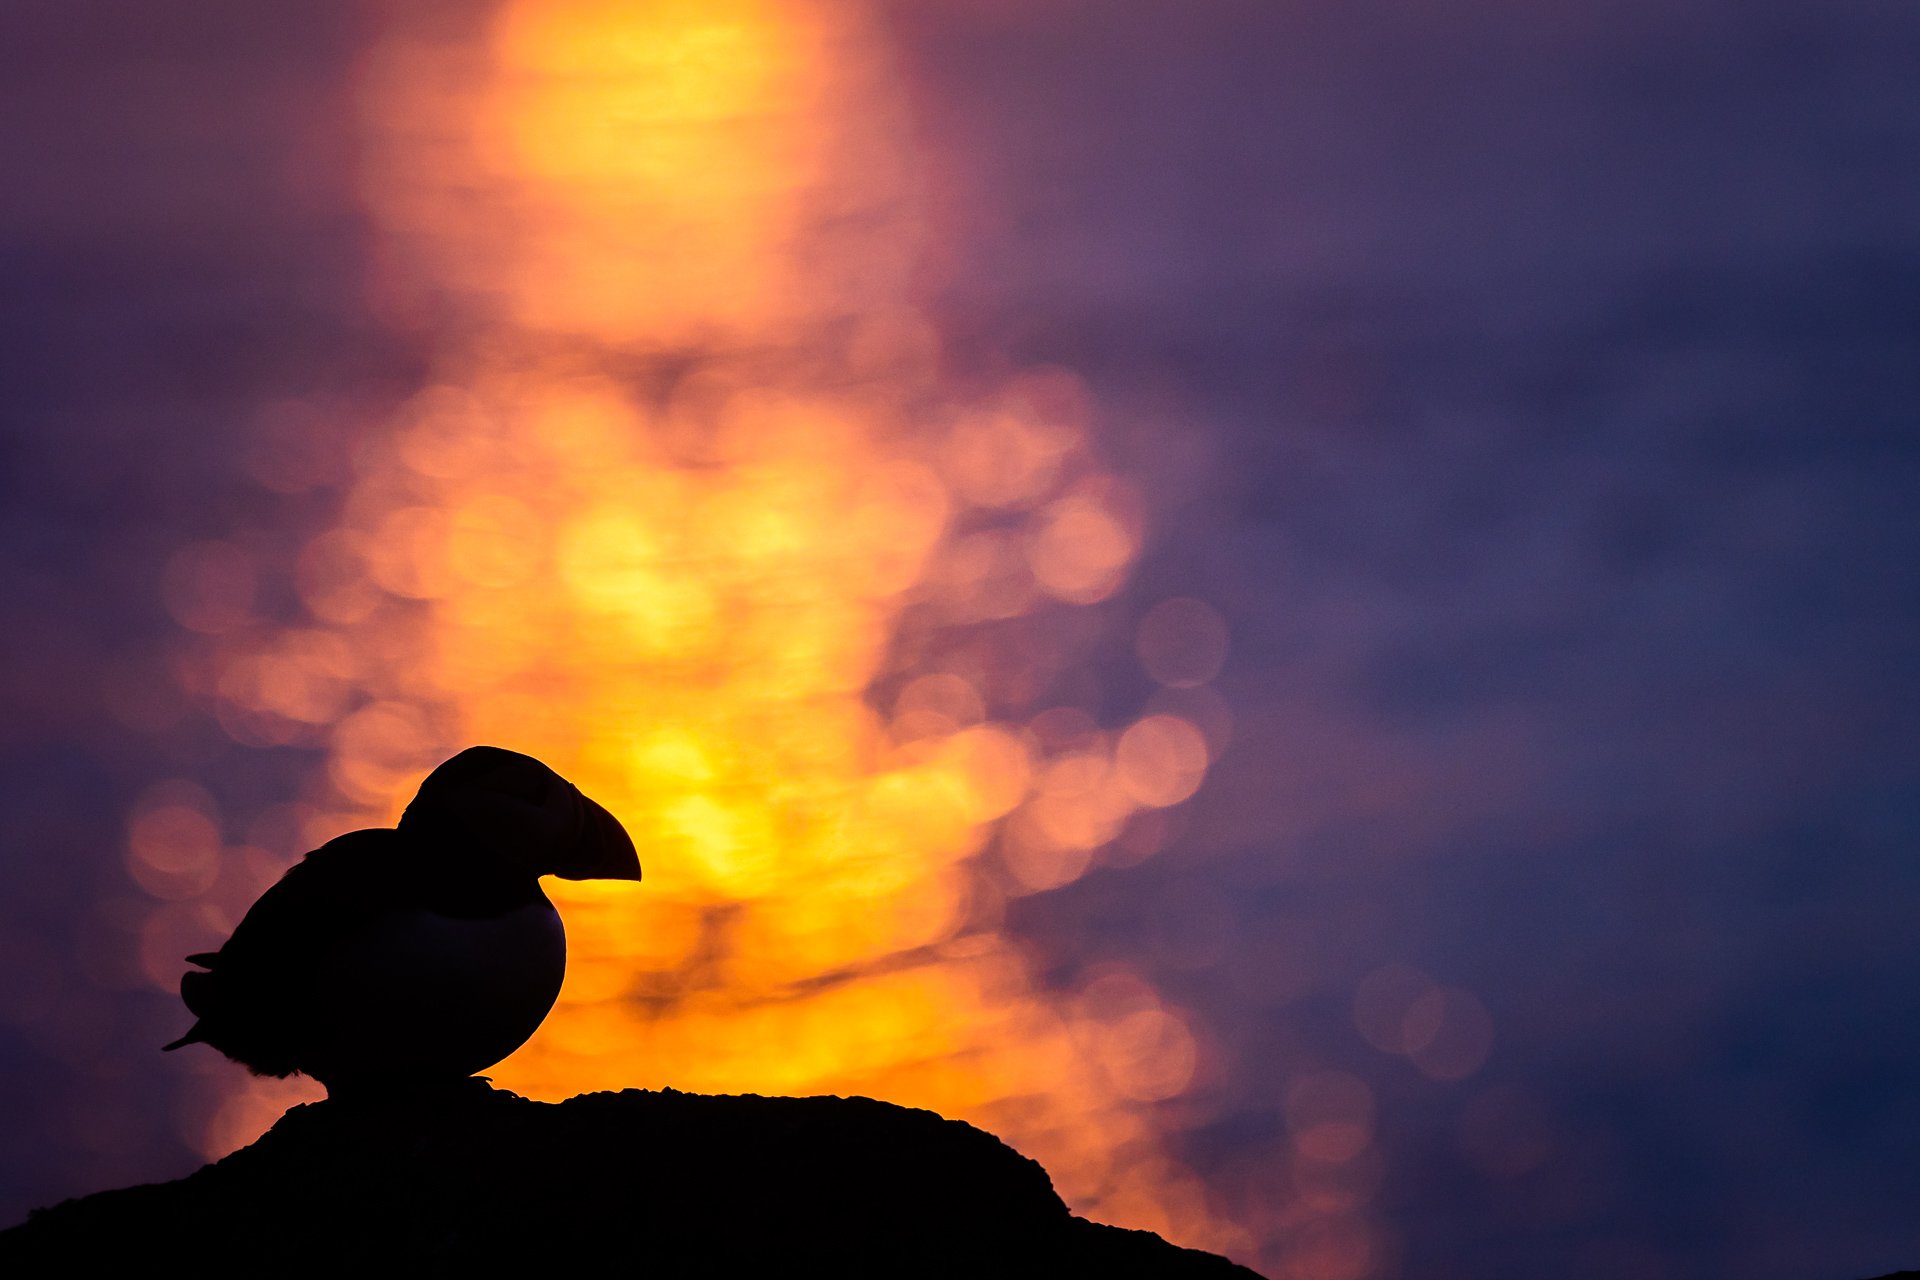
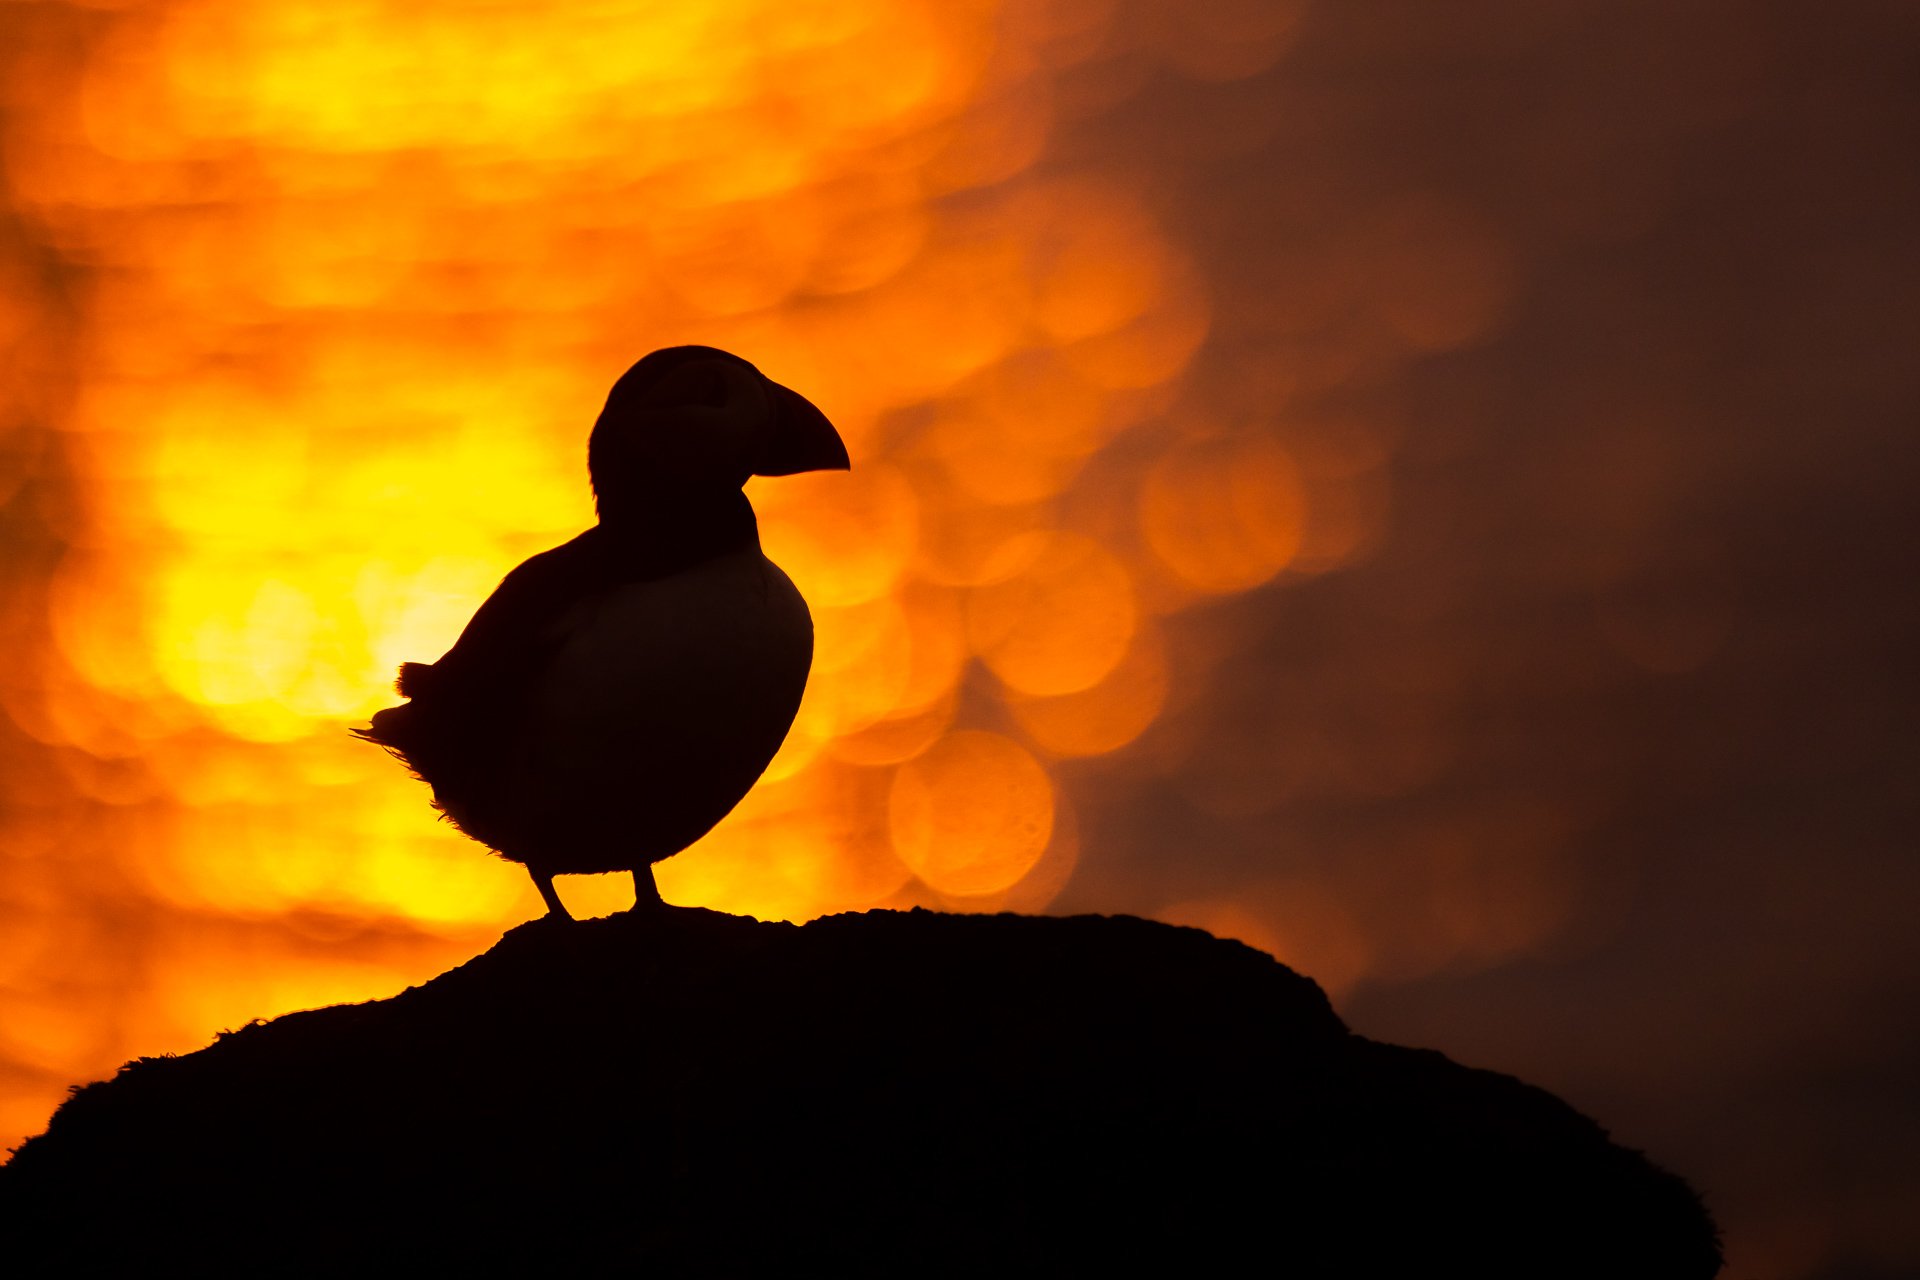
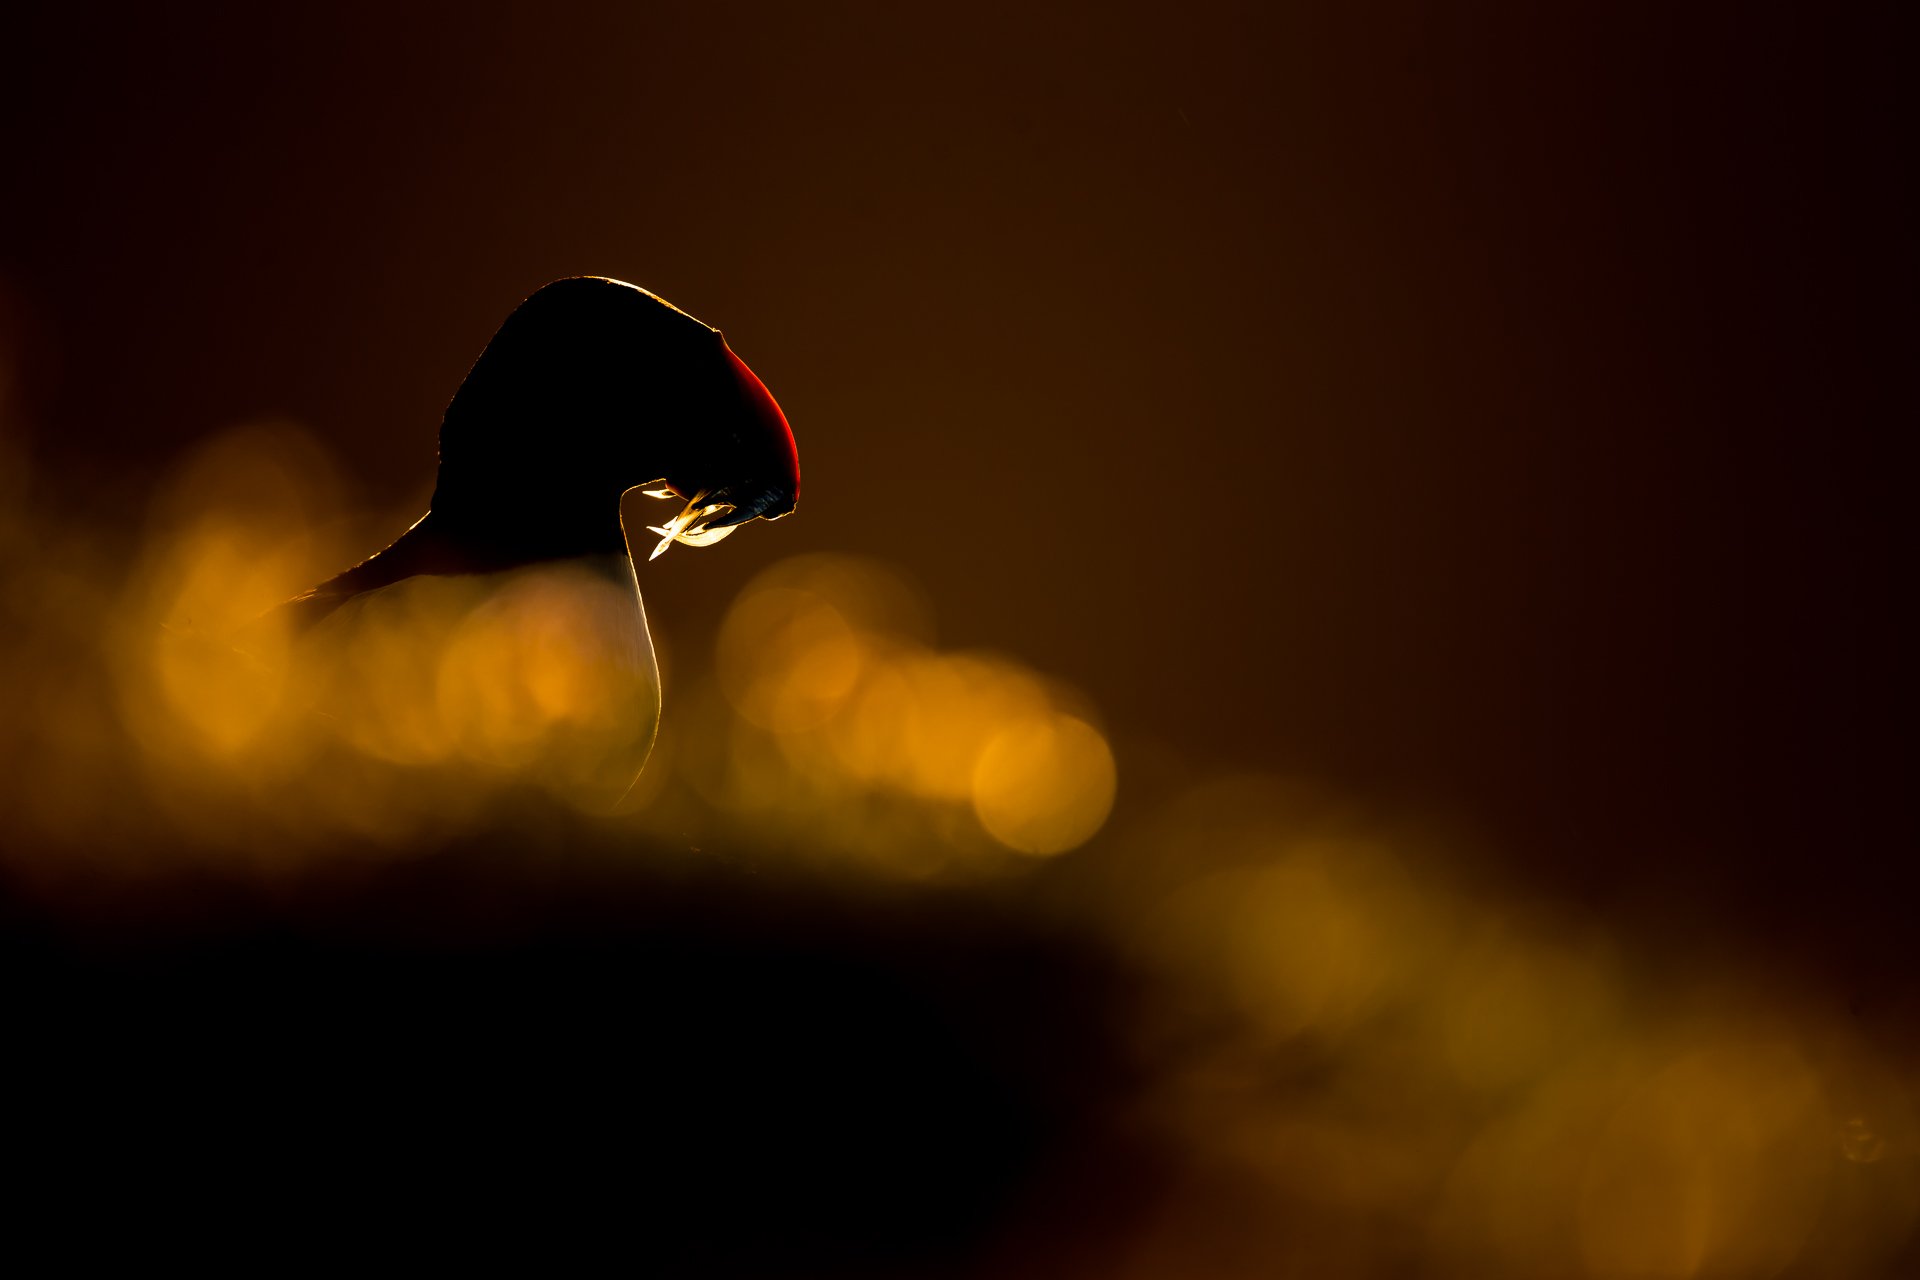
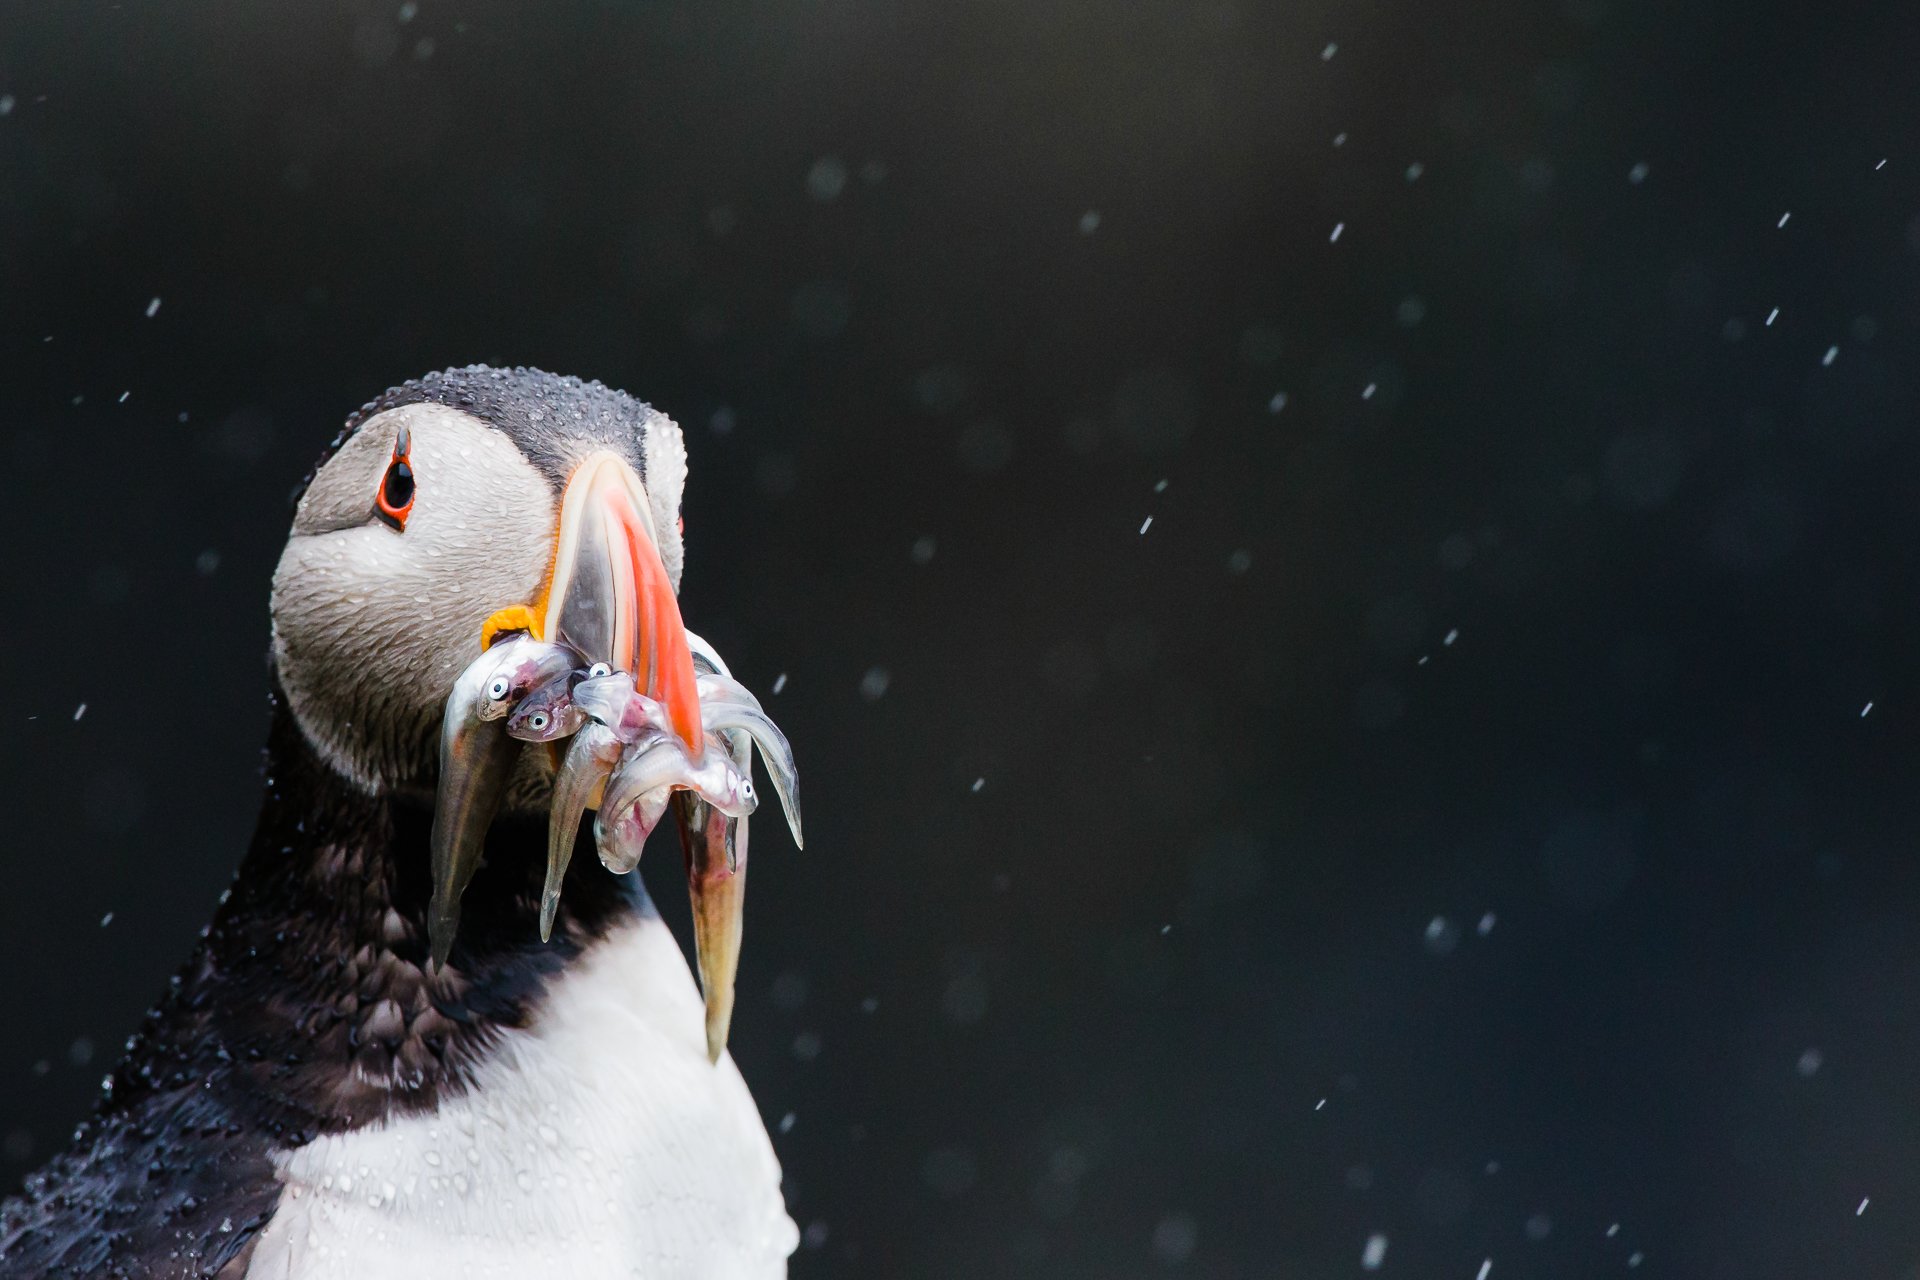
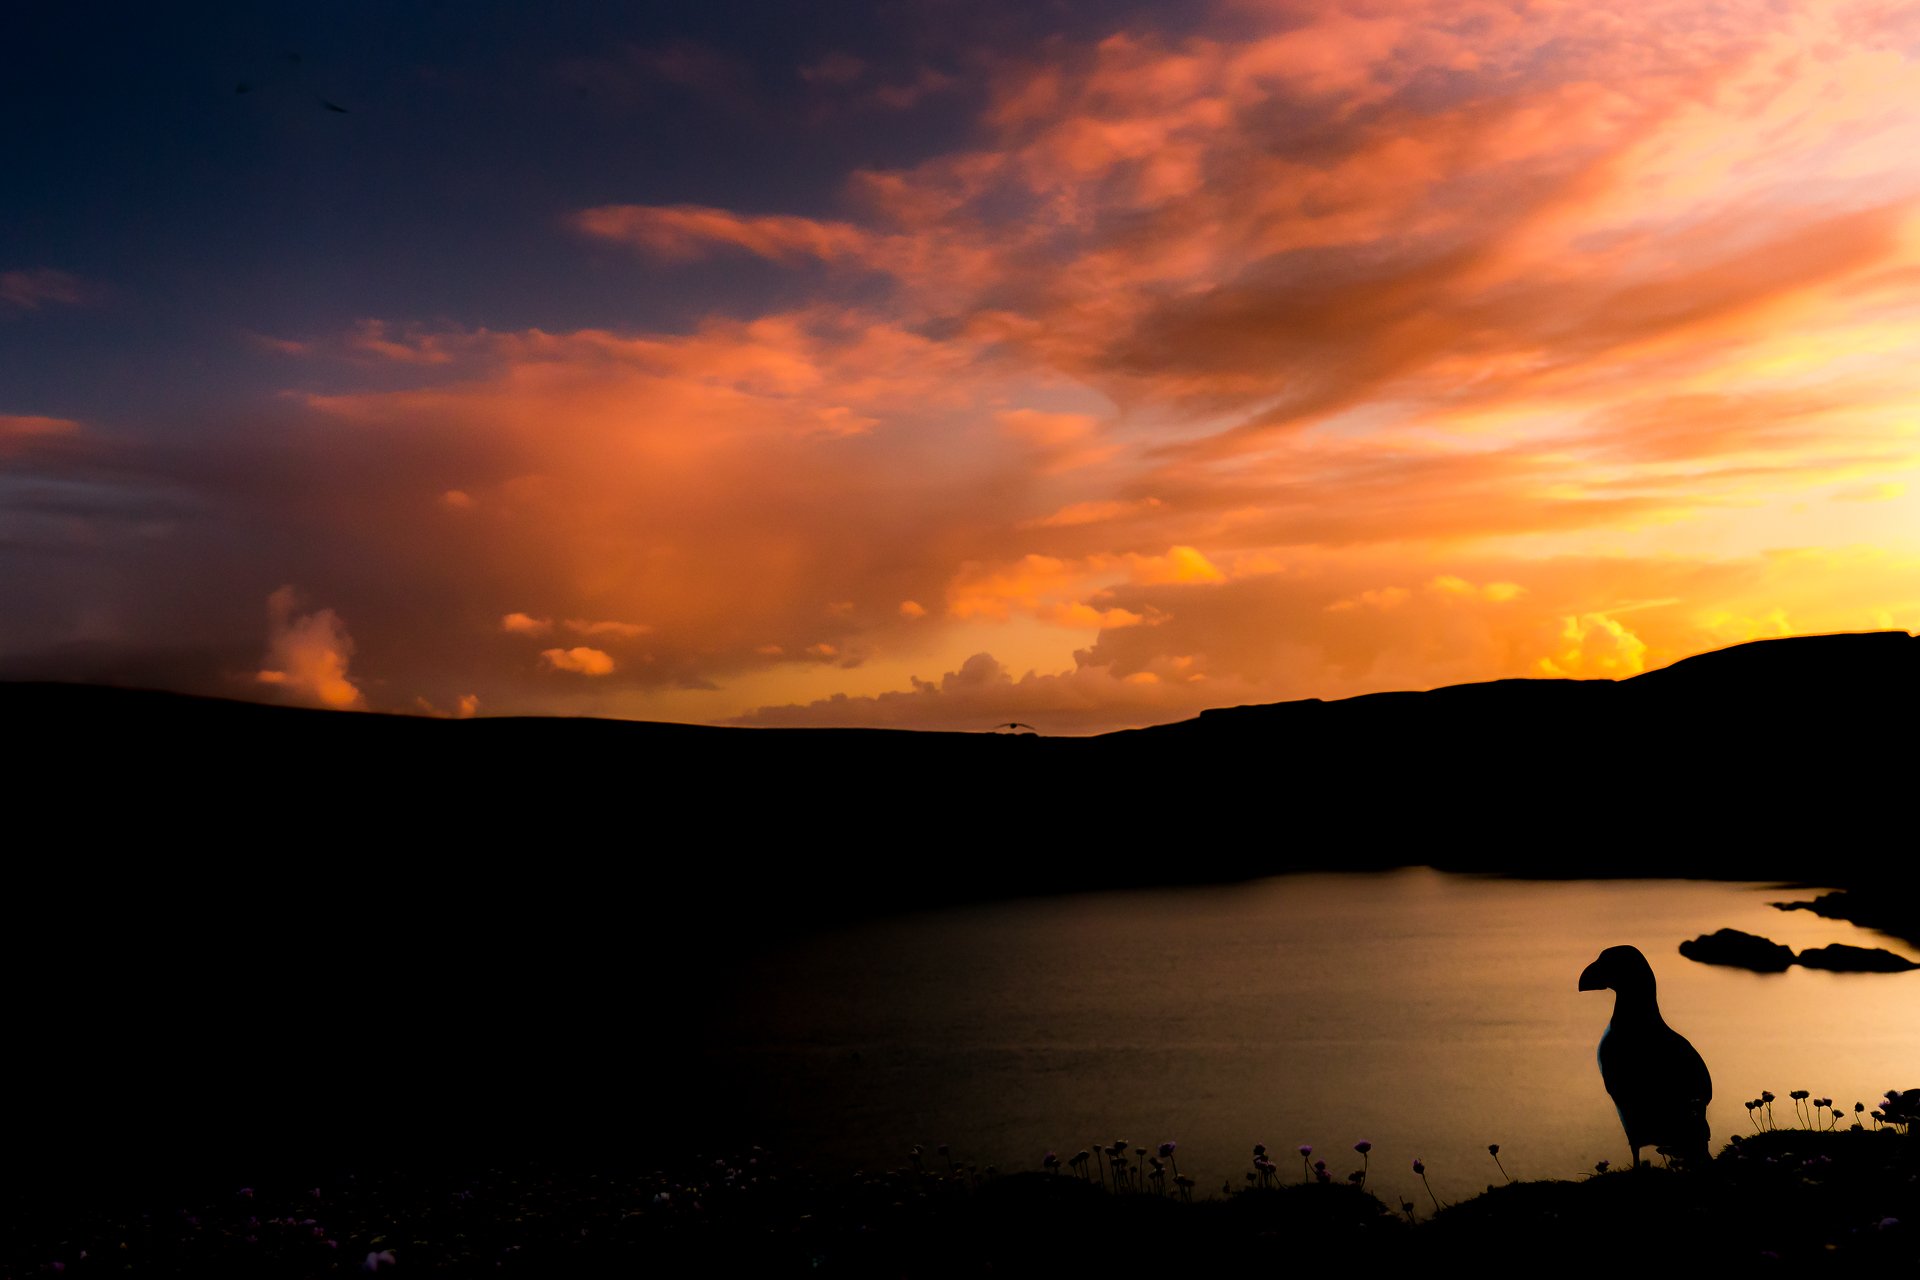
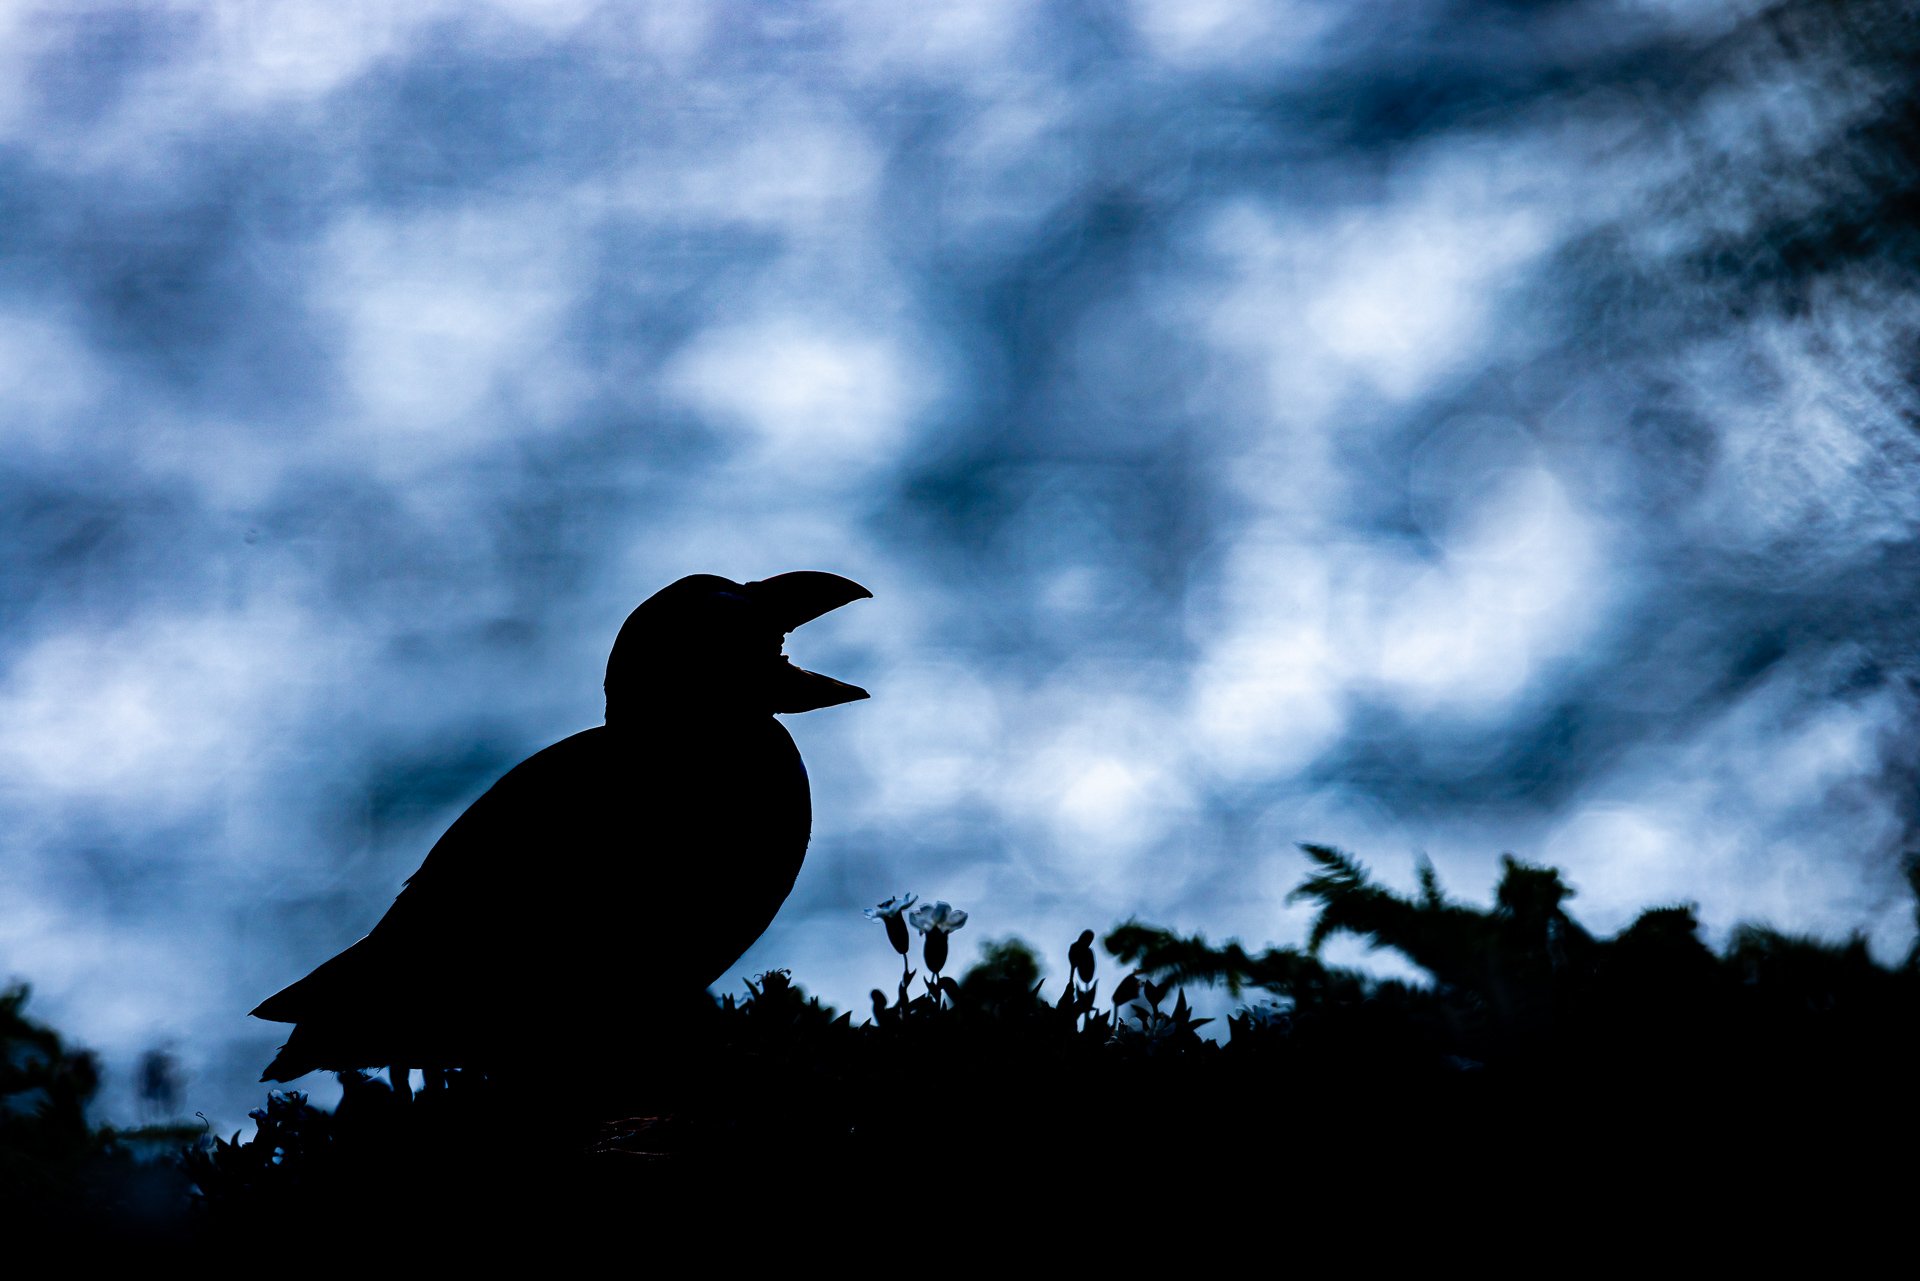
I often find myself drawn to dark and moody silhouettes. Playing with light and shadows can be an effective way to transform a scene, creating dramatic silhouettes and images full of darkness and mystery. Silhouettes are simple to create; the light source needs to be directly behind your subject, and you should expose for the brightest part of the image.

Typically, this will be your background, causing your subject to be underexposed and therefore a silhouette. Any subject can be made into a silhouette, but to create a strong image you need an instantly recognizable subject, such as a red deer stag or puffin’s bill.
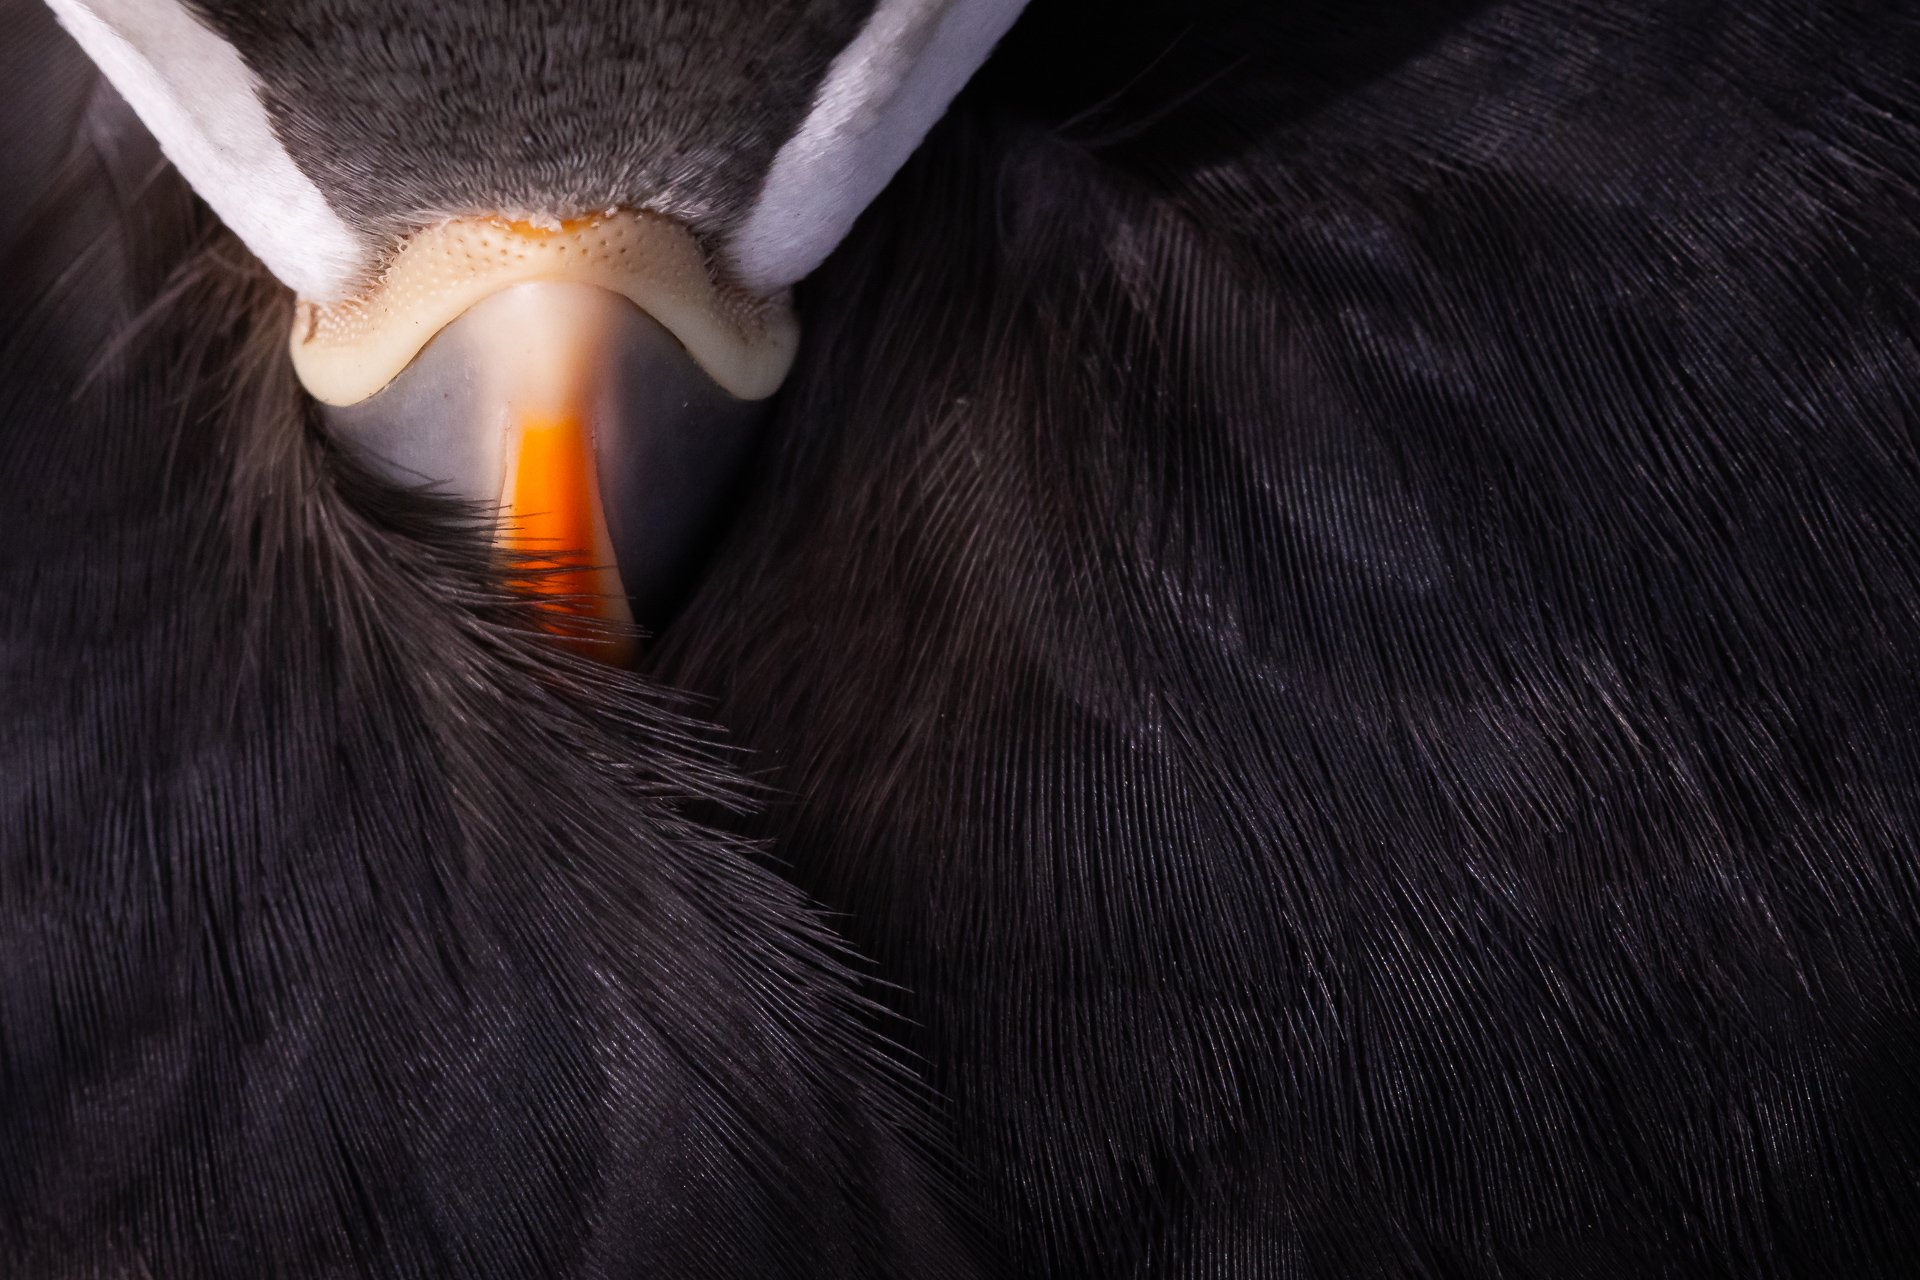
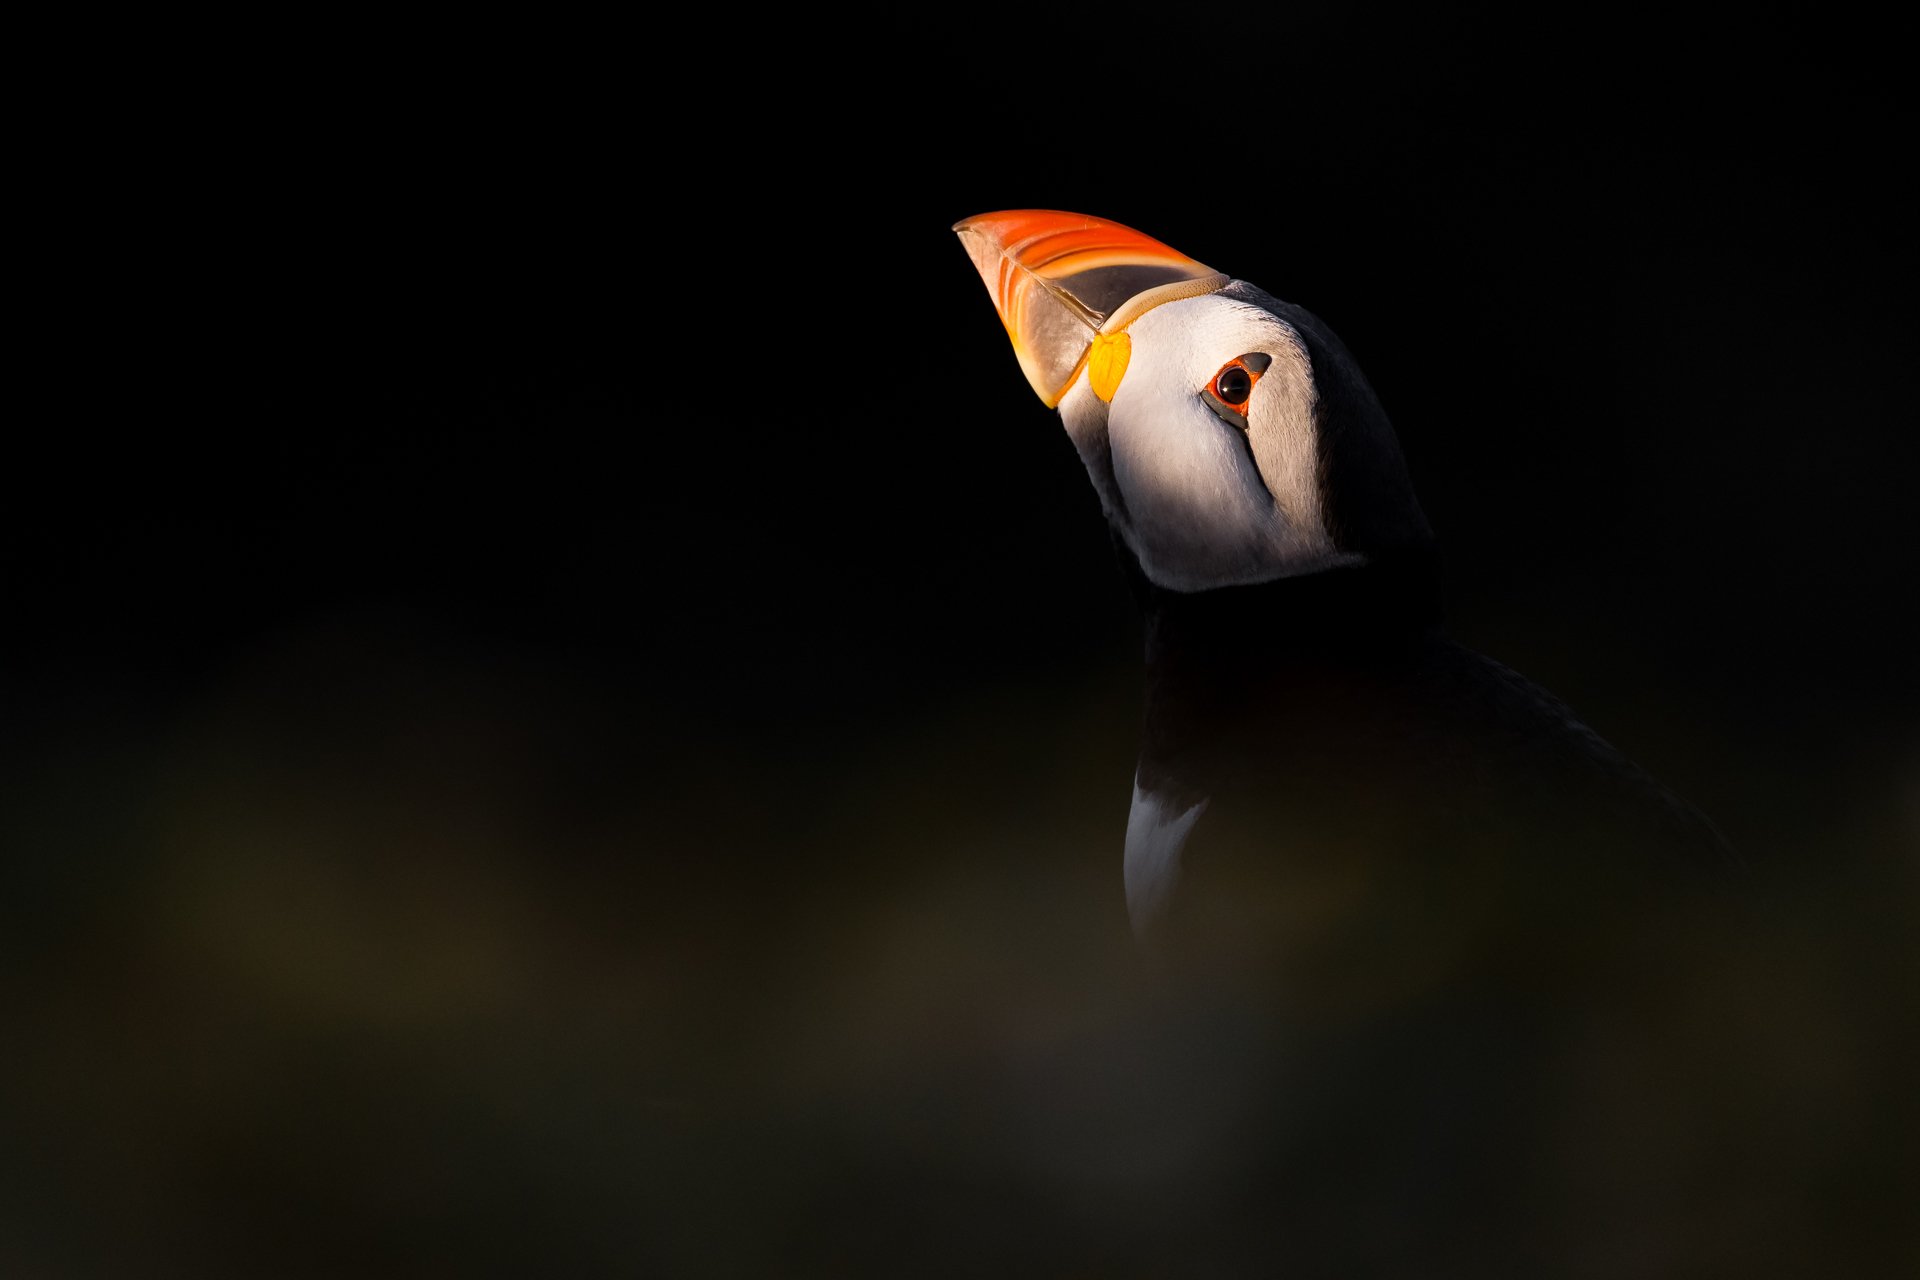
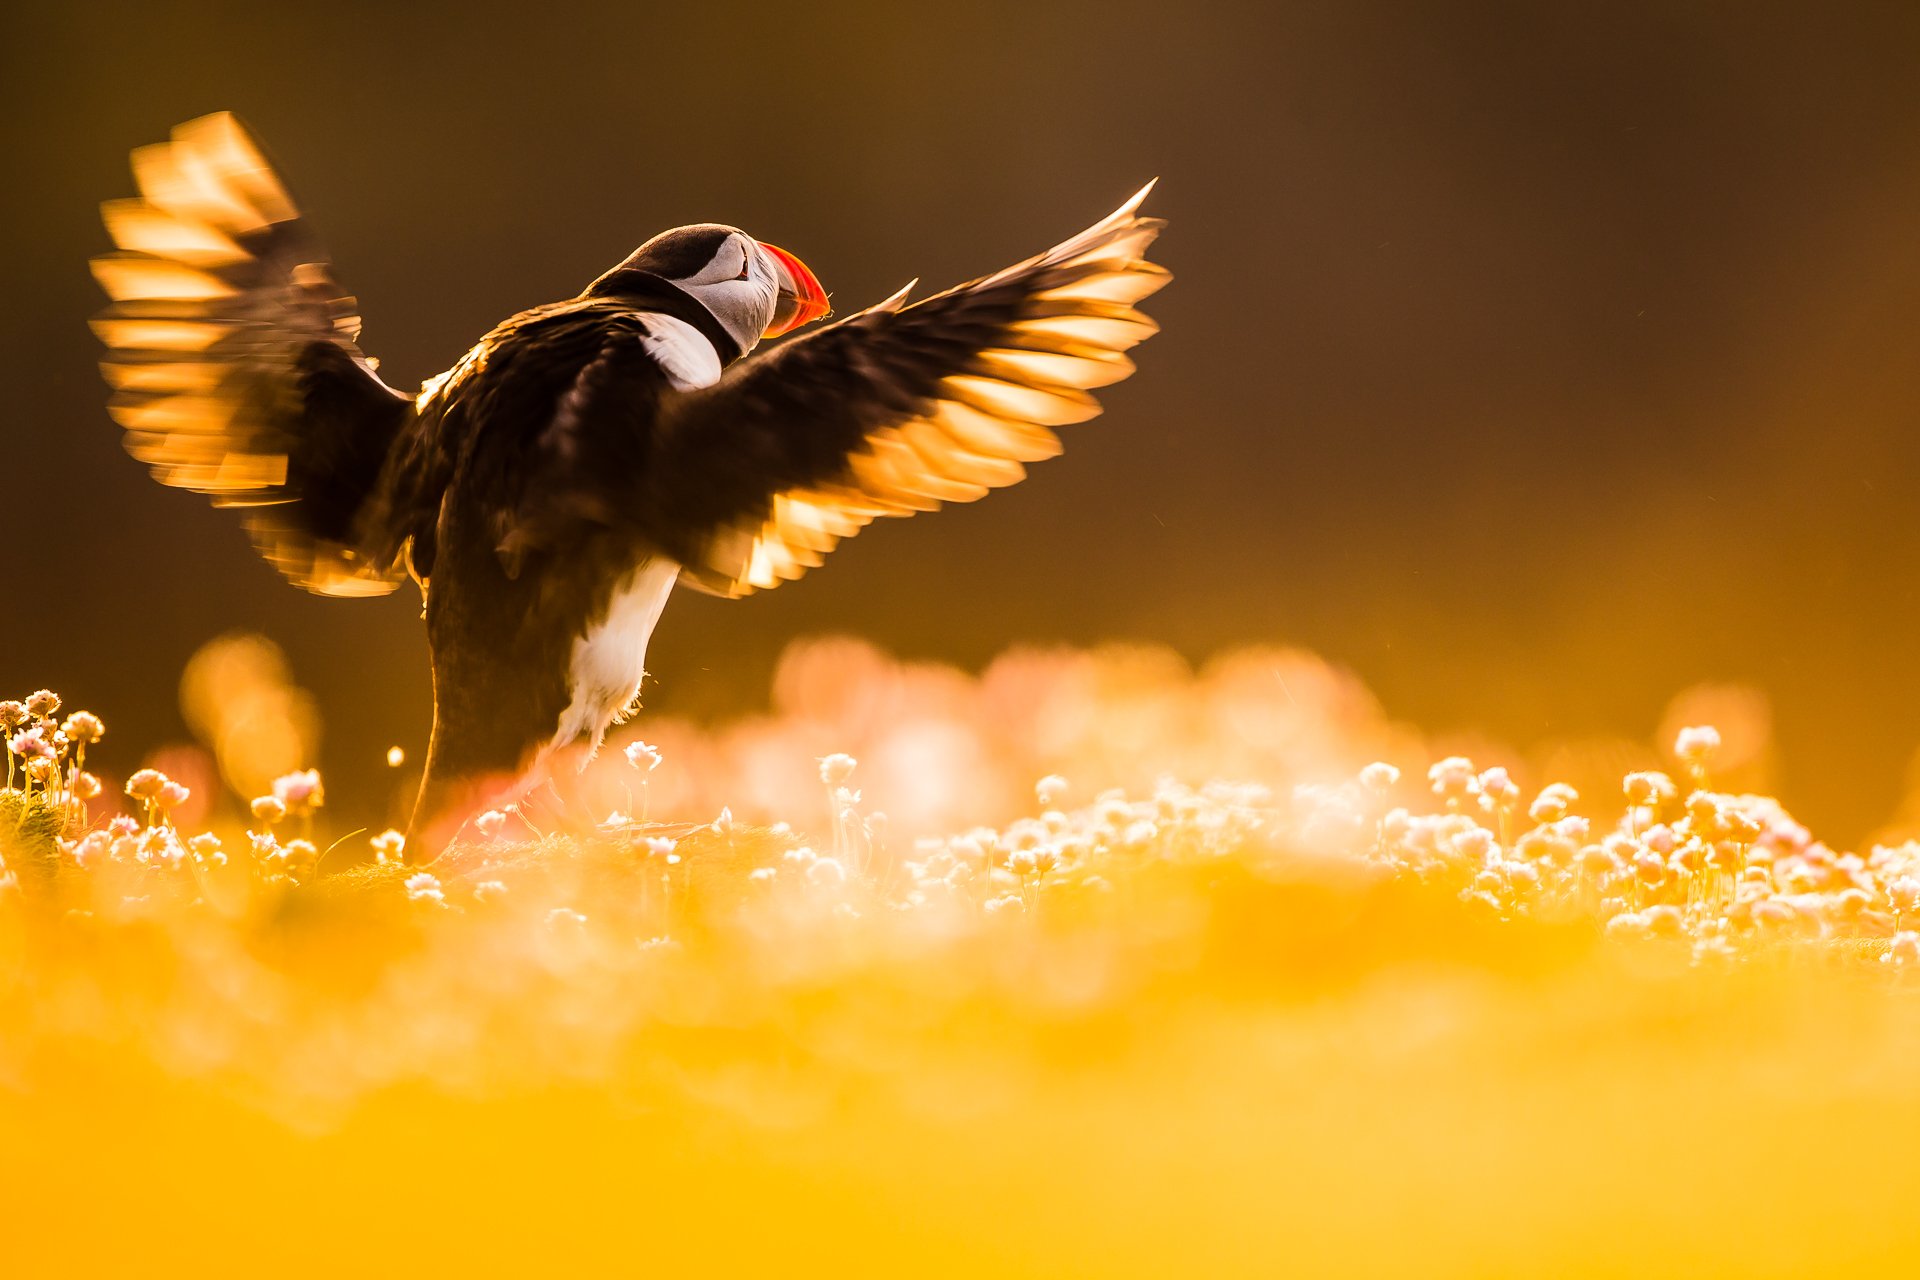
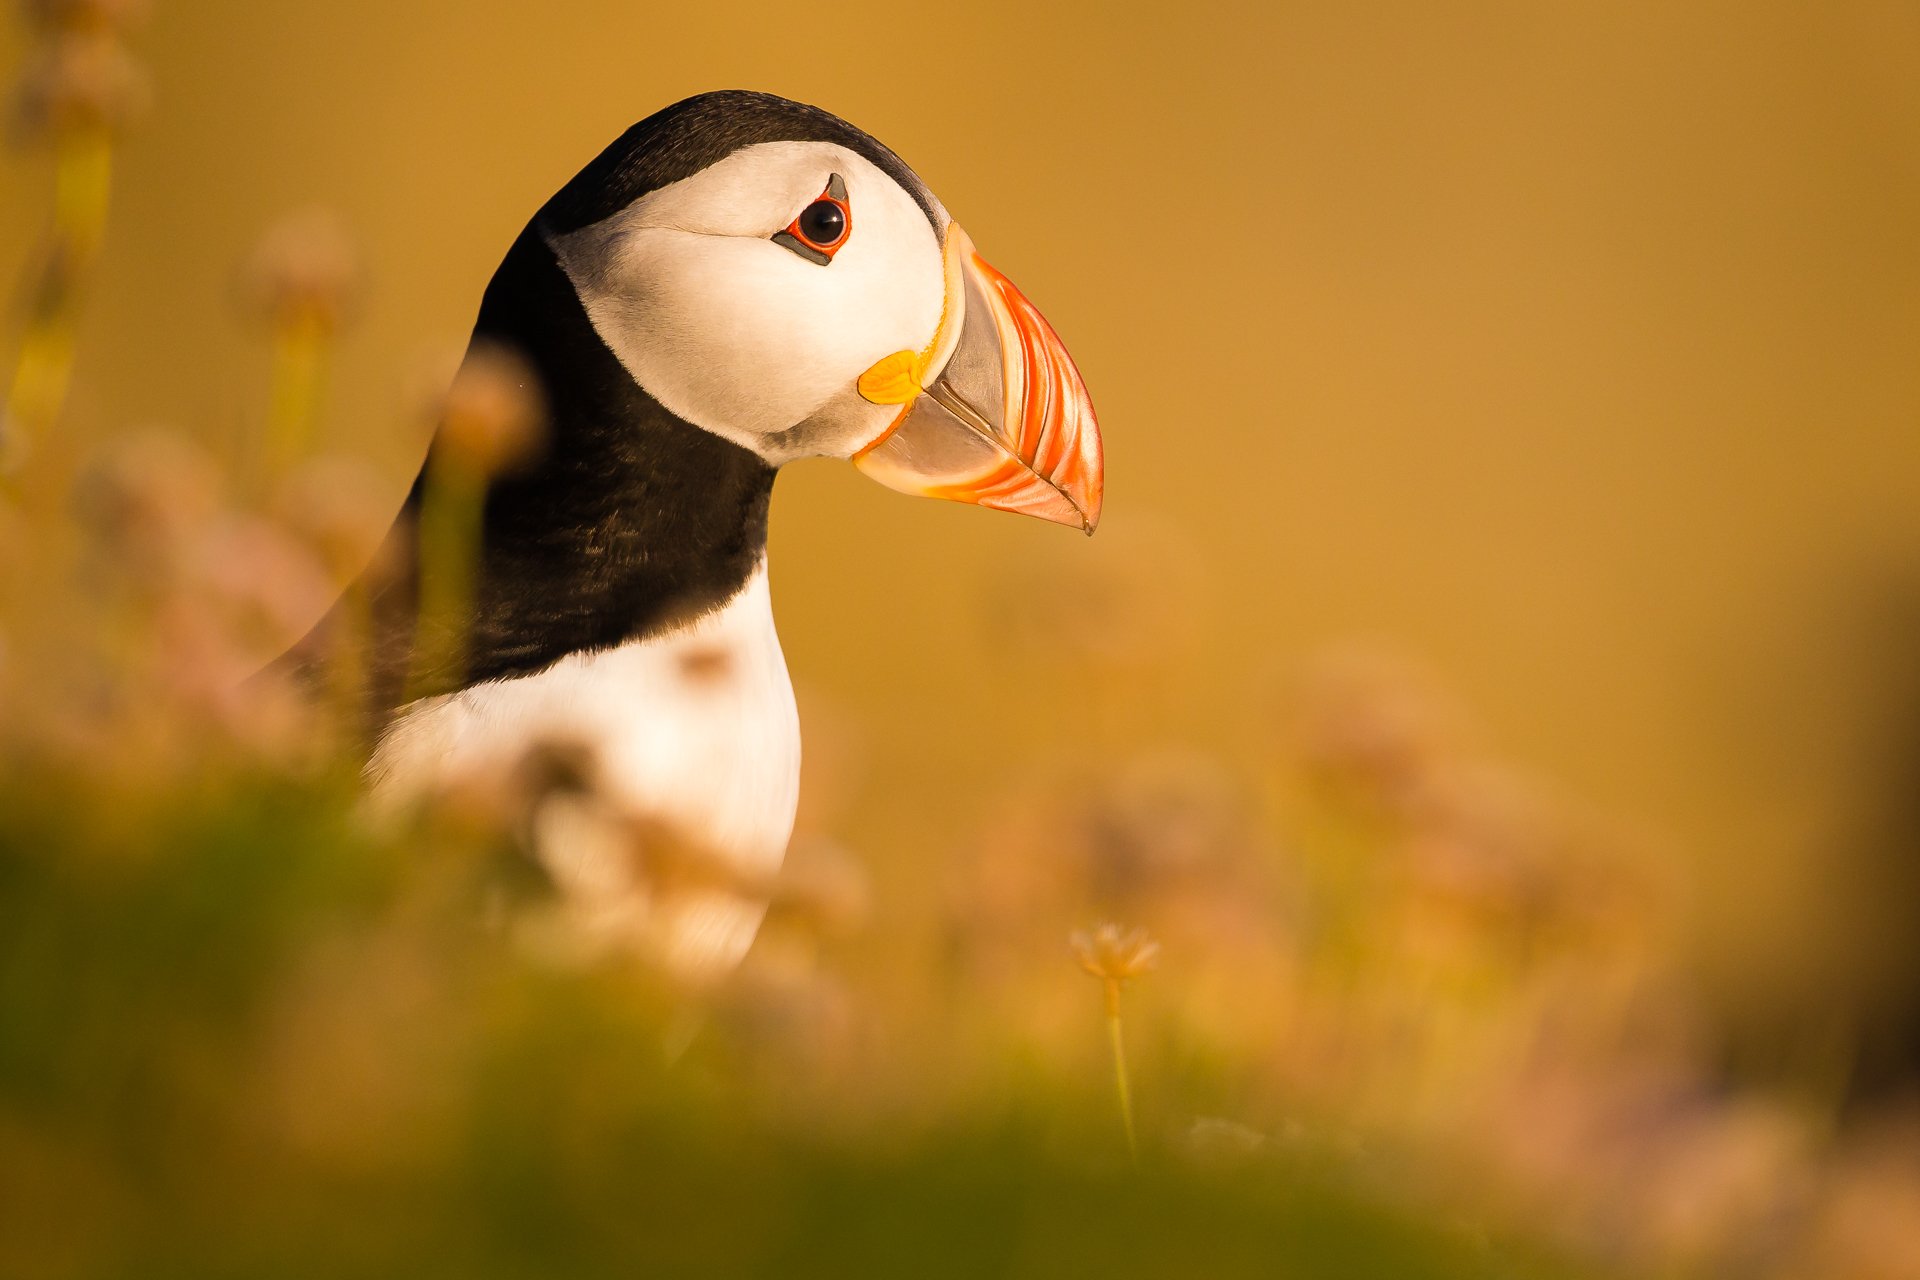
My favorite way to use light is backlighting. In simple terms, backlighting can be explained as when the sun is in front of you, lighting the back of your subject. Backlighting is a tricky style to master but, if done correctly, can often create a dramatic feel to your imagery and a final result packed full of atmosphere.
For me, one of the greatest draws to this style is the emphasis on shapes rather than detail. My preference is often to shoot dark and moody. When shooting this way, similar to the silhouettes above, you want distinctive shapes that make your subject easily recognizable to the viewer. Such as a puffin’s beak or squirrel’s tail.
To achieve these dark and moody images, first, explore your surroundings. Look for a dark background such as a distant cliff face, hillside, or treeline that has fallen into shadow. The next step is to dial in negative compensation. This is open to your own interpretation.
As a starting point, I will normally begin with -2 and adjust until only the rim lighting is visible. The finished product will be clean, outlining the shape of your subject, and stripping the imagery back to its simplest form.
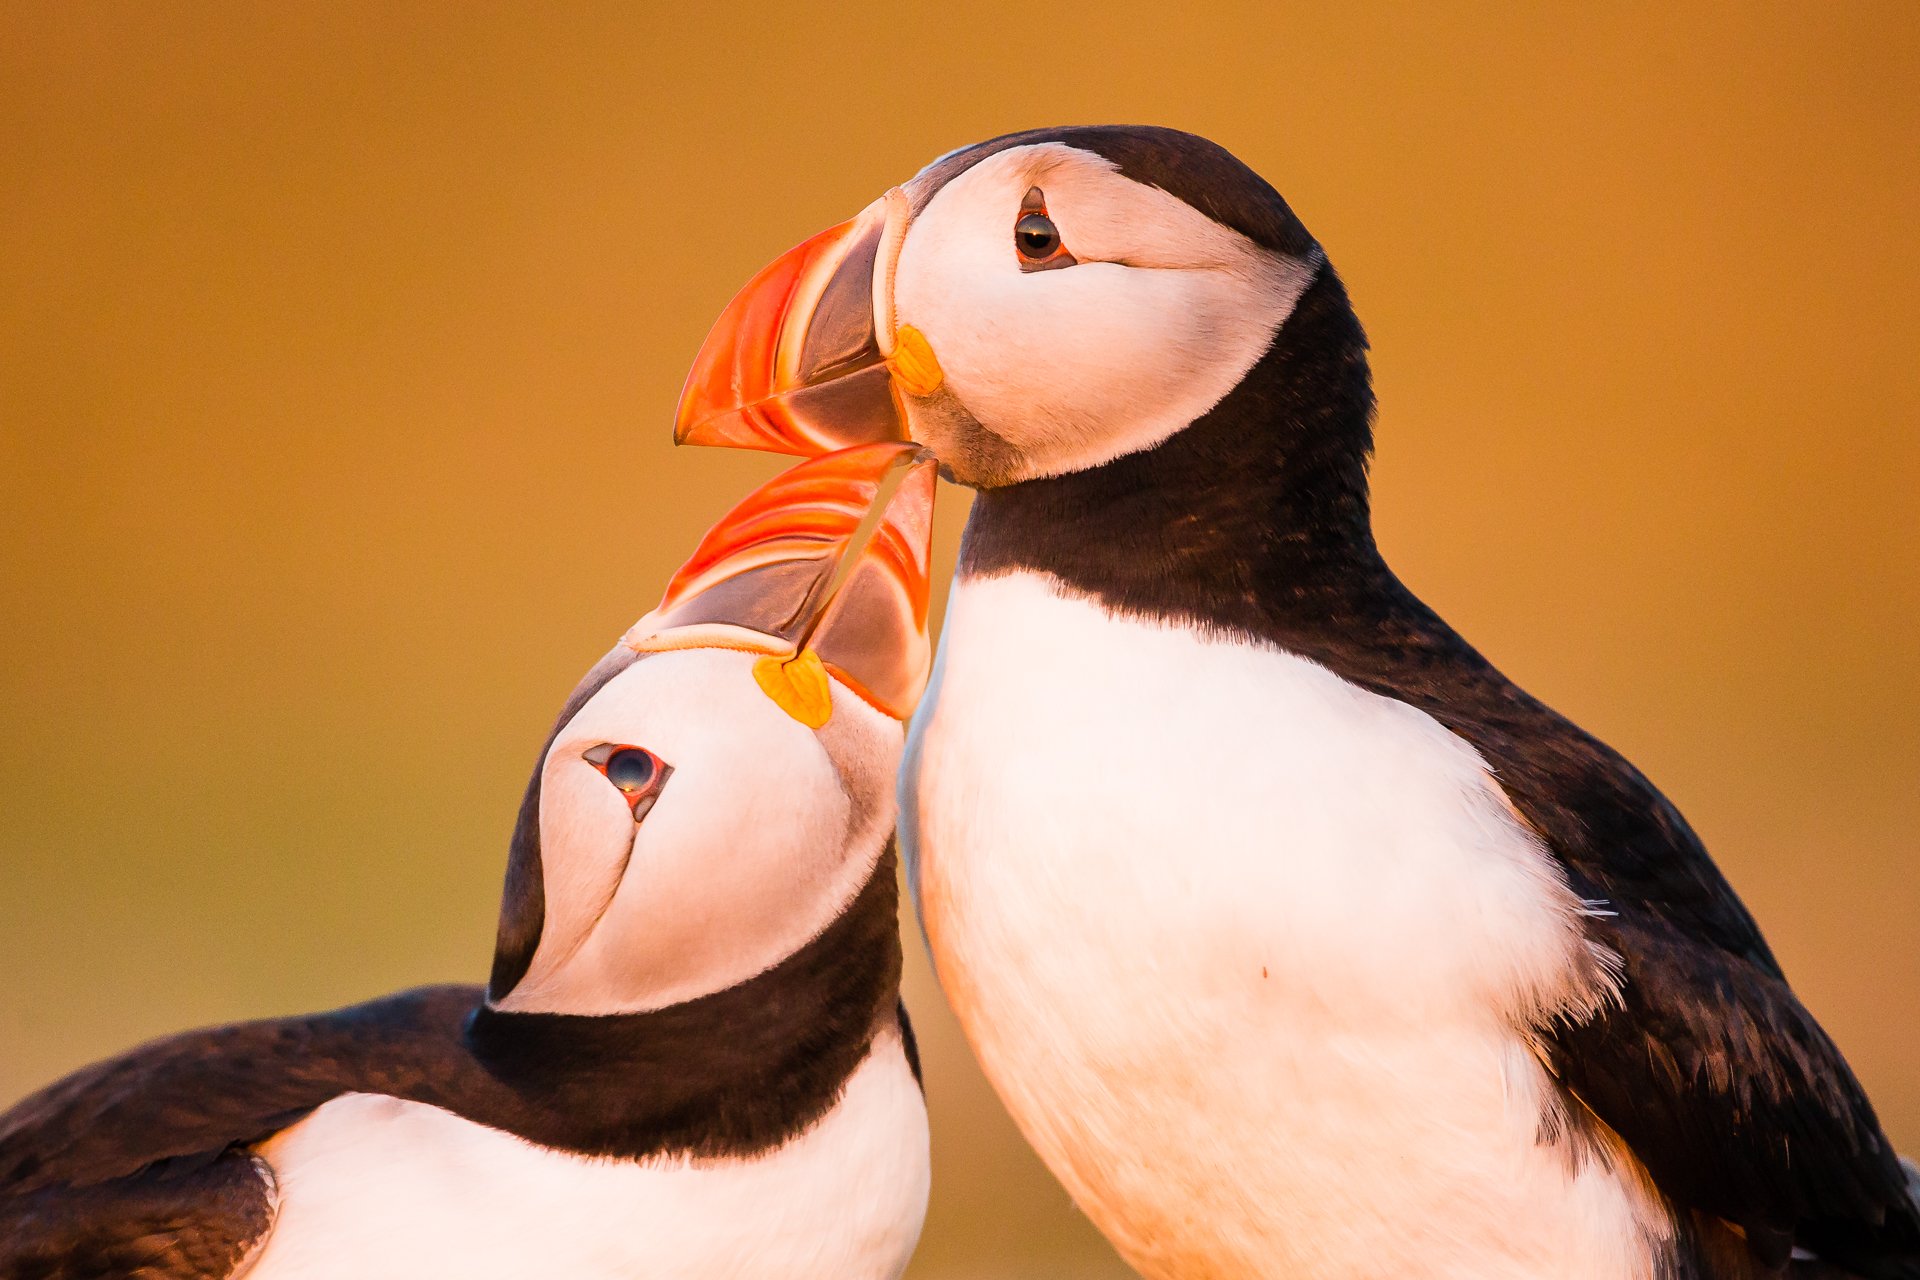
Shooting backlit is open to your creative freedom, depending on how you want the final image to look. You can either shoot dark and dramatic or light the subject instead. The latter choice will, in turn, cause the rim lighting around the subject to blow out a little.
Just be careful not to blow the highlight too much. Keeping an eye on your histogram is the best way to prevent this. Birds can look fantastic using this approach, as the light shining through their feathers looks almost translucent.
Read more: Wildlife Photography - Mastering Light
“In my photography, the key element is light. A camera is just a tool, light is what can transform an image into something truly breathtaking.”

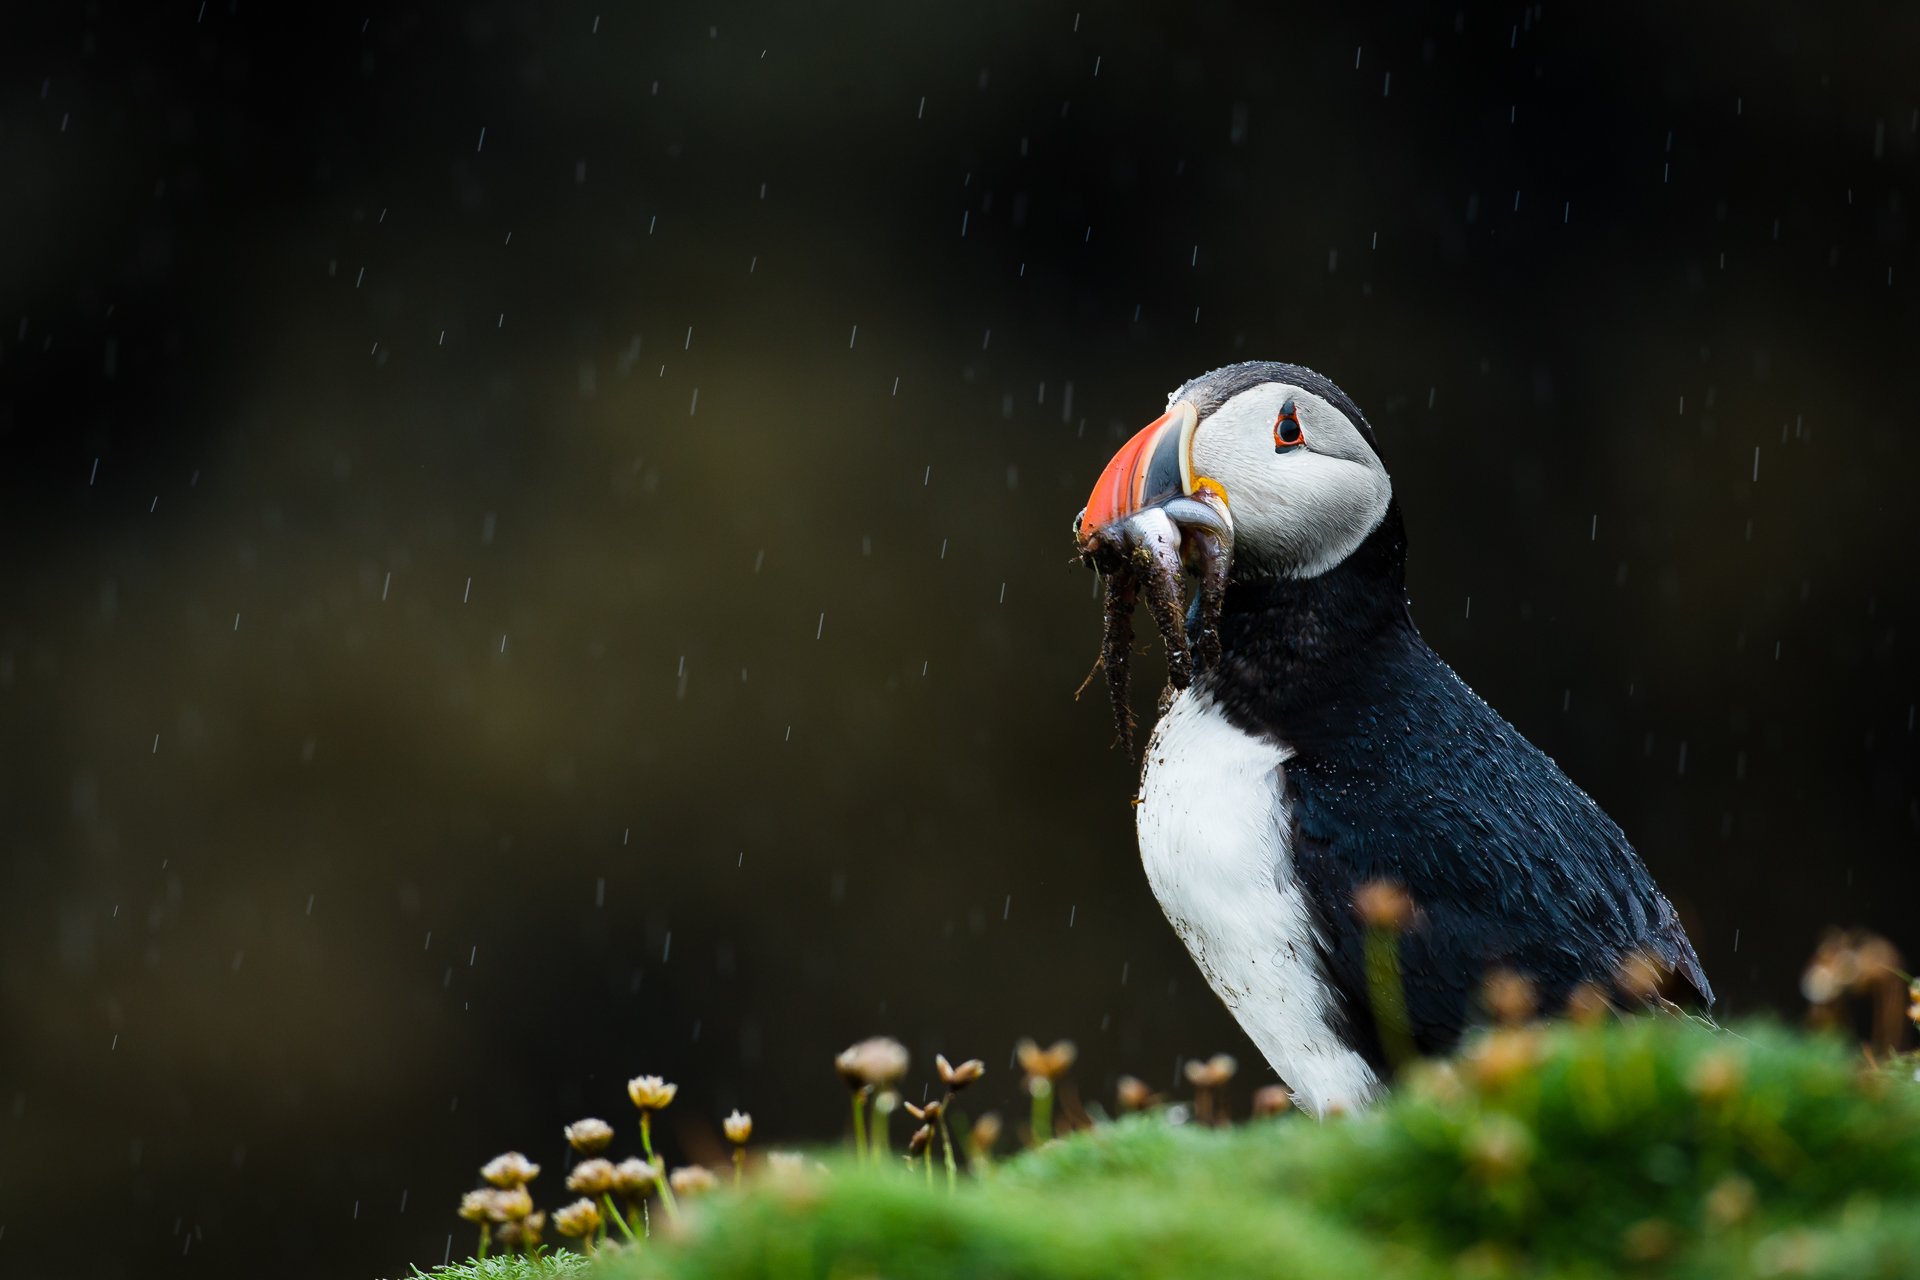
4. WEATHER THE STORM
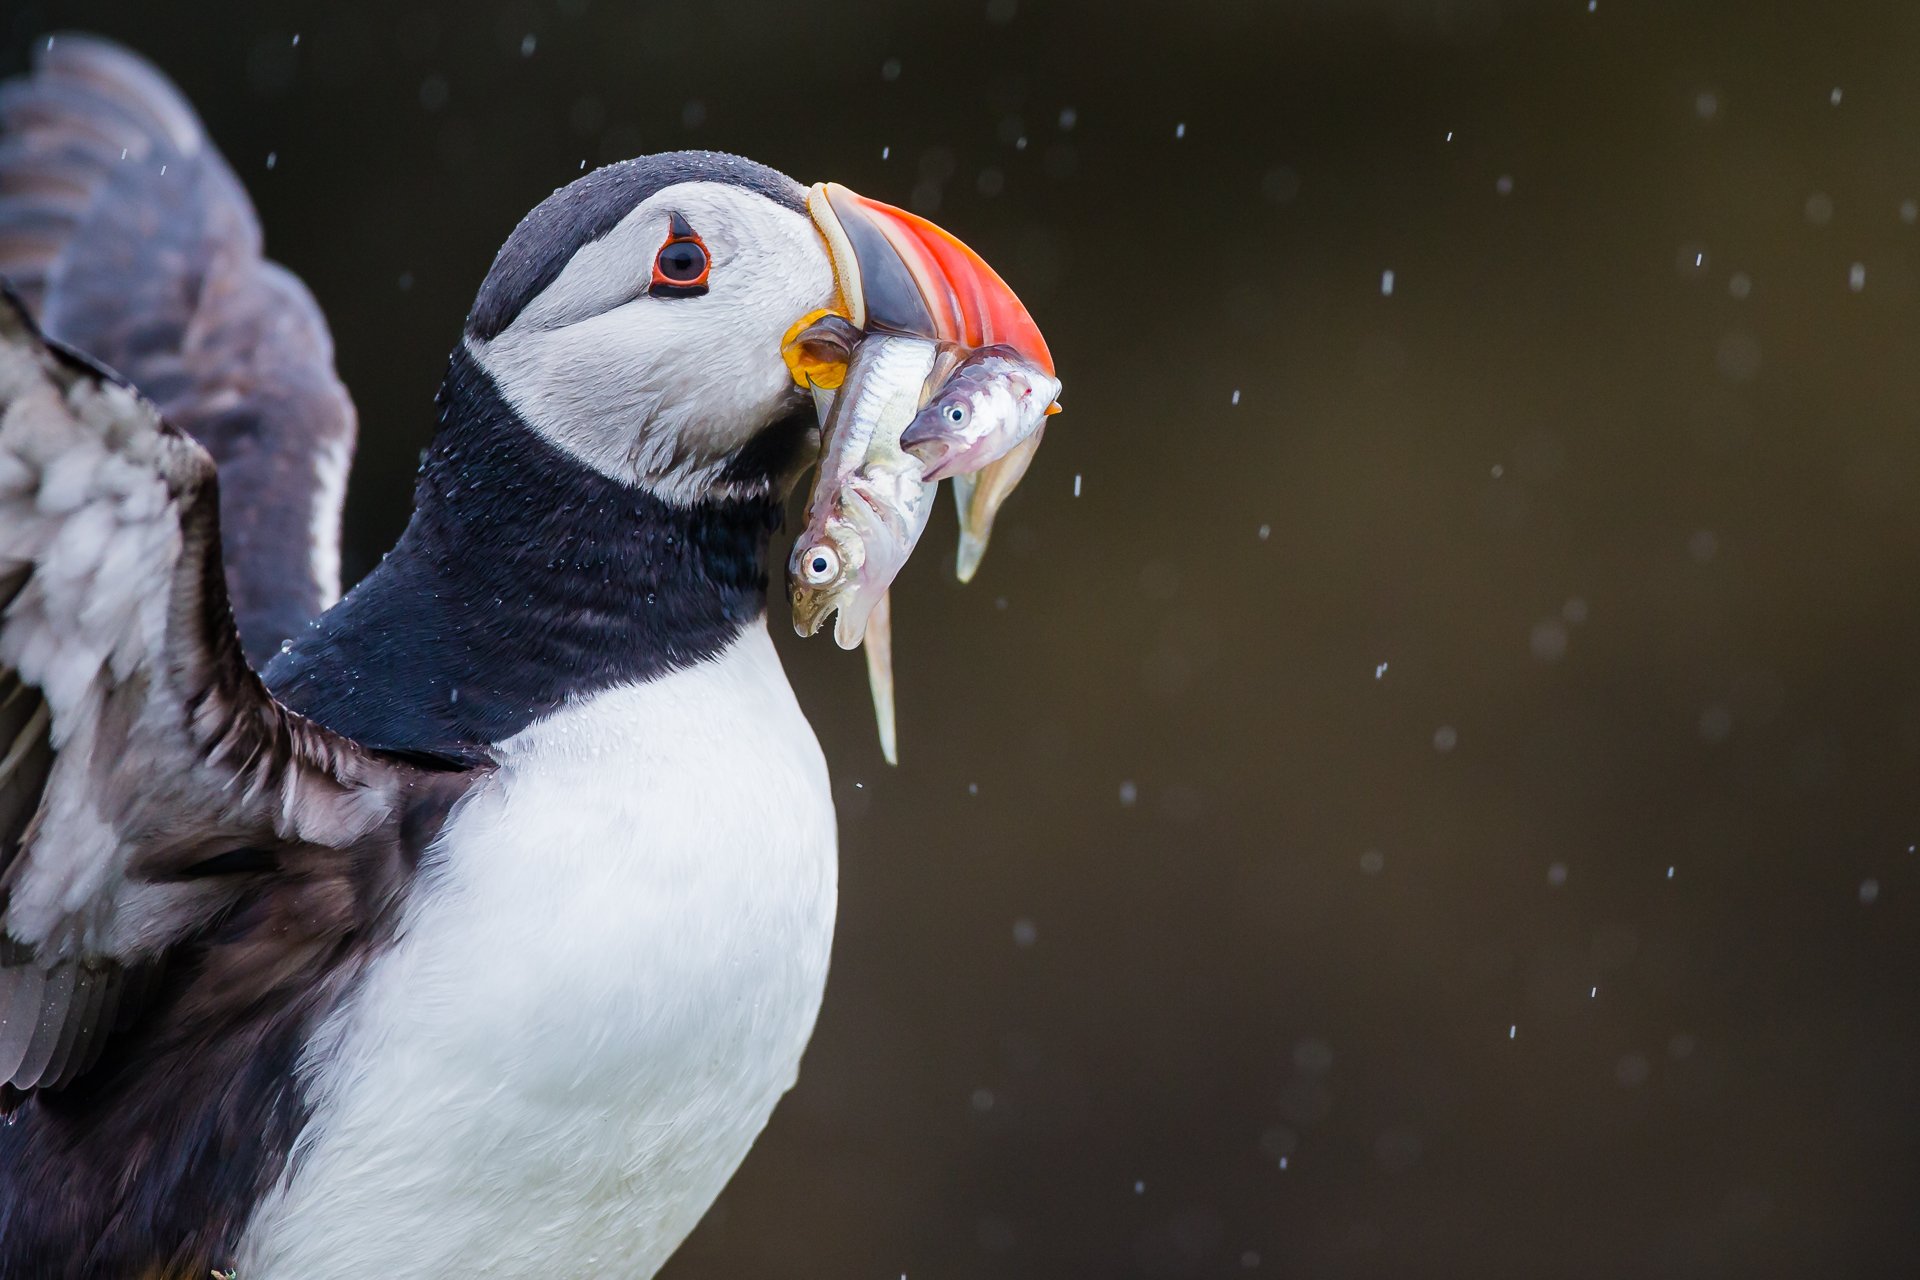
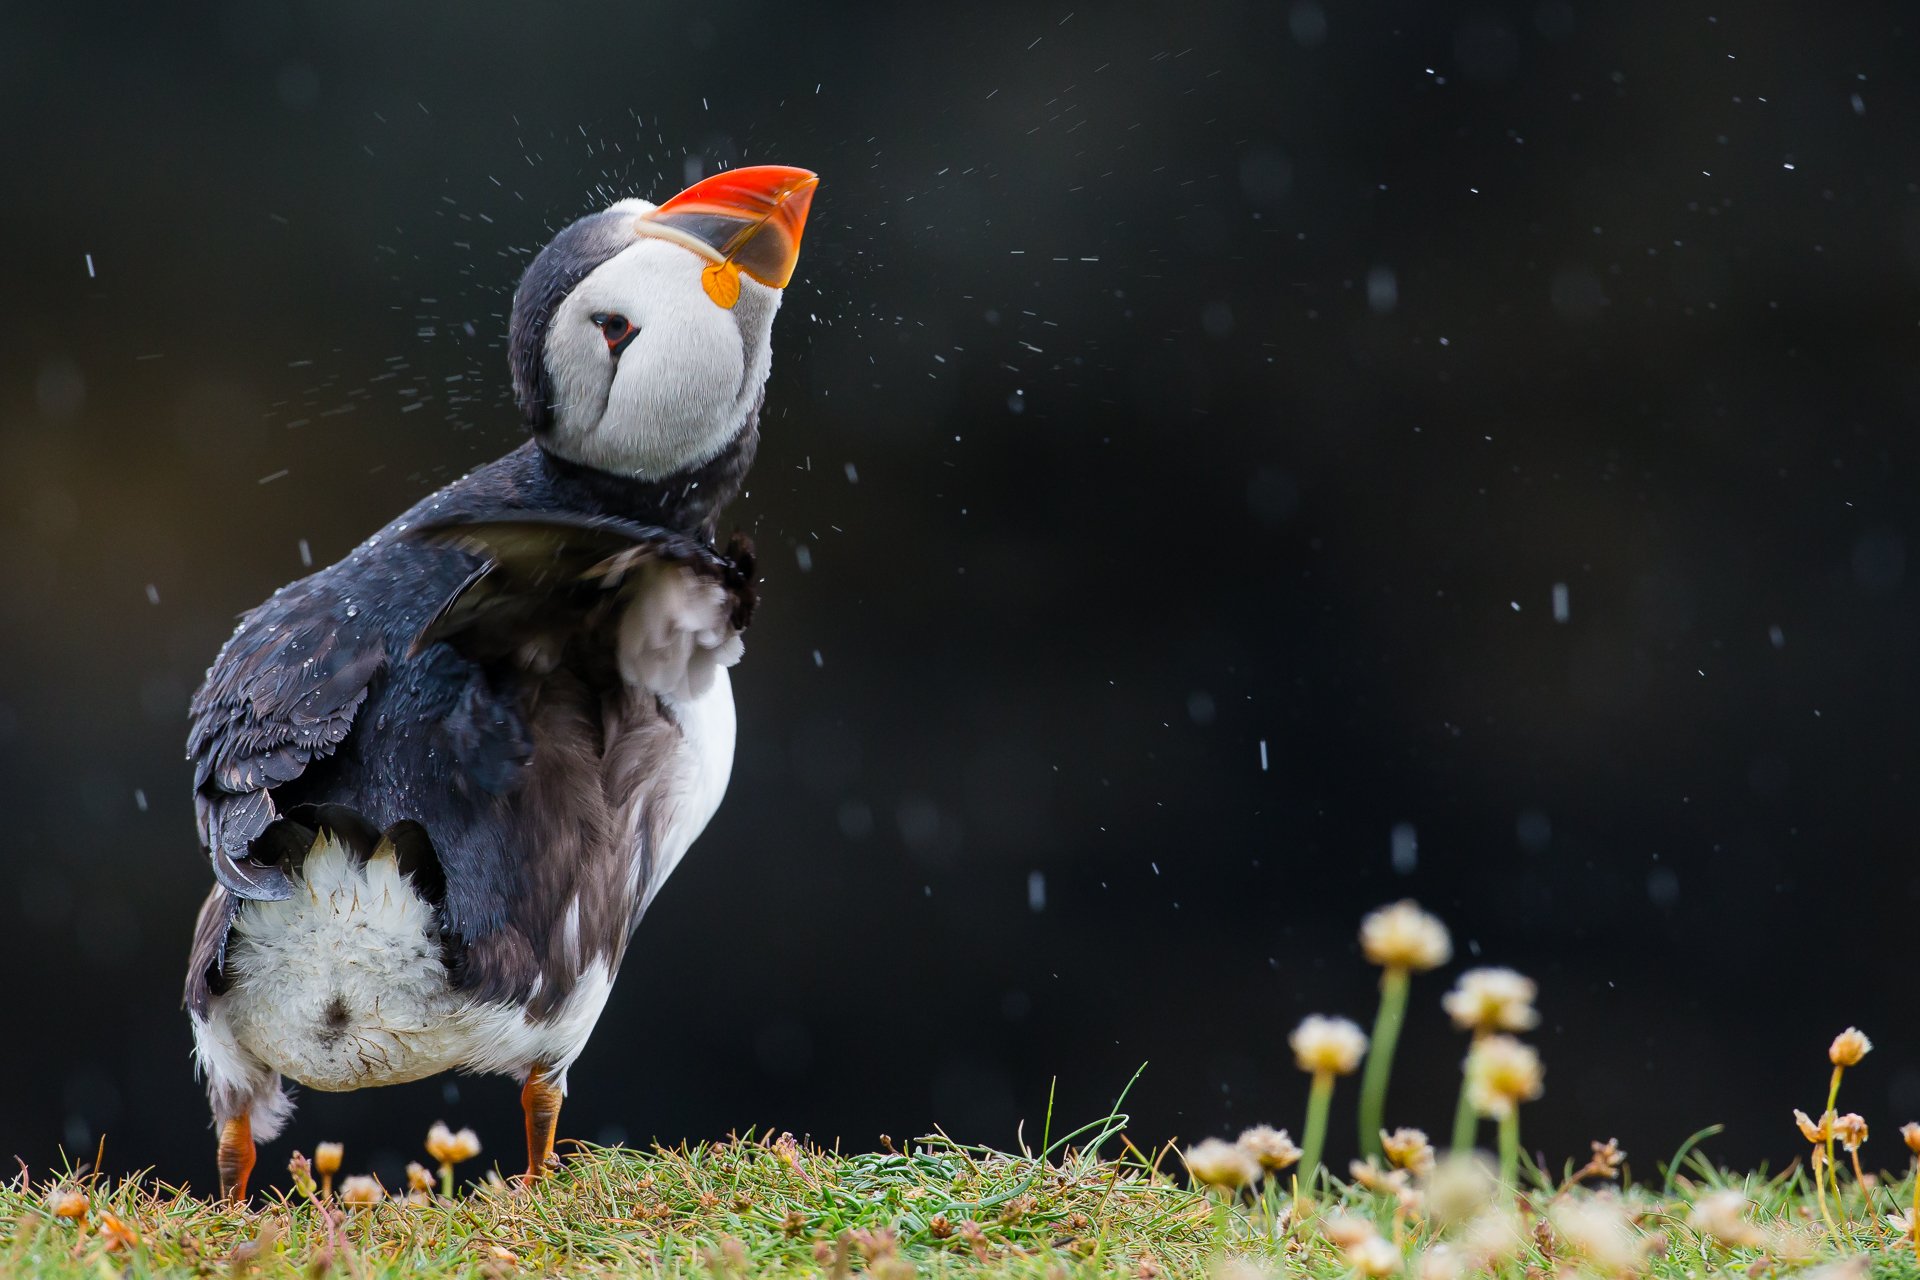
If we decide to wait for the golden light during British summertime, we may be waiting a long time. Clouds, rain, and fog are the norm. But, don’t get downbeat when the weather isn’t in your favor, instead, embrace it. Often, the best images can be achieved in the worst weather.
Shooting in wet weather can come with its own challenges, such as keeping yourself and your kit dry. Keeping yourself dry and warm in these conditions is vitally important. Once I get cold and wet, well, I’ll start thinking about that hot cup of tea and not the photography at hand. The longer you can stay out in these conditions, the more chance you have of producing unique puffin imagery.

5. COMPOSITION IS KEY - TELL A STORY
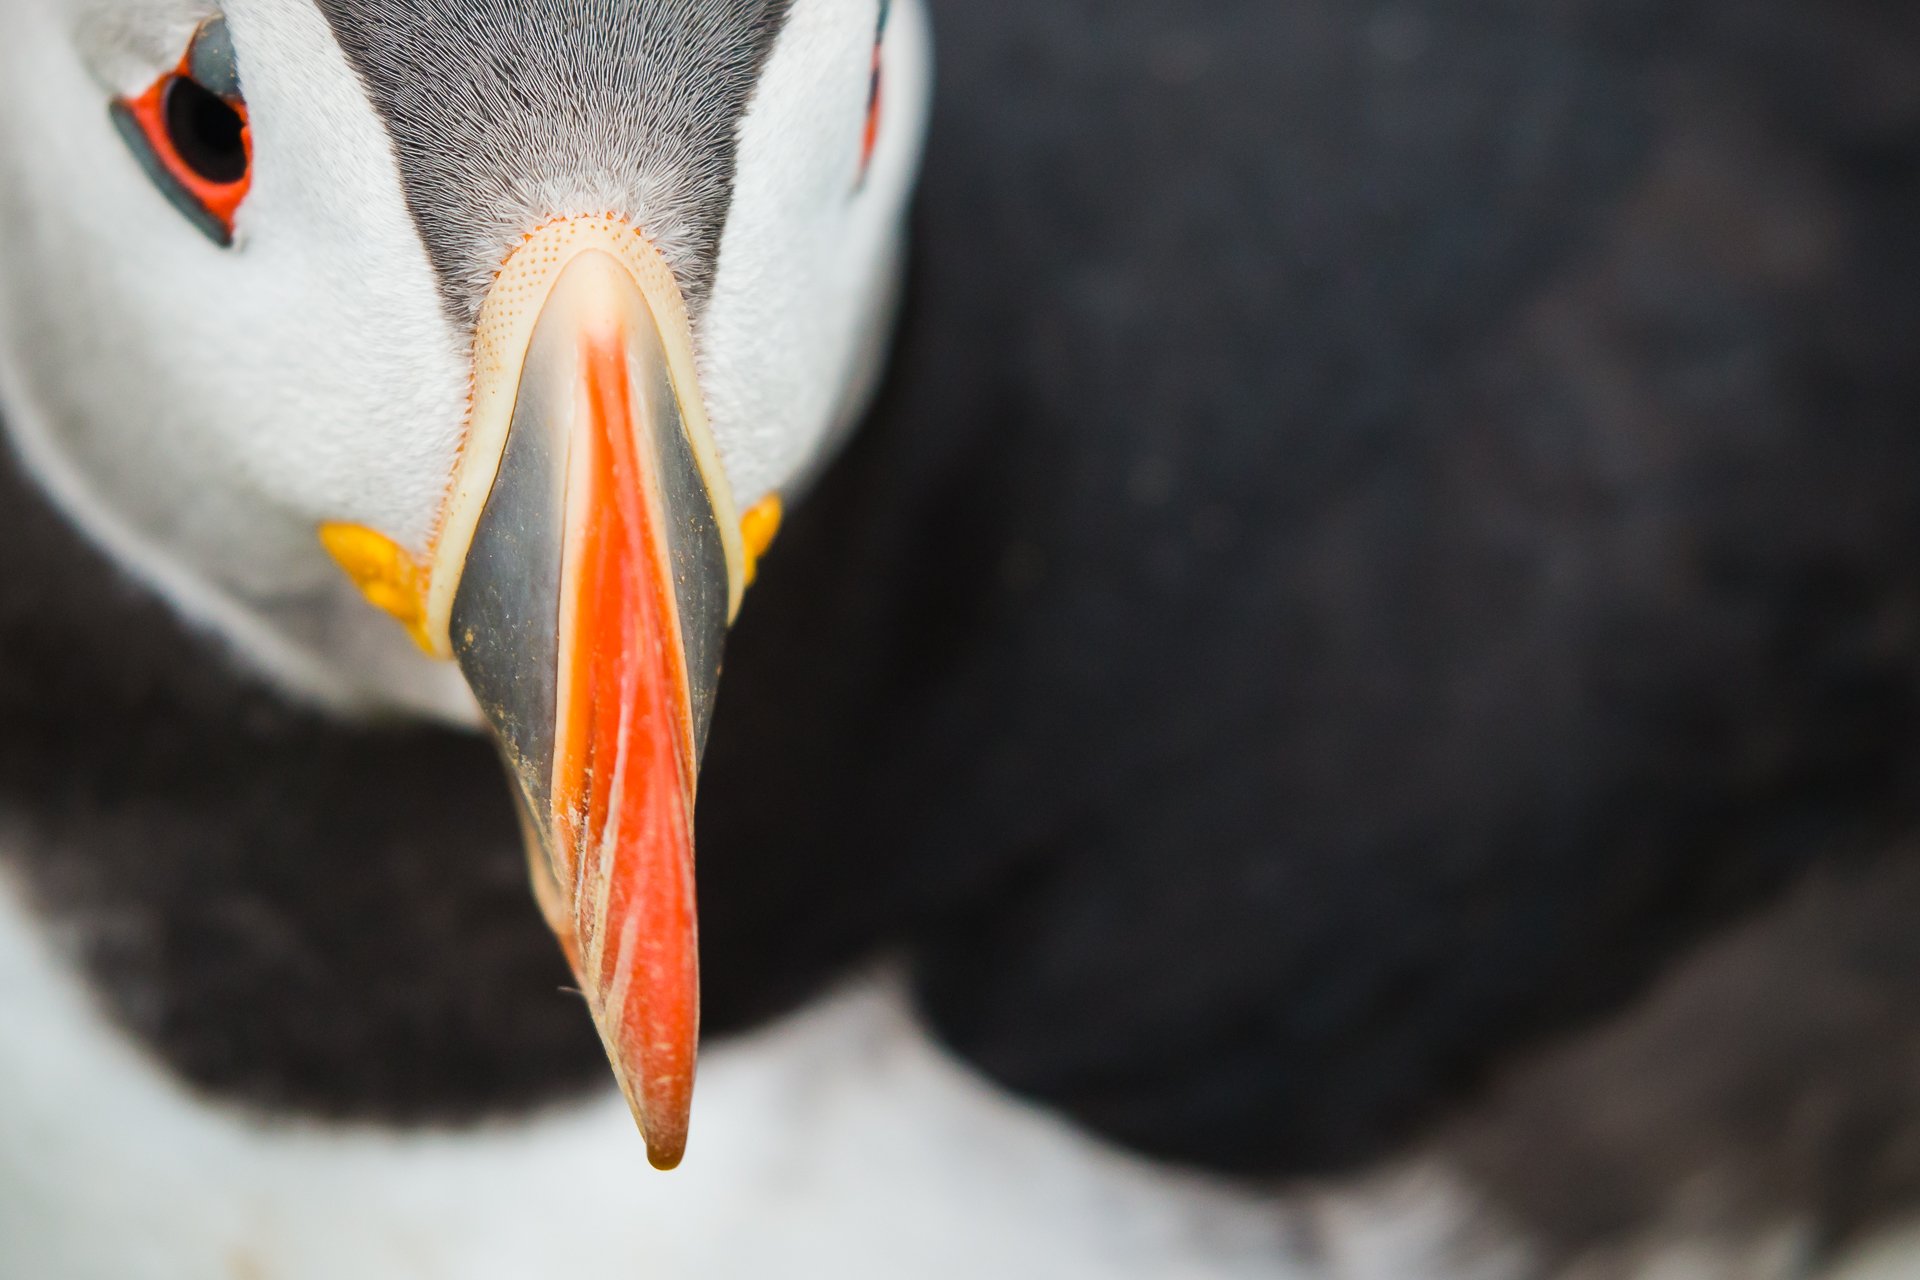
Composition is also a crucial element in making your images stand out from the crowd. It affects what you want your image to say. For example, you could shoot the same scene wide, close up, or focus on the eyes, feet, or hands.
Each composition tells a different story. With your camera in hand, you are a visual storyteller — you want to create images that connect the audience with the scene and make them feel like they are right there with you.
Before you press the shutter, think about what story you want to tell. A mistake I often find photographers make when working at seabird colonies is not stepping back and looking at the bigger picture.
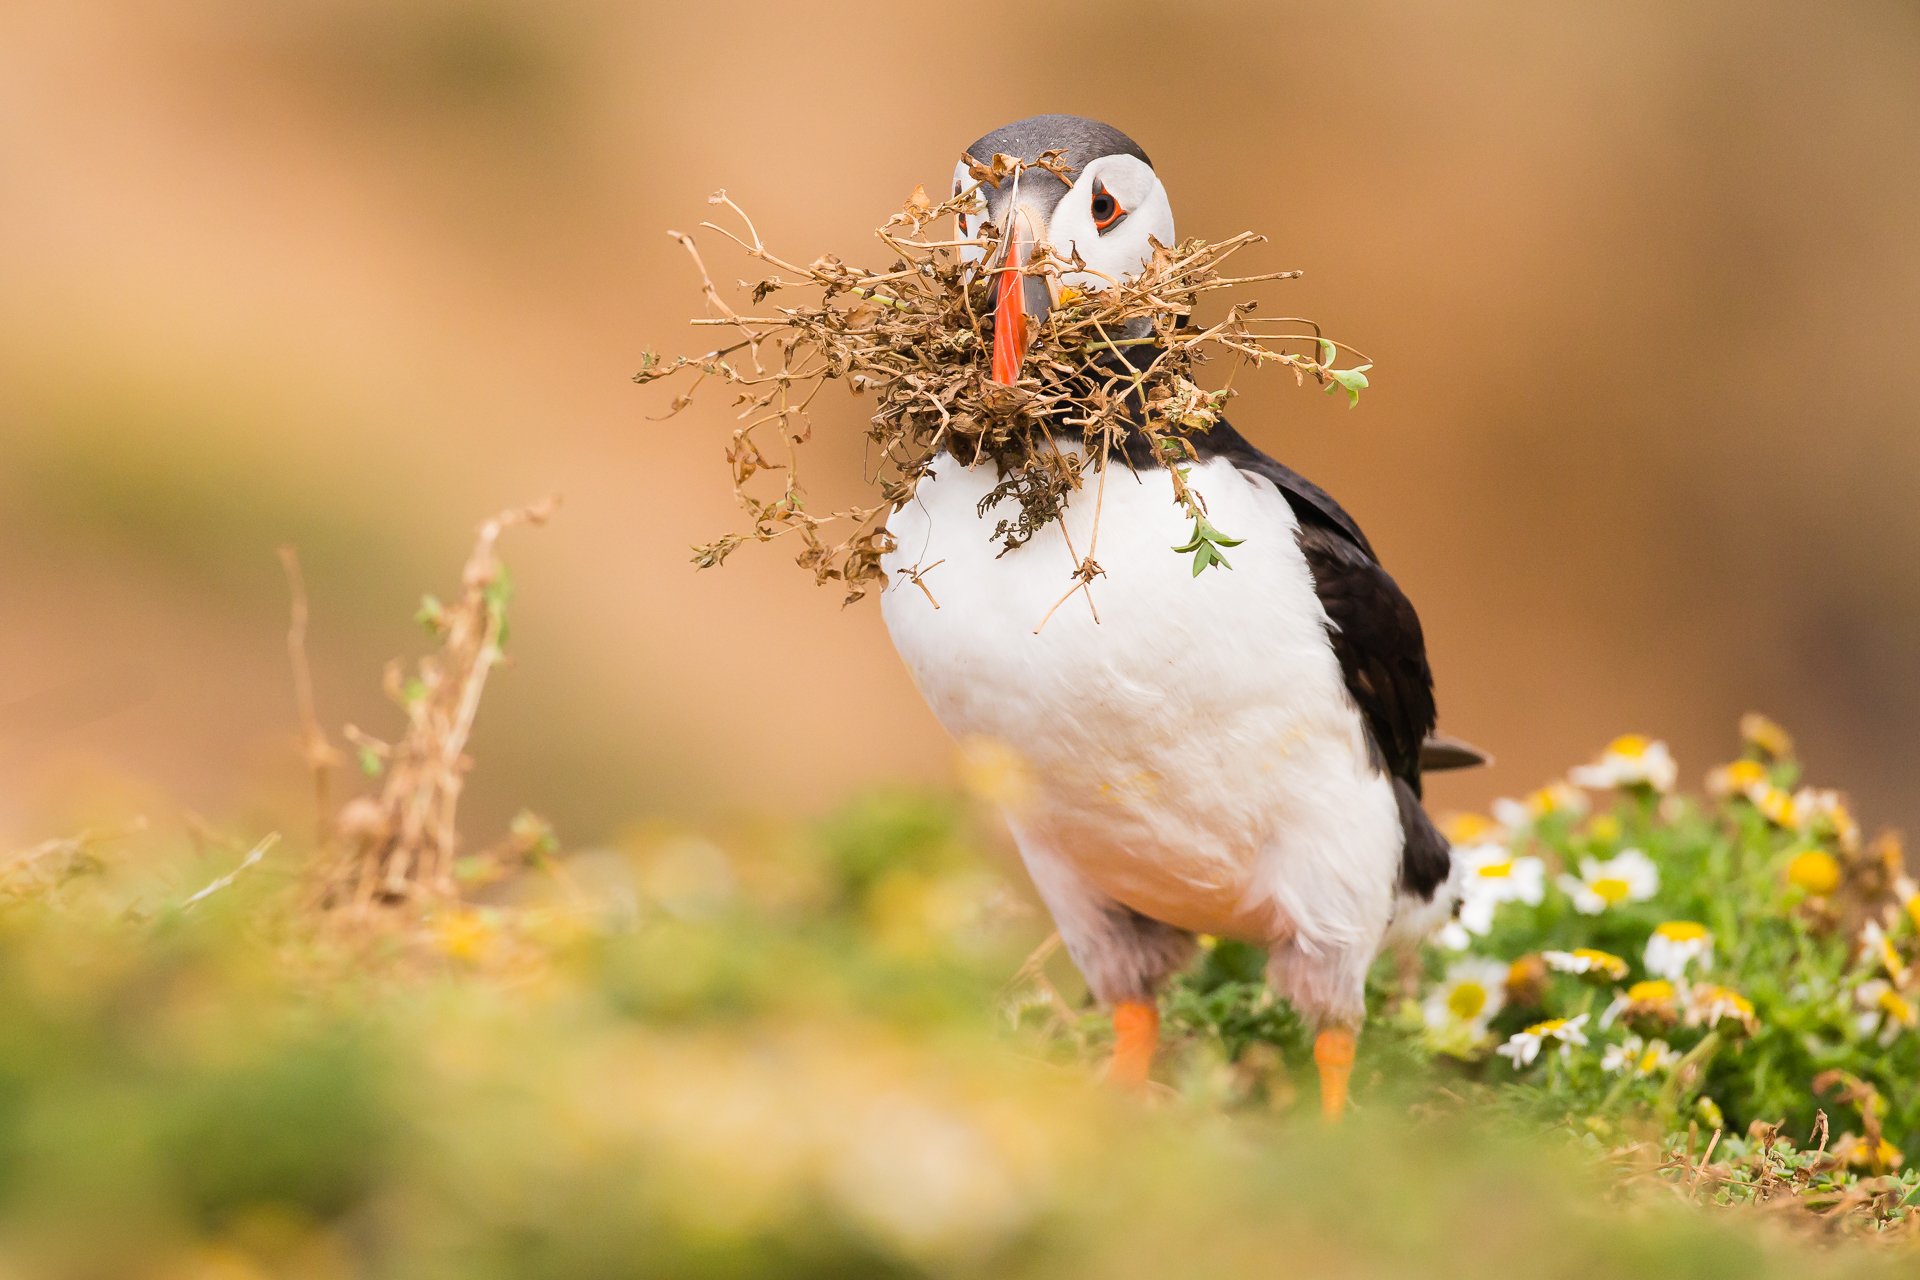
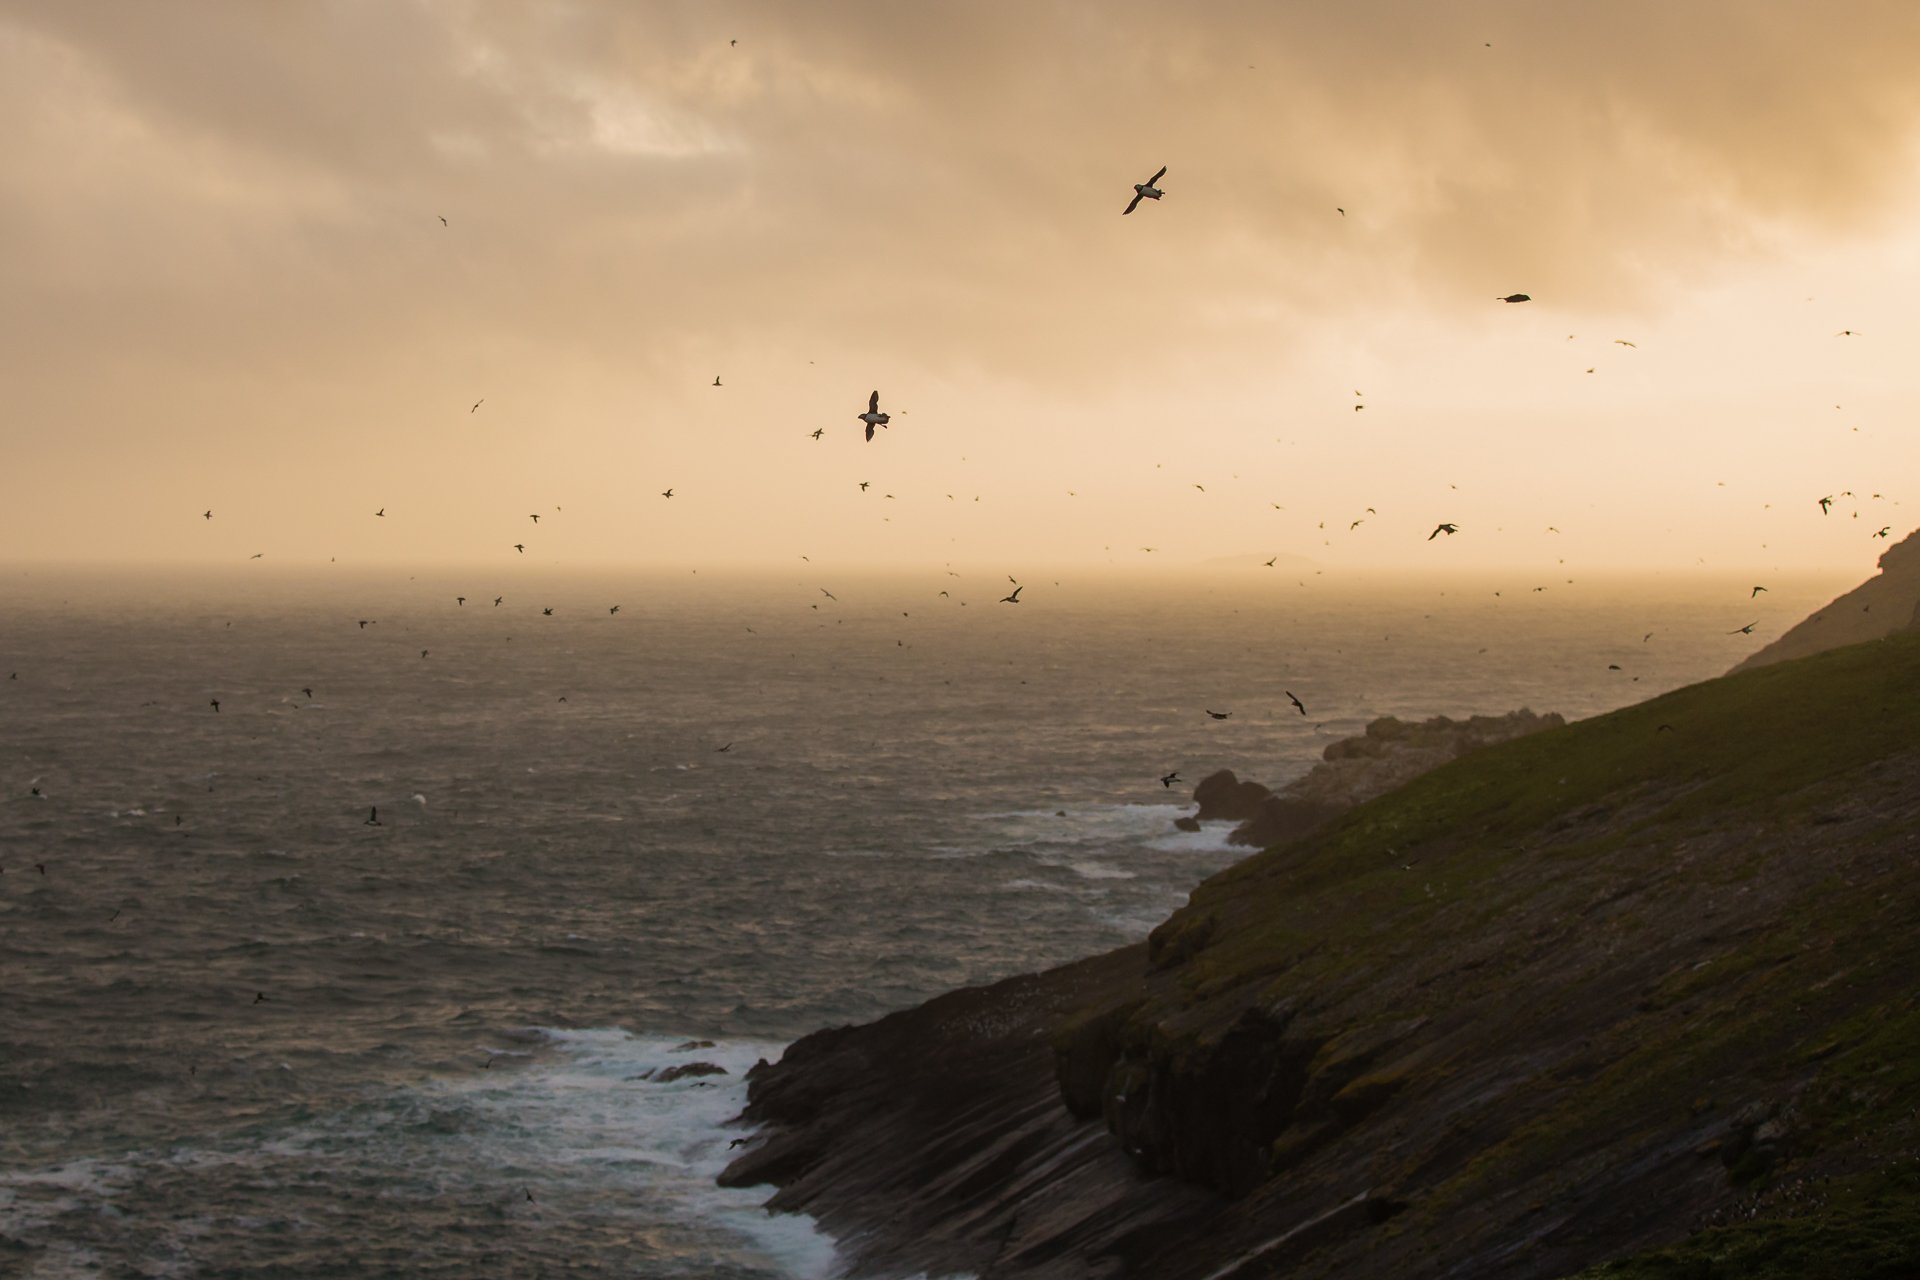
It’s easy to see a beautiful subject, such as a puffin, and rush to shoot the bird as big and bold in the frame as possible. It can be a little more difficult to compose when shooting wide, as the subject no longer becomes the main focus of the frame.
When shooting wide, the main focus becomes the landscape with your subject small within the frame. Seabirds’ habitats are amongst the most stunning on the planet. Look to combine the two for some stand-out shots this summer; the beauty of the seabird, and the habitat.
When I first started, a good friend once told me, “If the habitat adds to the image, include it; if not, exclude it from the image.” I know it’s a very basic quote, but please bear it in mind when next composing an image.
Now imagine the same image shot through a long telephoto lens; the viewer’s perception would be greatly altered. It creates a completely different story and situation. Before composing your images, take a moment and ask yourself: is this the story I want to tell?
Read more: Wildlife Photography - Composition Is Key
“If the habitat adds to the image, include it; if not, exclude it from the image.”


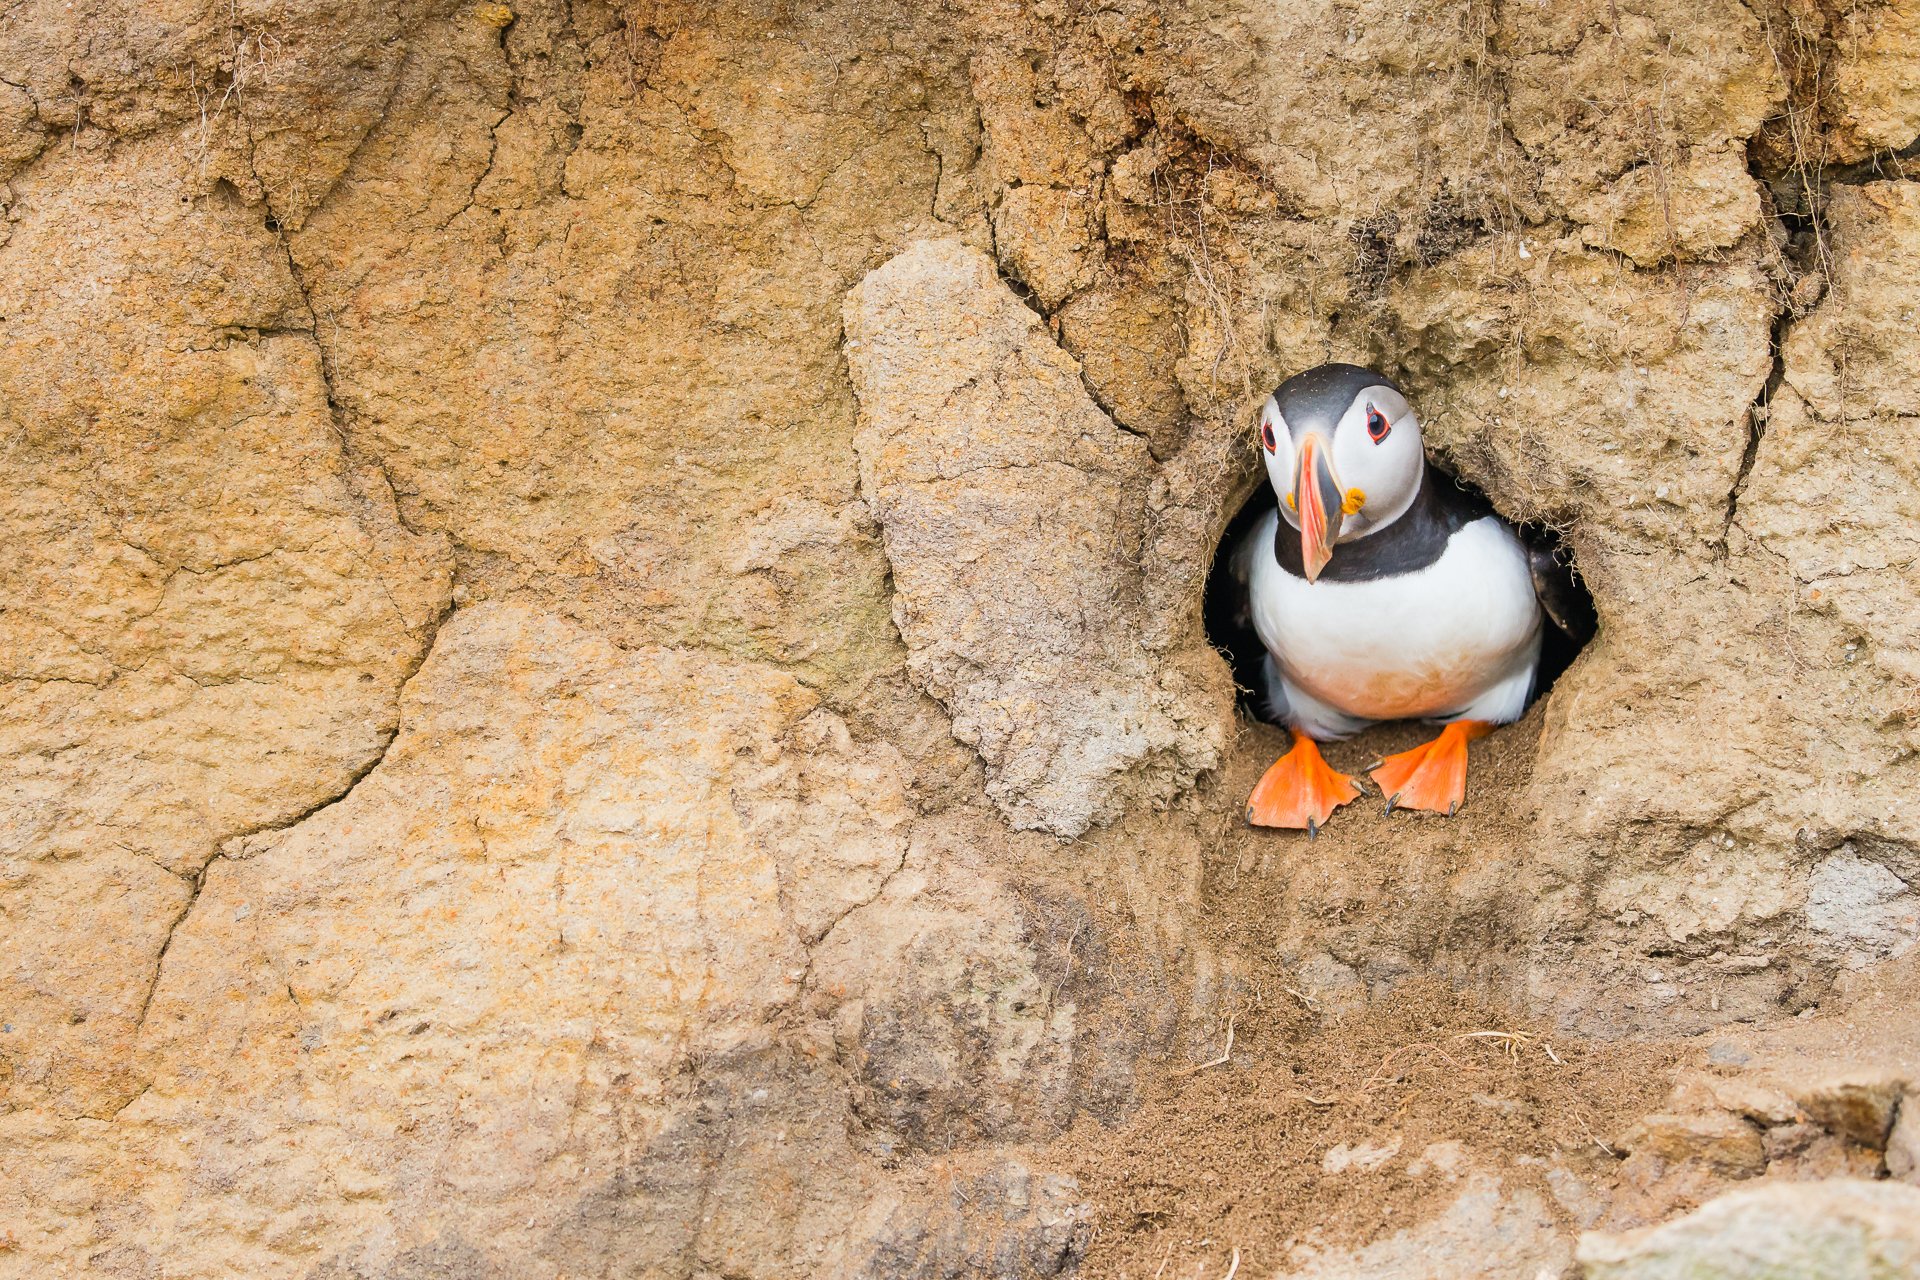
6. GET LOW
To truly connect with a subject, you need to shoot from their level. Atlantic puffins see the world from roughly 10 inches (18 cm) off the ground, whereas a human’s eye level is much taller at about 5-6 feet. Towering over a puffin shooting down will very rarely make for a pleasing composition.
Ditch the tripod, get on the ground, and shoot from the animal’s perspective. By shooting from this standpoint, the viewer will be transported into the bird’s world. It will also produce an intimate portrait, allowing the viewer to connect with the subject.
Shooting low can transform an otherwise cluttered scene. Being low will often allow you to shoot through a diffused foreground and background, and it’ll make your subject pop.
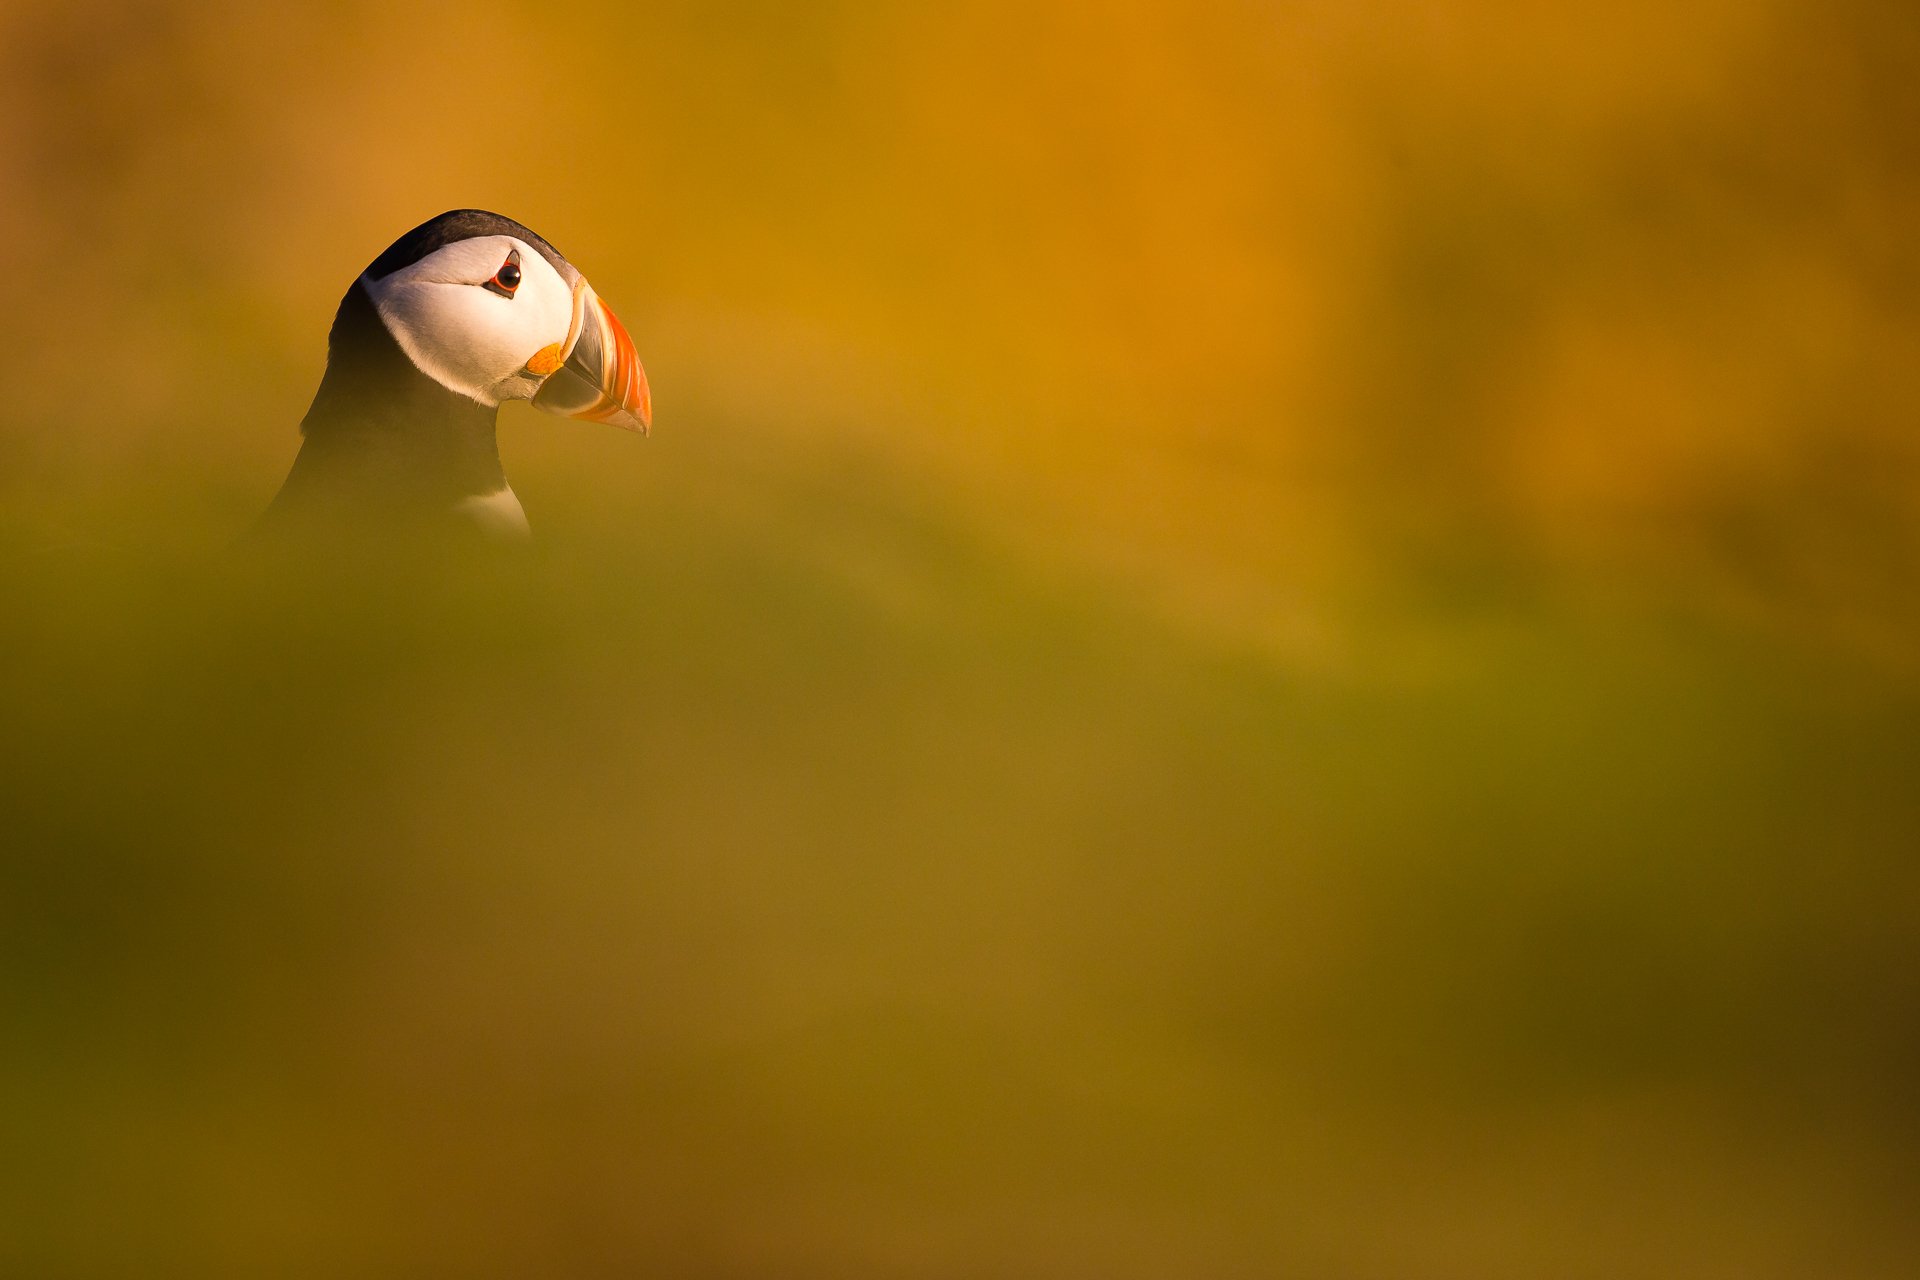

7. USE NEGATIVE SPACE
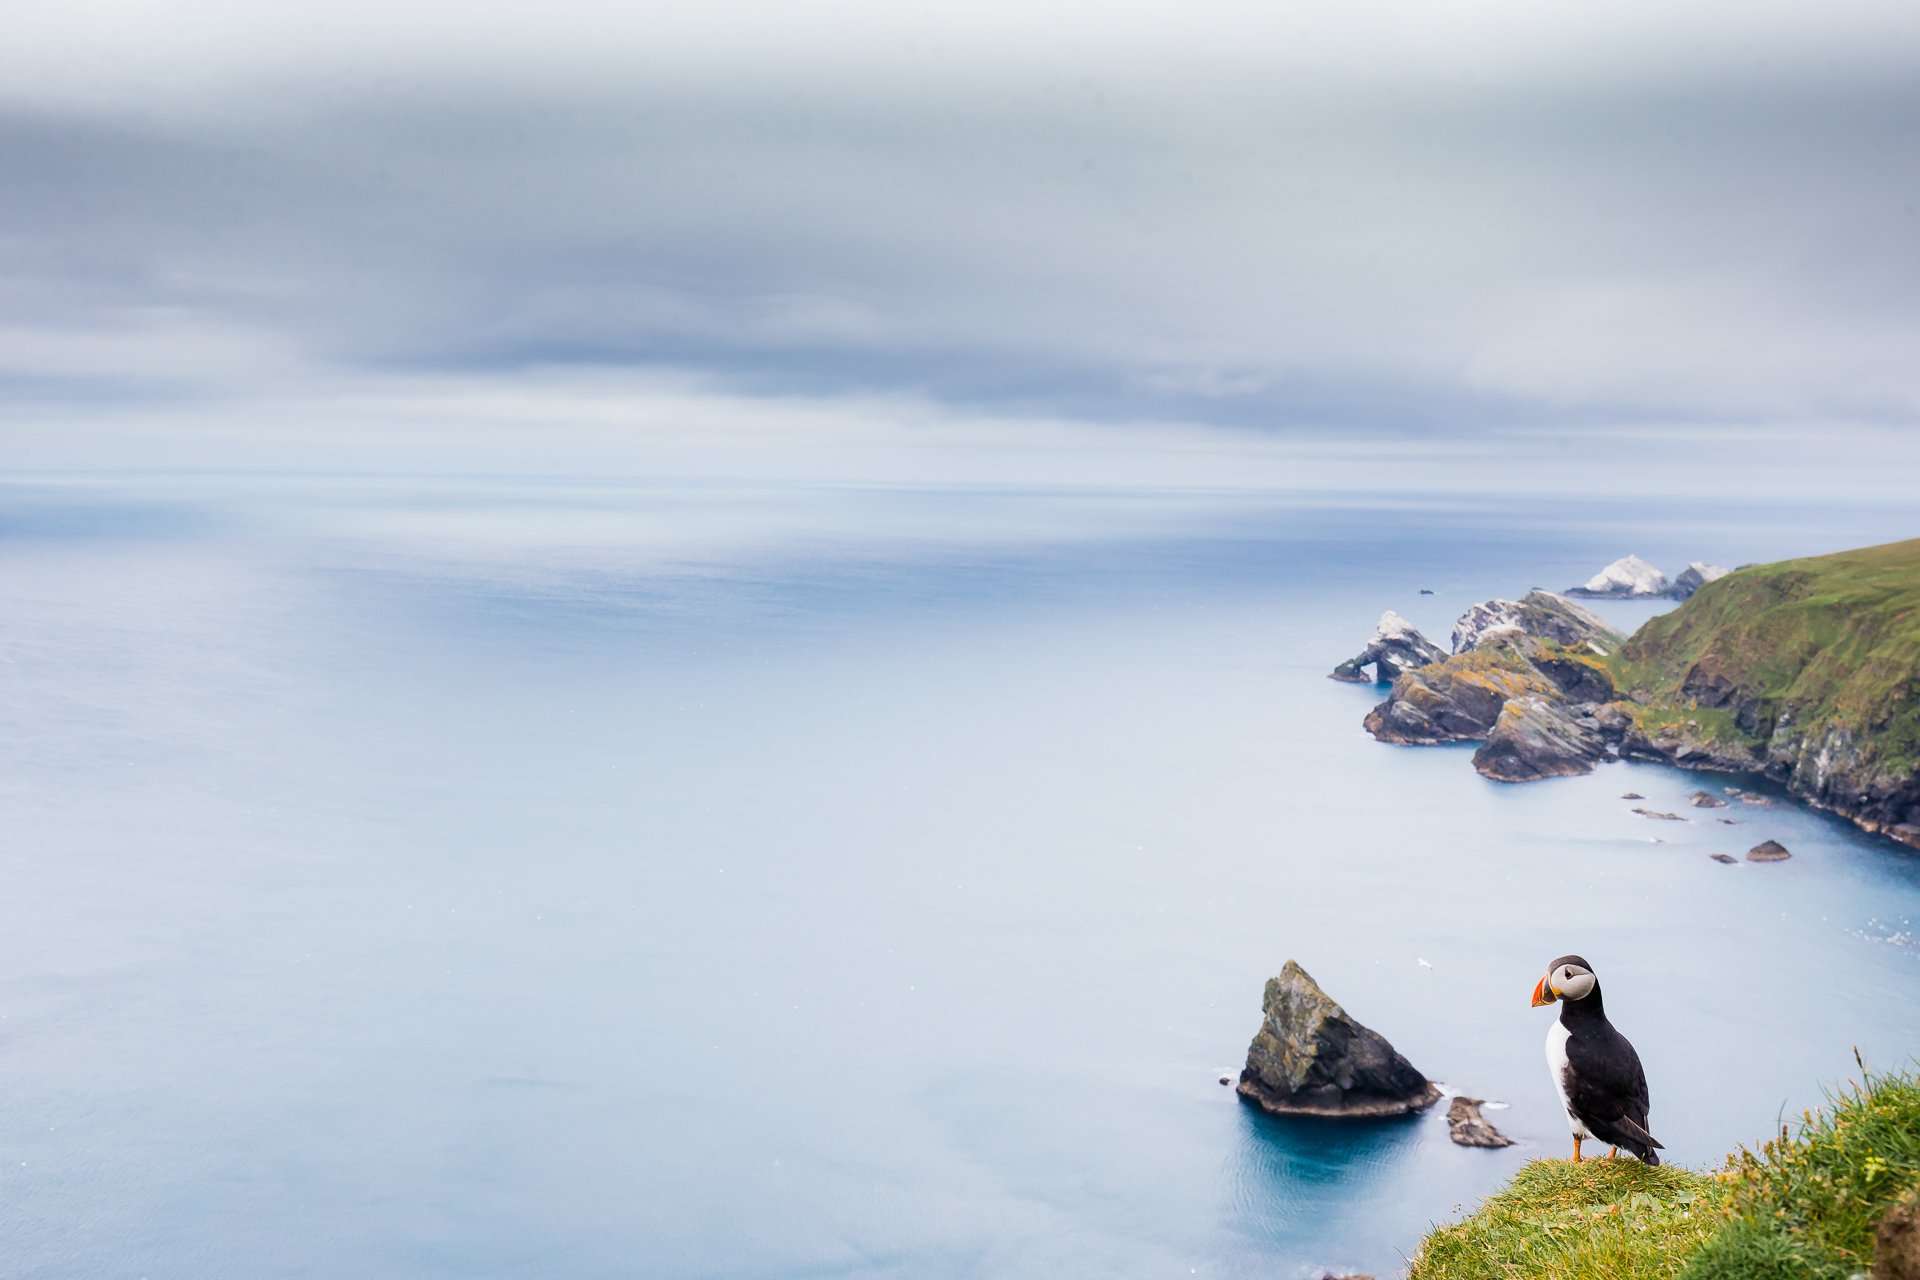
The negative space in an image isn’t always something photographers first think of. It’s easy to get caught up in the main subject of the frame. Negative space is an important element in composing a wildlife photo. Where the subject is framed, and how much space surrounds it, can greatly alter the viewer’s perception of an image.
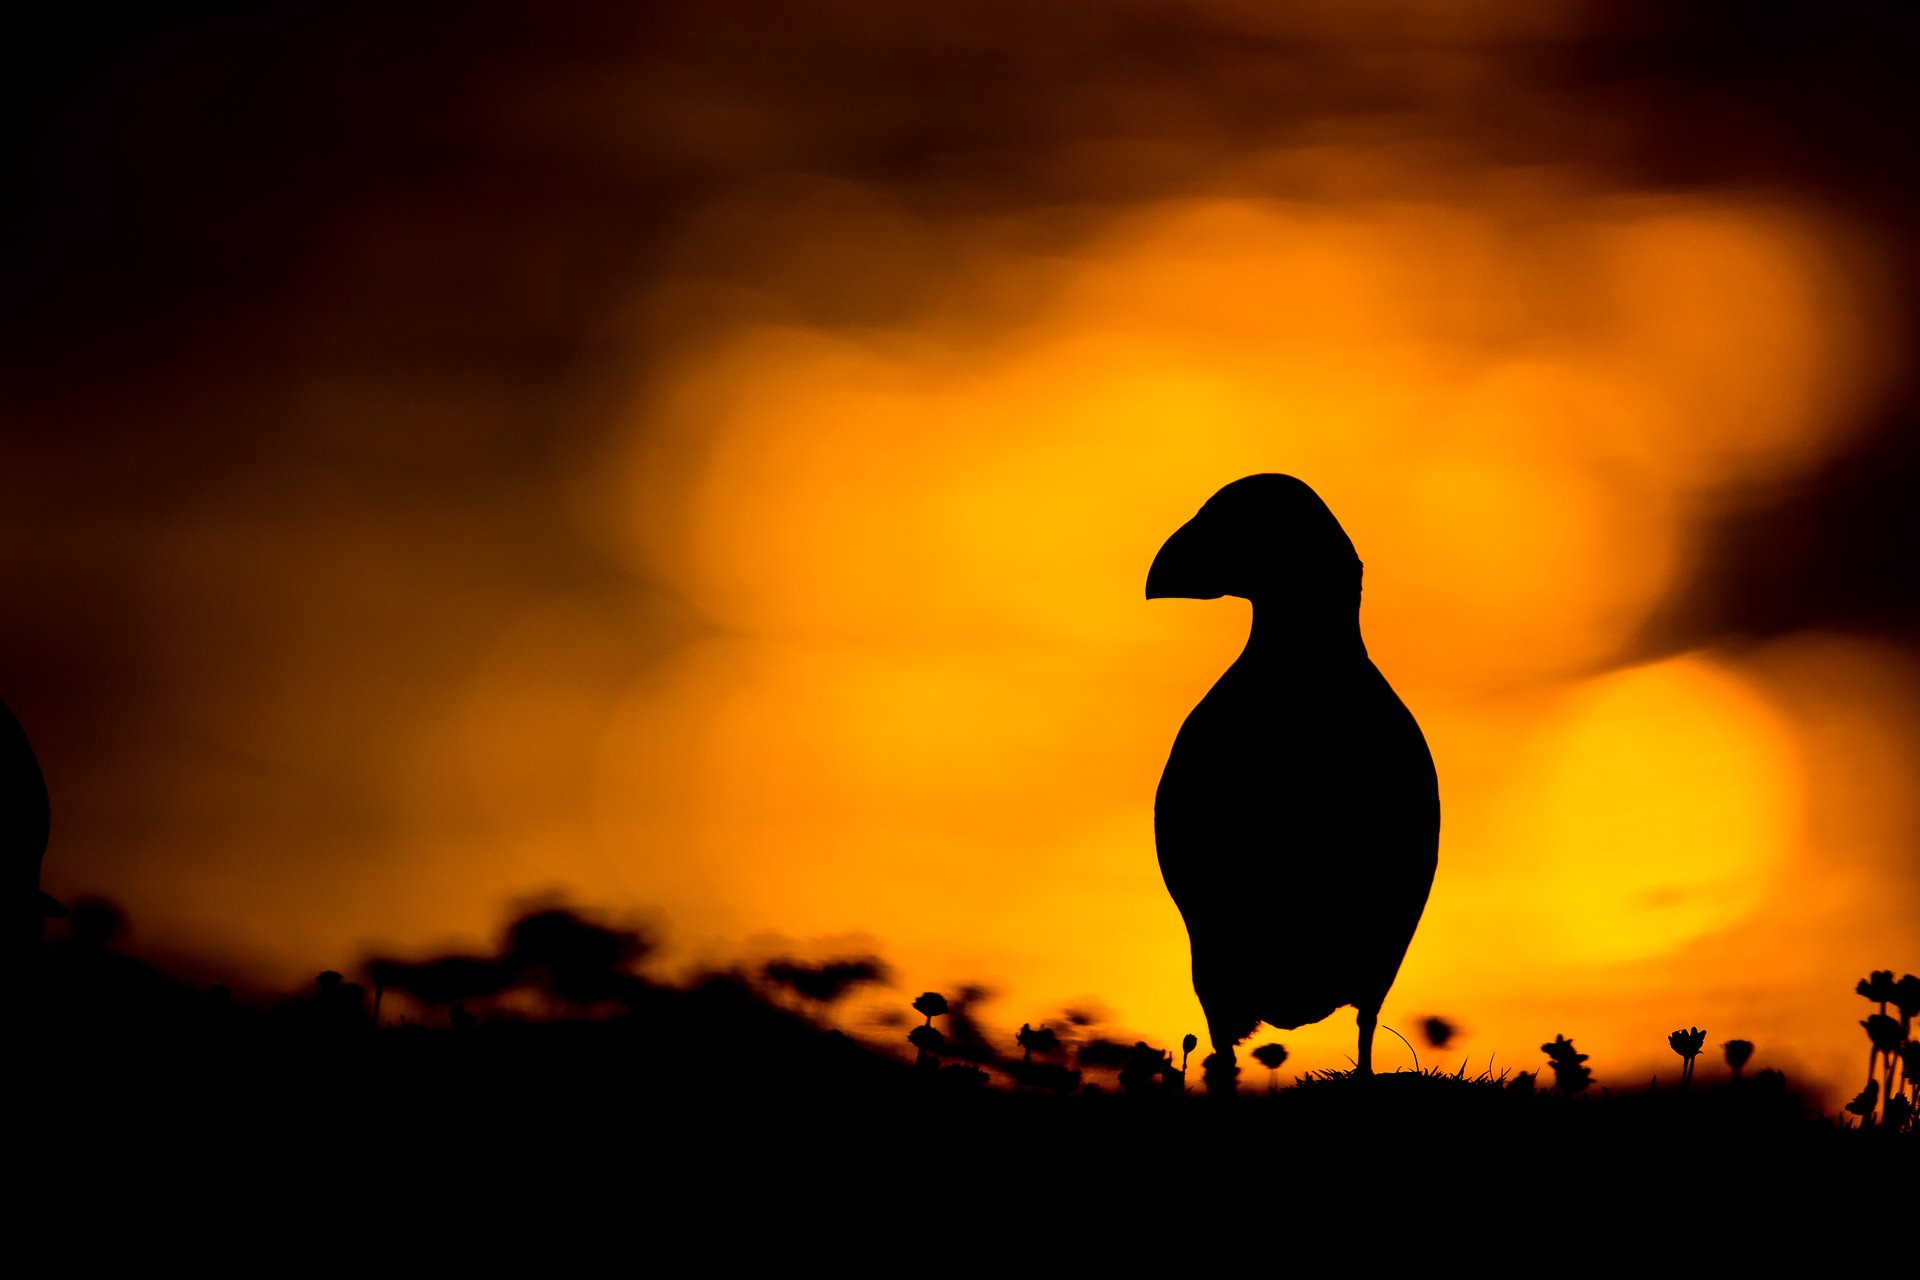
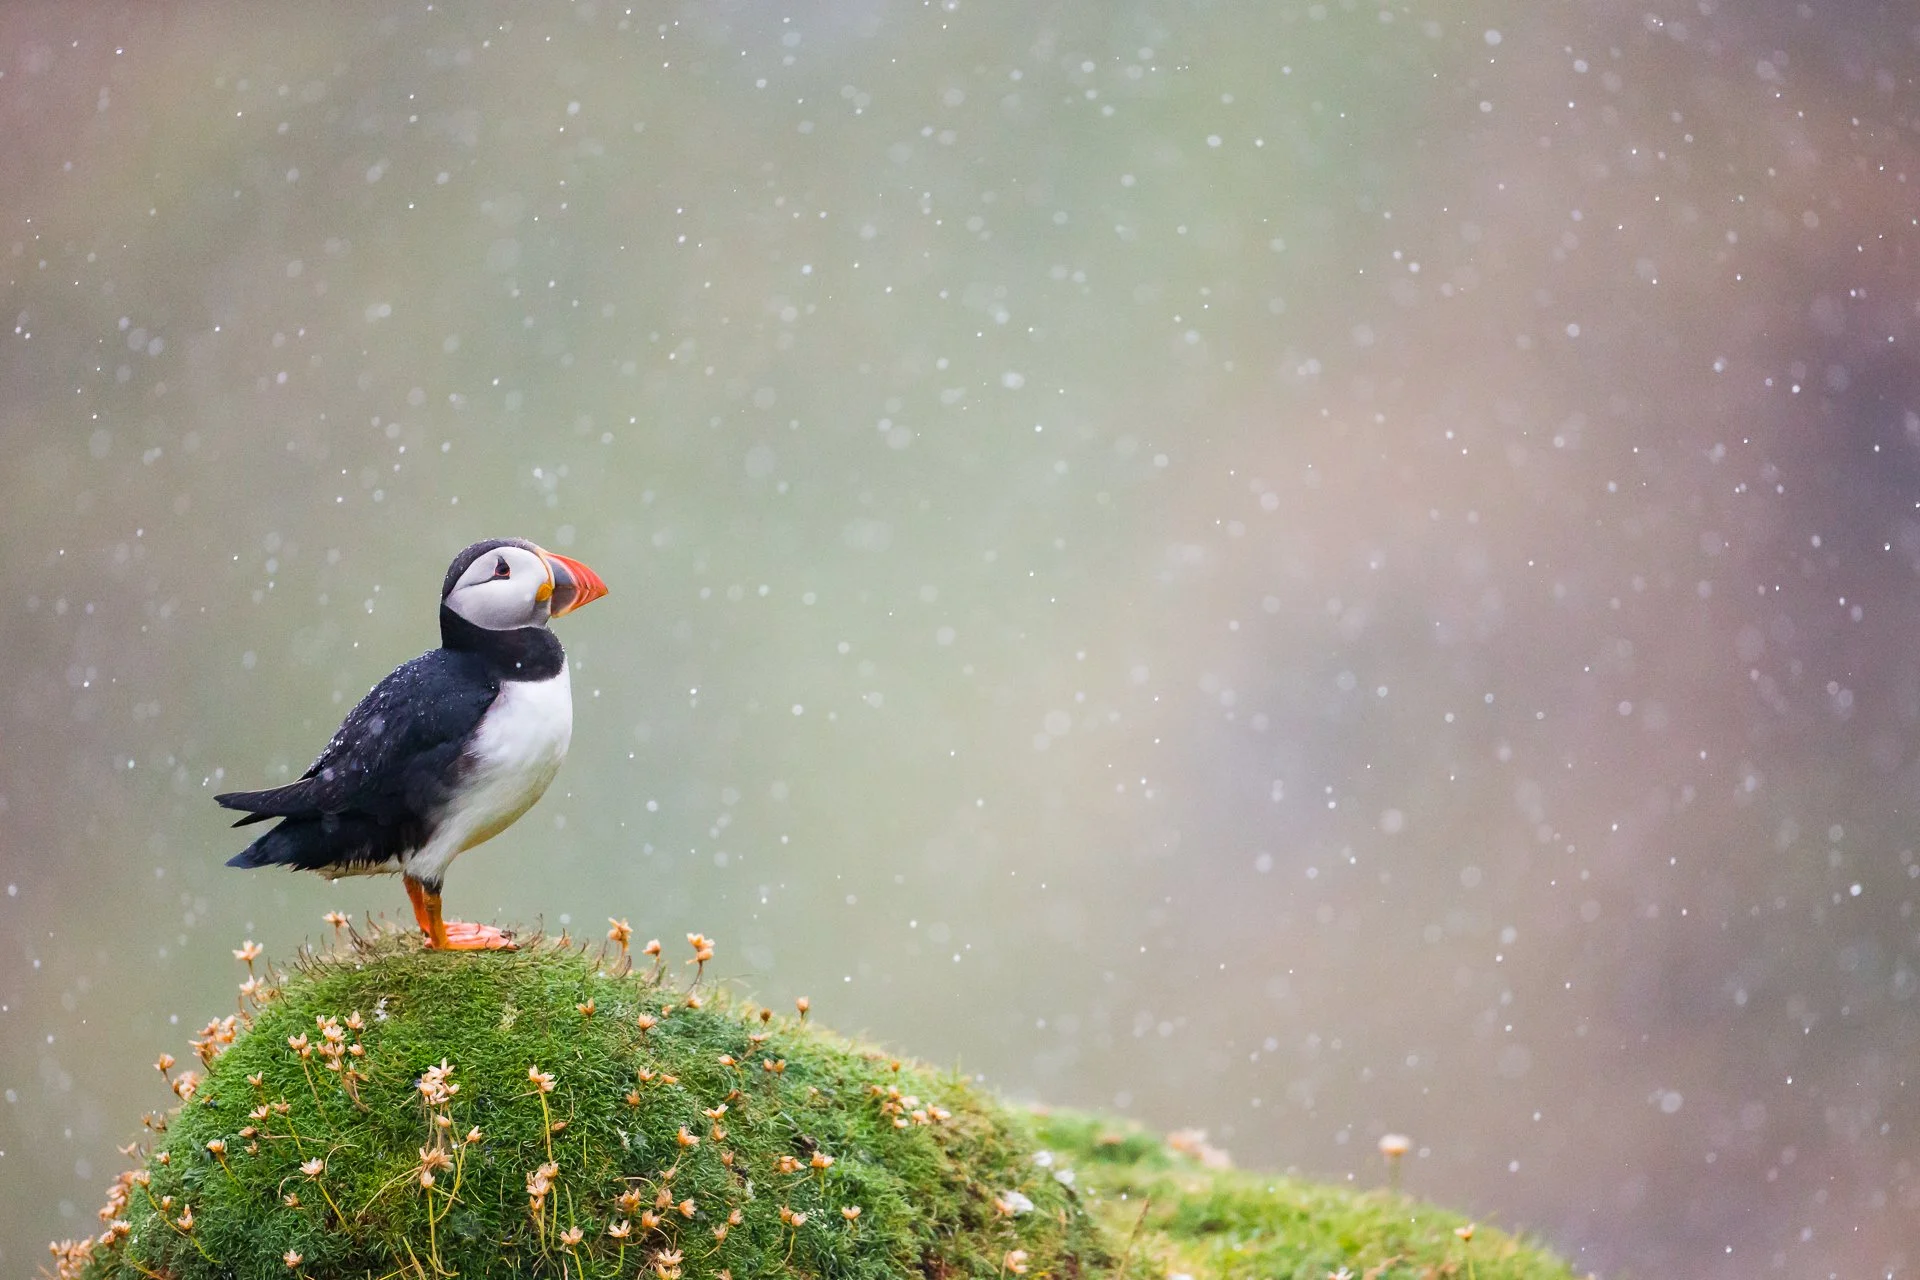
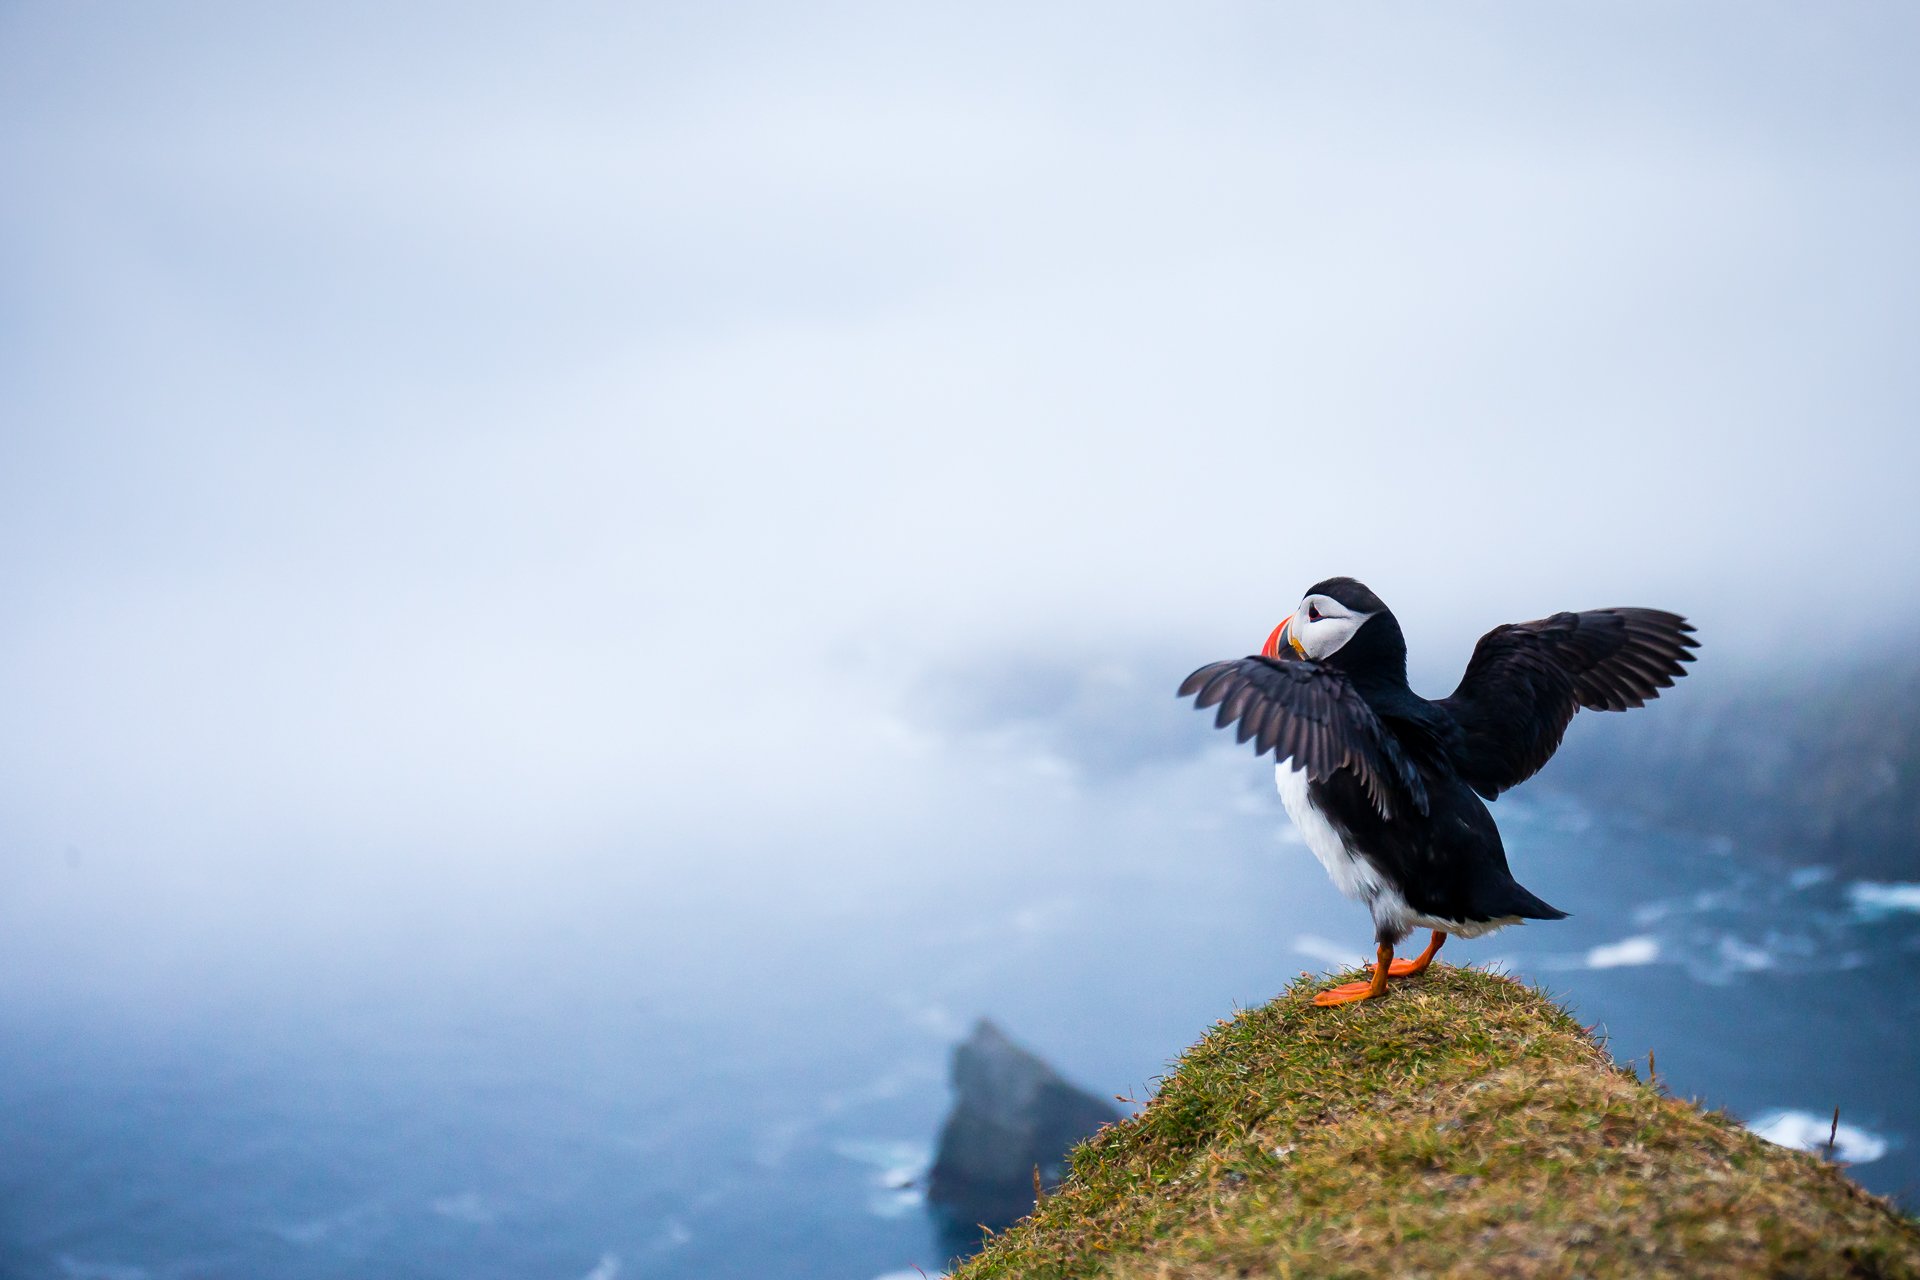
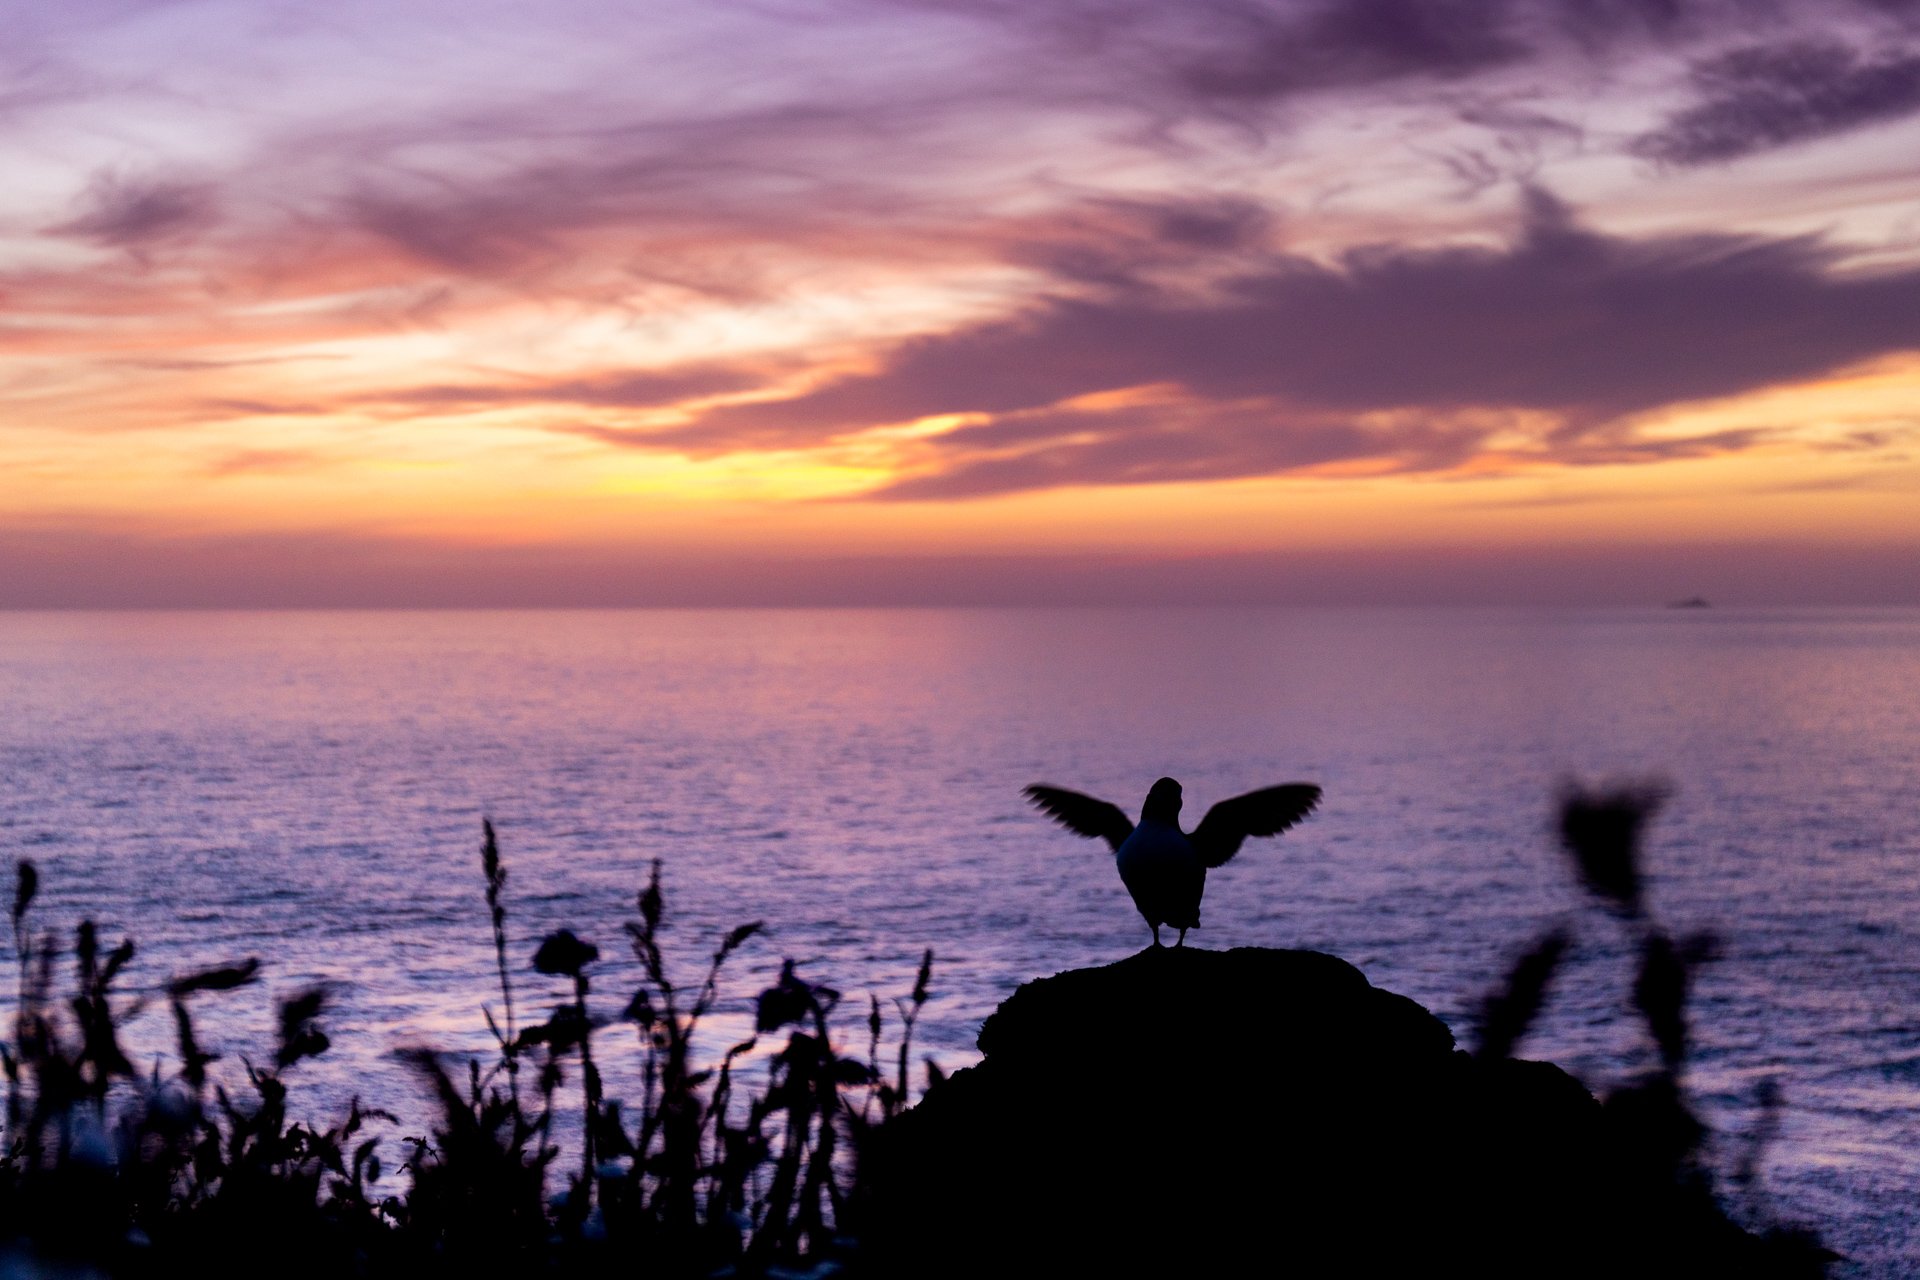
In wildlife photography, this can often be an empty space for an animal to run into or a wider view of the subject’s habitat. In this image of an Atlantic puffin, taken on beautiful Fair Isle, Shetland, the subject of the frame is the puffin. However, it’s the surrounding space that tells the story.
The setting sun, the uneasy pose of the puffin, and the scenery bring up many questions and thoughts. Where is the puffin looking? What is the bird thinking? What lies beyond the horizon?
This image breaks many of the traditional rules of composition as the subject is centrally composed. Remember, the rule of thirds is only a guideline. Once you understand the principles of these guidelines, don’t be afraid to break them.
The issue with composing all your images via this rule means they may run the risk of becoming one-dimensional, and perhaps a little clinical. Look to shock your viewers and stand out from the crowd.

FINAL THOUGHTS
In summary, composing an image is just as important as your subject. It’s the composition that helps tell the story that you want to tell. It’s not only about what you choose to include in your image, but what you choose to exclude. So next time you are pointing your lens at an Atlantic puffin, think about what story you want to tell, and how you want to tell it.
Light, composition, and creativity of photographic style are all ways to make your images stand out from the crowd. However, I want to finish the article as I started it. Remember that even with a well-documented species, there are always new images to be found. Try to think outside the box and let your creativity run wild.
Enjoy your summer photographing these amazing birds! Before we know it, they will have disappeared back into the Atlantic for another winter at sea.